
Starting your journey with Moose Gear cloth diapers (often locally referred to as lampin) is an excellent way to embrace sustainable parenting while keeping your baby comfortable. Transitioning from disposable options to reusable cloth diapers might seem overwhelming at first, but once you master the basic components, fitting techniques, and washing routines, it quickly becomes a seamless part of your daily household flow. By understanding how to adjust the snaps for a leak-free fit and how to care for the fabrics in a tropical climate, you can ensure your baby stays dry and rash-free.
Understanding Your Moose Gear Cloth Diaper Components
A standard Moose Gear cloth diaper system consists of two primary parts: the waterproof outer shell (or cover) and the absorbent insert. The outer shell is designed with a water-resistant layer, typically made of polyurethane laminate (PUL) or thermoplastic polyurethane (TPU), which keeps wetness from leaking onto your baby’s clothes. The inner lining of the shell is usually made of a soft, stay-dry fabric that channels moisture away from the skin and into the absorbent insert underneath.
The inserts themselves are the workhorses of the diaper, crafted from highly absorbent materials such as microfiber, bamboo, or charcoal bamboo. These layers work in tandem to contain moisture while allowing the skin to breathe. Before using your new diapers for the first time, it is essential to prepare the inserts. New fabrics contain natural oils or manufacturing residues that limit their initial absorbency. Pre-washing the inserts according to the manufacturer’s instructions—often requiring one to three wash cycles with a mild, residue-free detergent—primes the fibers so they can perform at their best from day one.
Products mentioned in this guide
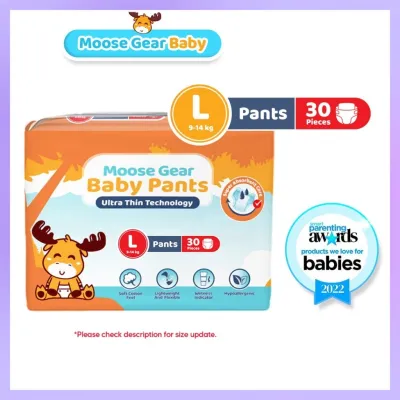
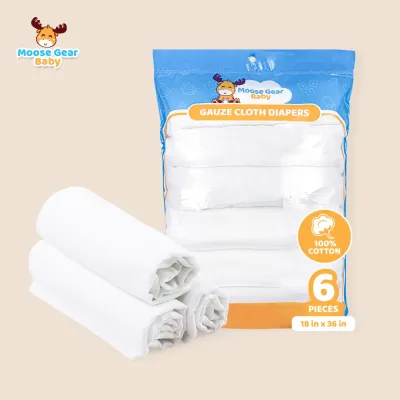
Prices are valid at publication and may change. Please refer to the product page for the latest price.
Step-by-Step Guide to Fitting and Securing the Diaper
Achieving a proper fit is the most critical step in preventing leaks and ensuring your baby’s comfort. Moose Gear cloth diapers feature an adjustable snap system, including rise snaps on the front of the diaper and waist snaps at the top.

Adjusting the Rise Snaps: Before putting the diaper on your baby, adjust the rise snaps to match their current size and weight. These snaps run vertically down the front of the diaper and control the overall length. For newborns or smaller babies, snap the rise to its lowest setting. As your baby grows, let the rise out to the medium or fully open setting. Refer to the weight guidelines on the product packaging as a starting point, but always prioritize the physical fit on your baby’s body.
Positioning the Insert: If you are using a pocket diaper model, slide the pre-washed insert completely inside the pocket opening at the back of the diaper. Ensure the insert lies completely flat and smooth from front to back, without any bunching or folding, which can cause uneven absorbency and leaks. For cover-style models, simply lay the insert flat on top of the inner lining.
Securing the Waist and Leg Gussets: Lay your baby on the open diaper, ensuring the back of the shell sits just above their hips. Pull the front of the diaper up over their tummy, keeping it flat. Fasten the waist snaps symmetrically on both sides. The waist should be snug but comfortable—you should easily be able to slide two fingers between the diaper and your baby’s tummy. Next, pay close attention to the leg gussets. The elastic edges must sit snugly in the groin crease (like underwear), rather than resting on the plump part of the thighs.
Checking the Fit: Once secured, perform a quick manual check. Run your index finger around the leg cuffs to ensure the inner fabric or insert is not poking out, as any exposed absorbent material will draw moisture outward onto clothing. Check for gaps around the legs; if you see gaps, the rise snaps may need to be adjusted tighter, or the waist snaps may need to be repositioned. Conversely, look for deep red marks on your baby’s skin after removal. While light, sock-like impressions are normal, deep or painful-looking indentations indicate the fit is too tight and needs to be loosened.
Establishing a Safe and Effective Washing Routine
Establishing a consistent, hygienic laundry routine is vital for maintaining the absorbency and longevity of your cloth diapers, especially in the warm, humid climate of the Philippines.
Handling Soiled Diapers: For breastfed infants, solid waste is water-soluble and can go directly into the washing machine. However, once your baby starts consuming formula or solid foods, you must shake or spray any solid waste into the toilet before storing the diaper. Store the dirty diapers and inserts in a dry, breathable pail or a zippered wet bag. Avoid soaking them in water between washes, as standing water encourages bacterial growth and mold, which thrive in tropical humidity. Plan to wash your diapers every one to two days to keep odors and mildew at bay.
The Pre-Wash Cycle: Always start with a short pre-wash or rinse cycle using cold or warm water and a small amount of cloth-diaper-safe detergent. This initial step flushes out the bulk of the urine and surface soil, ensuring that your main wash cycle is cleaning the diapers in fresh, clean water. Avoid using fabric softeners, bleach, or detergents with optical brighteners, as these additives leave a residue that coats the fibers and causes them to repel liquid.
The Main Wash Cycle: Follow the pre-wash with a heavy-duty, hot or warm wash cycle (ensuring the water temperature does not exceed the manufacturer’s recommended limit, usually around 40°C to 60°C to protect the waterproof laminate). Use the full recommended dosage of detergent for a heavily soiled load. Ensure there is enough water in the machine to allow the diapers to agitate against one another, which provides the mechanical scrubbing action needed to clean the deep fibers of the inserts.
Drying Methods: Hang-drying is highly effective and energy-efficient. In the Philippines, hanging your diapers outdoors allows the natural sunlight to act as a mild sanitizer and a natural stain remover. However, avoid exposing the waterproof outer covers to intense, direct midday sun for extended periods, as extreme heat can degrade the TPU/PUL laminate and damage the elastics. Hang the covers in a shaded, well-ventilated area instead. Inserts can be dried in direct sunlight or tumble-dried on a low-heat setting if permitted by the manufacturer’s care label.
Daily Care, Maintenance, and Troubleshooting
Caring for your cloth diapers on a daily basis involves monitoring your baby’s skin health and keeping an eye on fabric performance.
Managing Diaper Rash: While cloth diapers are gentle on sensitive skin, diaper rash can still occur due to moisture, teething, or dietary changes. To prevent irritation, ensure your baby’s skin is completely dry before putting on a clean diaper. If you suspect detergent buildup is causing skin irritation, perform a thorough rinse check and review your washing routine.
Addressing Leaks: If you experience leaks, systematically evaluate the cause. First, check the fit: are there gaps around the legs, or is the rise too loose? Second, check the saturation: if the insert is completely soaked through when you change the baby, you may need to add a booster insert or change the diaper more frequently. Third, check for repelling: pour a small amount of water onto a dry insert; if the water puddles on top instead of sinking in immediately, there is likely a buildup of oils or detergent residues.
Stripping Diapers: If your diapers suffer from persistent leaks due to repelling, or if they retain a strong odor even after a thorough wash, they may require “stripping.” Stripping is a deep-cleaning process designed to remove mineral deposits, fabric softener buildup, or oil residues. This should only be done occasionally and strictly in accordance with the manufacturer’s guidelines to avoid voiding your warranty or damaging the delicate fabrics.
When to Stop and Consult: Always prioritize your baby’s health and safety. If your baby develops a persistent, bright red, or painful diaper rash that does not improve with basic care, stop using cloth diapers temporarily and consult a pediatrician to rule out yeast infections or other medical conditions. Additionally, if you notice significant fabric degradation, torn laminates, or failing elastics, contact the manufacturer or a qualified professional for guidance on repair or replacement.
Frequently Asked Questions (FAQ)
Can I use standard diaper rash creams with Moose Gear cloth diapers?
Standard diaper rash creams, especially those containing petroleum, mineral oil, or high concentrations of zinc oxide, are not recommended for direct contact with cloth diapers. These ingredients create a waterproof barrier on the fabric that is extremely difficult to wash out, leading to repelling and leaks. Before applying any cream, check the manufacturer’s care instructions for approved, cloth-safe barrier creams. If your baby requires a specific medical cream, always use a reusable fleece liner or a disposable liner to protect the diaper fabric from direct contact.
How many cloth diapers do I need for a newborn versus an older baby?
The size of your diaper stash depends on your baby’s age and how often you plan to wash. Newborns typically require 10 to 12 diaper changes per day due to frequent feeding. Older babies generally need about 6 to 8 changes daily. If you wash your diapers every other day, a newborn stash should ideally consist of 20 to 24 diapers to allow for washing and drying time. For an older baby, 14 to 18 diapers may suffice. Keep in mind that during the rainy season in the Philippines, high humidity can significantly extend line-drying times, so having a few extra diapers in your rotation is highly beneficial.
What should I do if the diapers start smelling like ammonia after washing?
An ammonia smell is a common sign of incomplete cleaning, bacterial buildup, or detergent residue rather than a product defect. When urine is not fully washed out, it breaks down into ammonia over time. To resolve this, review your washing routine: ensure you are using enough high-quality detergent, check if your water is hard (which requires more detergent or a water softener), and verify that your machine is agitating properly. If the smell persists, follow the manufacturer’s approved deep-cleaning or sanitizing protocol to reset the fabrics safely.

Community discussion
Share your experience or ask a question. Comments are reviewed before publication.