
Switching to reusable cloth diapers is a rewarding journey for parents looking to reduce household waste and save thousands of ₱ over time compared to single-use alternatives. Using Happy Flute cloth diapers successfully requires a simple routine of proper assembly, precise fitting, and a consistent washing method. By mastering these basic steps, you can keep your baby comfortable, prevent leaks, and ensure your diaper stash lasts through multiple developmental stages.
In tropical climates like the Philippines, managing cloth diapers involves unique considerations, such as handling high humidity and adjusting drying times during the rainy season. Understanding how to care for these diapers under local conditions will protect the waterproof lining and maintain the absorbency of the inserts. With a little practice, this eco-friendly routine easily integrates into your daily parenting schedule.
Understanding Your Happy Flute Cloth Diaper Components
Before putting a cloth diaper on your baby, it is essential to understand the specific design and parts of the system you have purchased. Happy Flute offers several styles, including pocket diapers, all-in-one systems, and diaper covers. Pocket diapers feature a waterproof outer shell with a stay-dry inner lining that creates a pocket where you stuff the absorbent inserts. All-in-one diapers have the absorbent layers sewn directly into the waterproof shell for maximum convenience, while cover systems allow you to lay inserts directly on top of a wipeable waterproof shell and reuse the cover through multiple changes.
Products mentioned in this guide
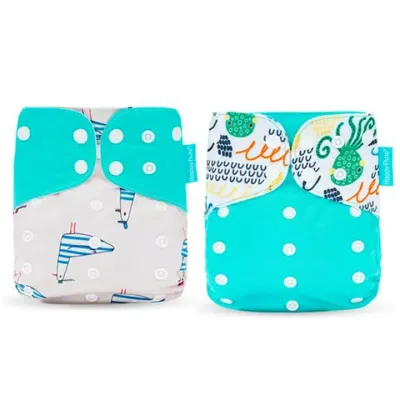
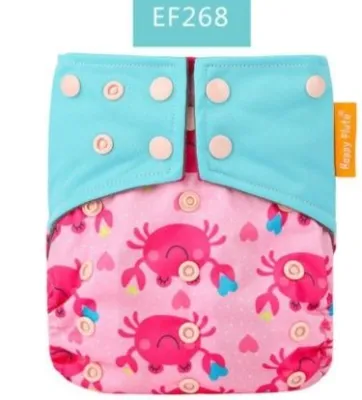
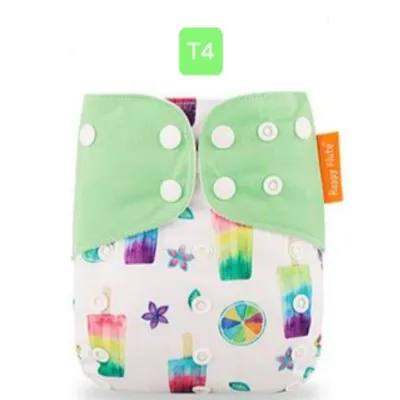
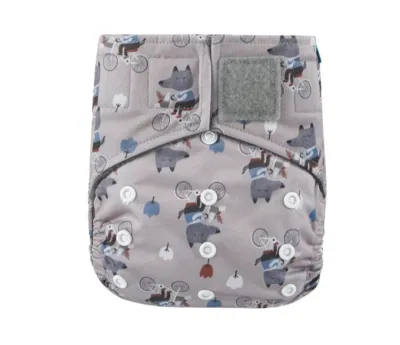

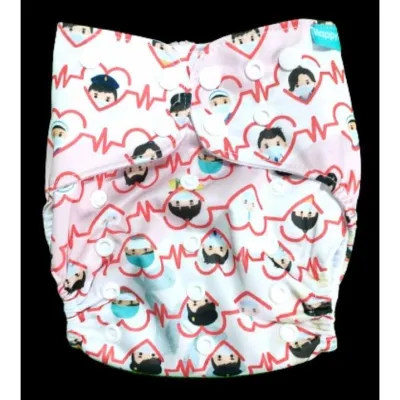
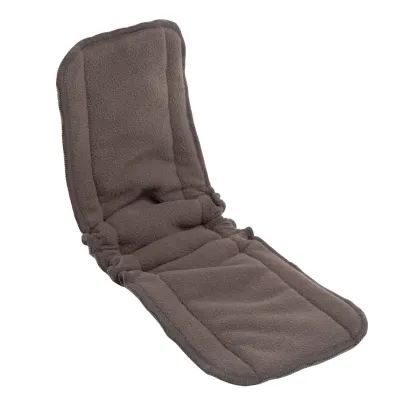
Prices are valid at publication and may change. Please refer to the product page for the latest price.
Every diaper comes with a manufacturer’s care label that outlines material-specific limits and washing boundaries. It is crucial to locate and read this label before your first use, as different fabrics—such as microfiber, bamboo, or hemp—have distinct care requirements. For instance, some materials cannot tolerate high heat, while others require multiple prep washes to reach their maximum absorbency.
Before prepping your new diapers, perform a thorough physical inspection of each item. Check that all plastic snaps fasten securely and align symmetrically without cracking. Examine the elastics around the legs and back to ensure they are springy and intact, and inspect the inner waterproof polyurethane laminate lining for any visible tears or peeling. Verifying these structural components early ensures your diapers are fully functional and ready to perform.
Step-by-Step Guide to Fitting and Using the Diaper
Assembling the diaper correctly is the first step to ensuring a leak-free experience. If you are using a pocket diaper system, carefully stuff the absorbent insert into the pocket opening, smoothing it out from front to back so it lies completely flat. Ensure that no part of the insert sticks out of the pocket opening or around the leg openings, as exposed insert fabric will draw moisture outward onto your baby’s clothes through a process known as wicking. For cover systems, lay the insert flat within the designated flaps, keeping the edges neatly tucked inside the waterproof border.

Once the diaper is assembled, place it under your baby and prepare to fasten the snaps. Happy Flute diapers typically feature a grid of rise snaps on the front face, which adjust the overall length of the diaper to accommodate different weights and physical proportions. Adjust these rise snaps first, snapping them upward to shorten the diaper for smaller babies or leaving them open for older infants. Next, pull the wings of the diaper around your baby’s waist and fasten the waist snaps symmetrically, ensuring the diaper sits snugly but comfortably below the belly button.
After fastening the snaps, perform a quick physical check to verify the fit. Run your finger along the inside of the leg cuffs to ensure the elastic sits nestled in the groin crease, much like underwear, rather than resting on the outer thighs. Gently tuck any loose fabric from the rise snaps upward to prevent sagging. The waist should be snug enough that you can easily slide two fingers between the diaper and your baby’s tummy, ensuring a secure fit that prevents leaks without leaving deep, painful red marks on their delicate skin.
Daily Storage and Pre-Wash Routine
Managing soiled diapers throughout the day requires a simple, hygienic routine to prevent stains, odors, and fabric degradation. For wet-only diapers, you can place them directly into your storage container. For soiled diapers, you must remove solid waste into the toilet before storage. If your baby is fully breastfed, the waste is water-soluble and can go straight into the wash, but for formula-fed babies or those eating solid foods, you should shake or spray the solids into the toilet using a diaper sprayer or utilize a flushable liner to simplify cleanup.
Once prepped, store your dirty diapers in a dry, well-ventilated pail or a breathable hanging wet bag. Avoid using airtight plastic containers or soaking diapers in buckets of water, as these oxygen-deprived environments promote rapid bacterial growth, mold, and severe ammonia buildup that can damage the diaper fibers and irritate your baby’s skin. Proper airflow keeps odors to a minimum and makes the eventual wash day much more manageable.
When you are ready to wash, always begin with a short pre-wash cycle before running your main wash. Use a cold or warm cycle with a small amount of cloth-diaper-safe detergent to flush away the bulk of the urine and surface soil. This initial rinse ensures that your main wash cycle is performed in clean water, which is essential for achieving a deep, hygienic clean and preventing lingering residues.
Main Wash and Drying Instructions
The main wash cycle is where your diapers get thoroughly deep-cleaned, and preserving their delicate components requires following the manufacturer’s care tag instructions. Select the appropriate water temperature and wash cycle length as specified by the brand, typically opting for a heavy-duty cycle with plenty of water agitation. Avoid excessively hot water, which can delaminate the waterproof lining and prematurely wear out the elastic bands.
Choosing the right detergent is critical for maintaining the absorbency and longevity of your cloth diapers. Use a standard, enzyme-rich detergent in the amount recommended for heavily soiled loads, but strictly avoid fabric softeners, optical brighteners, or chlorine bleach unless specifically advised by the manufacturer. Fabric softeners leave a waxy coating on the fibers that repels moisture, causing immediate leaks, while harsh bleach can degrade the waterproof laminate and void your product warranty.
Drying your diapers correctly is just as important as washing them, especially in tropical climates. Hang your waterproof covers and pocket shells to air dry in the shade, as direct, intense tropical sunlight can overheat and crack the waterproof lining. For the absorbent inserts, you can hang them in direct sunlight if the care label permits, as the sun acts as a natural stain remover and sanitizer. During the humid rainy season, ensure your drying area has excellent air circulation, or use an indoor fan to speed up the process and prevent a musty smell from developing.
Troubleshooting Common Cloth Diaper Issues
Even with a solid routine, you may occasionally encounter challenges like leaking, stubborn odors, or skin irritation. If you notice leaks, first check for compression saturation, which occurs when an insert is fully soaked and releases liquid under pressure, indicating your baby needs more frequent changes or an additional booster insert. Next, verify the fit to ensure the leg elastics are snug in the groin crease and that no clothing is tucked inside the diaper shell, which can wick moisture outward.
Lingering odors, such as a strong ammonia smell when your baby wets or a musty scent out of the wash, usually point to issues with your washing routine. This can be caused by water hardness, using too little or too much detergent, or a buildup of soil in the fabric fibers. To resolve this, evaluate your detergent dosage, ensure your washing machine is not overloaded, and consider running an extra rinse cycle to ensure all soap residue is completely flushed from the dense inserts.
If your baby develops a diaper rash, monitor the irritation closely and consult a pediatrician if it persists or appears raw and inflamed. Ensure that every diaper is fully rinsed of detergent and completely dry before placing it on your baby, as trapped moisture can exacerbate skin sensitivity. Adjusting your wash routine to ensure thorough rinsing and keeping your baby in fresh, dry diapers will help maintain healthy skin.
Frequently Asked Questions (FAQ)
How many cloth diapers do I need for a full-time routine?
The size of your diaper stash depends on your baby’s age, how often they need to be changed, and your washing frequency. Newborns typically require 10 to 12 diaper changes per day, while older infants may need 6 to 8 changes. If you plan to wash your diapers every other day, you will need a minimum stash of 20 to 24 diapers to ensure you have enough clean options while a load is in the wash. Additionally, you must factor in drying times; in highly humid environments or during the rainy season, inserts can take over 24 hours to air dry, meaning you will need a larger buffer stash to avoid running out of clean diapers.
Can I use standard diaper rash creams with cloth diapers?
Standard diaper rash creams containing petroleum, mineral oil, or high concentrations of zinc oxide should generally be avoided with cloth diapers. These ingredients are designed to create a waterproof barrier on the skin, but when they rub off onto diaper fabrics, they create the same barrier on the fibers, causing the diaper to repel moisture and leak. If your baby requires a specific medical cream, check your diaper manufacturer’s guidelines first. You can safely apply these creams by placing a reusable fleece liner or a disposable paper liner inside the diaper to act as a physical barrier, protecting the underlying diaper fibers from absorbing the oils.

Community discussion
Share your experience or ask a question. Comments are reviewed before publication.