
Cleaning baby bottles is a daily ritual that directly impacts your infant’s health. While it might seem straightforward, different bottle materials—namely glass, plastic, and silicone—have distinct physical properties that require specific care. Using a single, harsh brush on all of them is a fast track to ruined bottles and compromised hygiene. A 5-in-1 bottle cleaning brush set provides a versatile toolkit designed to address these differences, ensuring you can scrub away stubborn milk residue without scratching or degrading the containers. In the warm, tropical climate of the Philippines, where high humidity can turn a tiny amount of leftover milk into a breeding ground for bacteria within hours, mastering the precise use of each brush head is essential for keeping your baby’s feeding equipment pristine.
Identify the Brush Heads in Your 5-in-1 Set
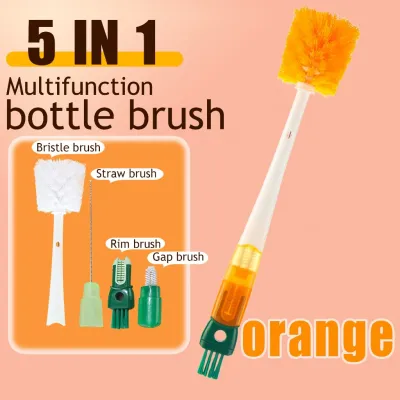
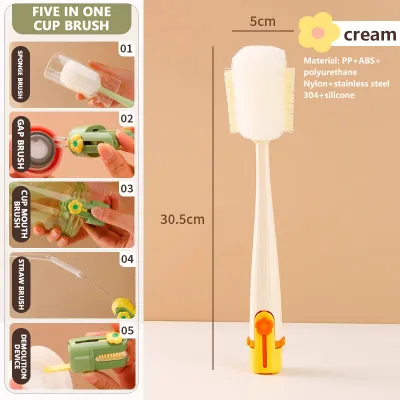
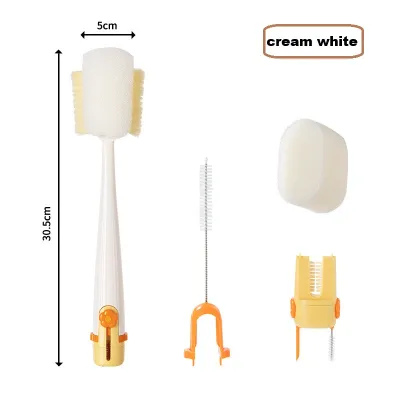
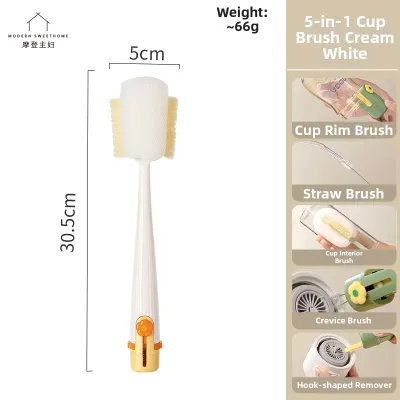
To get the most out of your 5-in-1 bottle cleaning brush set, you first need to understand the design and purpose of each tool in your kit. A typical high-quality set includes five distinct heads, each engineered to handle specific textures, shapes, and durability levels. Matching the correct brush head to the corresponding bottle material is the most effective way to prevent premature wear and tear.
Sponge or Foam Head
This head is highly absorbent and excellent for generating a rich, soapy lather. Because it is soft and non-abrasive, it is designed for delicate surfaces that scratch easily under friction.
Products mentioned in this guide

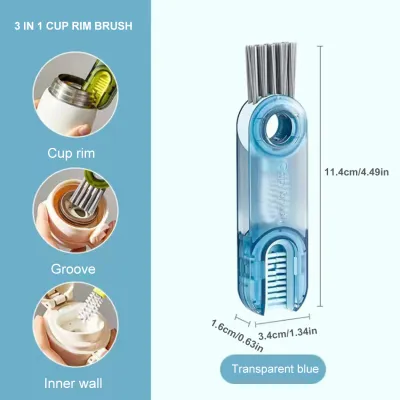
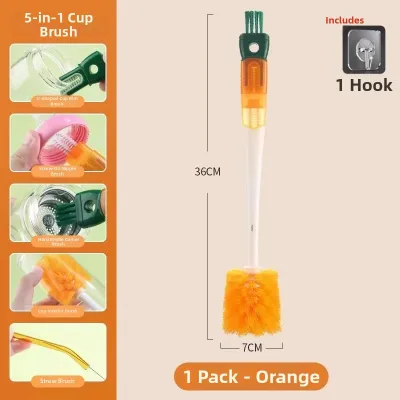
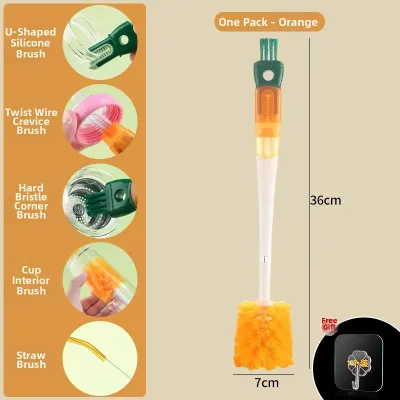
Prices are valid at publication and may change. Please refer to the product page for the latest price.
Stiff Nylon Bristle Brush
Featuring firm, tightly packed bristles, this brush is built for heavy-duty scrubbing. It excels at scraping away dried-on milk fats and proteins from hard, highly durable surfaces.
Soft Silicone Brush
Made from flexible, non-porous silicone bristles, this head provides excellent friction without scratching. It does not absorb water, making it highly resistant to mold and bacterial buildup—a major advantage in humid environments.
Nipple or Teat Brush
This is a miniature, contoured brush (often covered in soft foam or fine silicone bristles) shaped specifically to fit the narrow, conical interior of bottle nipples and pacifiers.
Straw and Detail Brush
A long, ultra-thin wire brush with delicate bristles along the tip, designed to slide into narrow drinking straws, anti-colic vent tubes, and the hard-to-reach threading of bottle collars.
Prepare the Bottles and Cleaning Station
A successful cleaning routine starts before you even pick up a brush. The moment your baby finishes a feed, immediate action is required to make the washing process easier and more hygienic.

Always rinse the bottle, nipple, and collar with cool or lukewarm water immediately after a feeding session. Milk contains complex proteins and fats that coagulate and stick to surfaces as they dry. Rinsing prevents these elements from forming a stubborn, dried-on film that is difficult to remove later. In the Philippines, the tropical warmth can cause milk residue to spoil rapidly, attracting household pests like ants, making this immediate rinse a vital habit.
Never wash baby bottles directly in the kitchen sink, which often harbors grease, food debris, and household bacteria. Instead, use a dedicated, clean plastic wash basin reserved solely for baby items. Fill the basin with warm water and add a few drops of a baby-safe, fragrance-free liquid dish soap.
Ensure the water is comfortably warm to help break down milk fats, but avoid boiling water at this stage. Extreme temperatures are unnecessary for hand-washing and can warp certain plastic or silicone components. Always check the manufacturer’s care instructions for your specific bottle brand to verify their recommended temperature limits.
How to Clean Glass Baby Bottles
Glass baby bottles are highly favored by many parents because they are exceptionally durable, chemical-free, and naturally resistant to scratches and odors. However, they require careful handling to prevent physical damage.
Because glass is highly scratch-resistant, you should use the stiff nylon bristle brush for these bottles. Nylon bristles are firm enough to easily dislodge the stubborn, greasy milk fat rings that often settle at the very bottom of glass bottles, especially after storing breastmilk or high-fat formulas.
Insert the nylon brush straight into the bottle. Guide the brush to the base and rotate the handle in a firm, circular motion to clear the bottom corners. Next, use smooth, vertical up-and-down strokes along the inner walls to sweep away any remaining film. Let the soapy water lubricate the bristles so they glide smoothly.
While glass is tough against scratches, it is vulnerable to thermal shock and physical impact. Never force a wide brush head into a narrow-necked glass bottle at an extreme angle, as this can apply uneven pressure and crack the neck. Before and after every wash, hold the glass bottle up to a bright light and inspect it thoroughly for micro-cracks, hairline fractures, or small chips around the rim and base. If you discover even a tiny chip or crack, discard the bottle immediately to prevent glass fragments from contaminating the milk or the bottle from breaking during sterilization.
How to Clean Plastic Baby Bottles
Plastic baby bottles, typically made from lightweight materials like Polypropylene (PP) or Polyphenylsulfone (PPSU), are popular for their shatterproof design and convenience. However, plastic is relatively soft and highly susceptible to physical damage during cleaning.
The main vulnerability of plastic bottles is that they scratch very easily. If you use a stiff nylon bristle brush on plastic, it will leave microscopic scratches on the inner walls. These micro-scratches ruin the bottle’s clarity, making it look permanently cloudy, and act as microscopic pockets where milk proteins, moisture, and bacteria can hide, surviving even standard sterilization cycles.
Strictly avoid using stiff nylon brushes on plastic. Instead, use the soft sponge/foam head or the soft silicone brush head from your 5-in-1 set. These materials glide over plastic surfaces without causing abrasion.
Wet the brush head thoroughly and apply baby-safe soap. Insert the brush and use a gentle, swirling motion rather than aggressive scrubbing. Allow the soapy water and the soft friction of the sponge or silicone to dissolve and lift the milk fats naturally.
Inspect your plastic bottles regularly. If the inside of the bottle feels rough to the touch, looks permanently hazy or yellowed, or has visible scratch marks that do not wash away, the plastic has degraded. To maintain high hygiene standards, replace the bottle immediately.
How to Clean Silicone Baby Bottles
Silicone baby bottles are soft, flexible, and popular because they mimic the natural feel of breastfeeding. While silicone is highly durable and naturally resistant to bacteria, its unique surface texture presents specific cleaning challenges.
Silicone has a slightly tacky, high-friction surface. This texture causes milk fats to cling tightly, often leaving a greasy, slippery film that can be difficult to rinse off. It also tends to absorb strong odors if milk is left inside for too long.
To tackle this, use the soft silicone brush head or the sponge head. The silicone-on-silicone contact creates the perfect amount of gentle friction needed to grab and peel away the greasy milk film without tearing or degrading the bottle’s surface.
Because silicone bottles are flexible, standard scrubbing can cause the bottle walls to collapse inward. To clean them effectively, hold the bottle firmly in one hand and gently squeeze or flex the sides while manipulating the brush with your other hand. This allows the brush head to make full contact with all the curved contours, especially the hard-to-reach corners near the base.
Never use abrasive scouring pads or stiff nylon brushes, which can cause micro-tears in the soft silicone. If the silicone bottle feels excessively sticky, gummy, or retains a persistent sour smell even after thorough washing, check the manufacturer’s care instructions. Some brands recommend a gentle soak in warm water mixed with baking soda to neutralize odors, but always verify compatibility first to avoid voiding the warranty or damaging the material.
Clean Nipples, Straws, and Vent Systems
The small accessories of your baby’s bottle—including silicone nipples (teats), collar rings, anti-colic straws, and vent valves—require the most meticulous attention, as they contain tiny crevices where milk residue easily hides.
Use the specialized nipple brush from your 5-in-1 set. Gently insert the brush into the underside of the silicone teat. Rotate it slowly to clear away dried milk. Never force the brush tip through the small feeding hole at the top of the nipple, as this can easily tear the delicate silicone or permanently enlarge the hole, altering the milk flow rate and creating a choking hazard for your baby.
Anti-colic bottles often feature complex venting systems, tubes, and straws. Insert the long, thin straw/detail brush directly into these narrow passages. Push the brush all the way through until the bristles emerge from the opposite end, then pull it back. This ensures that the entire inner surface is thoroughly scrubbed.
Use the detail brush to scrub the circular threads inside the bottle collar. Milk frequently leaks into these threads during feeding, and if left uncleaned, it can quickly sour and harbor bacteria.
Verify Cleanliness and Air-Dry
Once you have finished scrubbing, you must verify that every component is completely clean before moving on to drying and sterilization.
Thoroughly wash your own hands with soap and water. Run a clean finger along the inner walls of the washed bottle. The surface should feel completely smooth and produce a slight squeaking sound. If the surface feels slippery, greasy, or slimy, milk fat residue is still present, and the bottle must be washed again. Hold the bottle up to a bright light source and inspect the bottom and sides for any foggy patches, dried milk spots, or soap bubbles.
Shake off excess water from all parts. Place the bottles, nipples, collars, and vent parts upside down on a dedicated, clean bottle drying rack.
In the tropical climate of the Philippines, high relative humidity can slow down drying times, creating an environment where mold and bacteria can multiply on damp surfaces. Always place your drying rack in a well-ventilated area with active airflow, away from stagnant corners. Never use kitchen towels, dishcloths, or paper towels to dry the inside of the bottles or nipples. These cloths can easily transfer lint, fibers, and microscopic bacteria back onto your freshly cleaned items.
Maintain and Store Your Brush Set
A bottle cleaning brush is only as hygienic as the care it receives. Because these brushes are constantly exposed to water and organic milk residue, they can easily become breeding grounds for mold and bacteria if neglected.
After every washing session, rinse all the brush heads in your 5-in-1 set thoroughly under warm running water. Ensure all soap suds, foam, and trapped milk particles are completely flushed out.
Squeeze out any excess water from the sponge heads. Shake the nylon and silicone brushes to remove moisture. Hang the brushes by their handles or place them upright in a highly ventilated holder in an open, airy space. Avoid storing wet brushes in closed drawers, tight cupboards, or damp sink caddies, as this traps moisture and encourages mold.
Inspect your brush set weekly. Look for signs of wear such as tearing or thinning sponge heads, bent or splayed nylon bristles that no longer scrub effectively, or any dark spots indicating mold growth. For safety and hygiene, replace individual brush heads or the entire 5-in-1 set every two to three months, or immediately if you detect mold that cannot be washed away.
Frequently Asked Questions (FAQ)
Can I use the stiff nylon brush on plastic or silicone bottles?
No, you should never use a stiff nylon brush on plastic or silicone bottles. Nylon bristles are highly abrasive to these softer materials and will create microscopic scratches and tears. These damaged areas act as breeding grounds for bacteria and trap milk proteins, making the bottles highly unhygienic and difficult to clean. Reserve the nylon brush strictly for durable glass bottles or tough, scratch-resistant plastic accessories like the outer bottle collar, provided the manufacturer’s instructions allow it.
How do I know when to replace my bottle cleaning brushes?
You should replace your bottle cleaning brushes every two to three months of regular use, or sooner if you observe clear signs of degradation. These signs include torn or crumbling sponge heads, splayed or flattened nylon bristles that no longer clean effectively, or any dark green or black spots indicating mold growth on the brush heads or handles. Using a worn-out or moldy brush compromises your baby’s health by transferring bacteria directly onto their feeding equipment.

Community discussion
Share your experience or ask a question. Comments are reviewed before publication.