
Transitioning your baby from a bottle to a straw cup is a major developmental milestone that requires patience, consistency, and the right approach. Many parents dread this phase, fearing endless tantrums, rejected cups, and messy spills across the dining area. However, by understanding your baby’s developmental readiness and introducing the new cup gradually, you can make this transition a positive, stress-free experience for both of you.
The key to a smooth transition lies in working with your baby’s natural curiosity rather than forcing a sudden change. Replacing the familiar comfort of a bottle nipple with a silicone straw can feel strange to an infant, but with a few practical strategies, they will soon learn to love their new cup. This guide outlines the exact steps, troubleshooting tips, and maintenance practices to help your little one master the straw cup without resistance.
When Is the Right Time to Introduce a Straw Cup?
Before introducing a straw cup, it is essential to observe your baby’s physical development to ensure they can use it safely. One of the primary physical milestones to look for is the ability to sit up unassisted. A baby who can sit upright independently has developed the core strength and trunk control necessary to swallow liquids safely from a cup without a high risk of choking.
Products mentioned in this guide


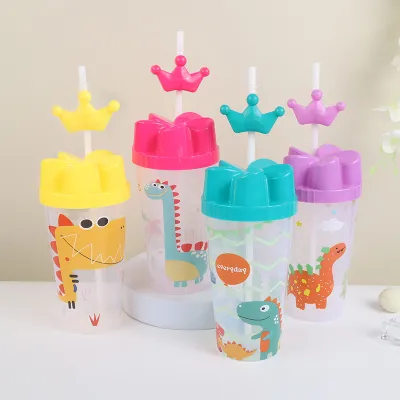
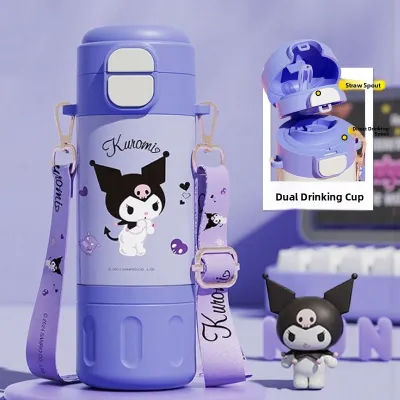
Prices are valid at publication and may change. Please refer to the product page for the latest price.
Good head and neck control is another critical physical milestone. Your baby must be able to hold their head steady while tilting or holding a cup, even if the straw cup itself is designed to be used completely upright. If your baby still wobbles or requires significant support to stay upright, it may be best to wait a few more weeks before starting the transition.
Behavioral cues often signal readiness just as clearly as physical milestones. You might notice your baby watching you intently whenever you take a sip from a glass or water bottle. They might reach out to grab your cup, mimic sipping motions with their mouth, or show a sudden interest in the utensils and plates on the family dining table. These actions demonstrate a natural curiosity that you can leverage to introduce the straw cup.
Always check the manufacturer’s age and developmental guidelines printed on the straw cup packaging before making a purchase. Most straw cups are labeled with a recommended age range, such as six months and older, which aligns with the typical start of solid foods. These guidelines are designed to match the average oral motor skills of babies at different stages, ensuring the straw’s diameter and flow rate are appropriate for their age.
Choosing the Right Straw Cup for Your Baby
Selecting the right straw cup can make a significant difference in how quickly your baby accepts the change. One of the first design features to evaluate is the type of straw. Weighted straws are highly recommended for beginners because they feature a small weight at the bottom of the straw that moves with the liquid. This design allows your baby to drink at any angle, even if they tilt the cup backward like a traditional bottle.

As your baby grows and learns to keep the cup upright, you can transition them to a straight straw cup. Straight straws require the baby to hold the cup vertically, which helps them develop mature drinking habits. Many transition cups come with removable handles, allowing your baby to grip the cup easily with both hands before progressing to a handle-free design that mimics an adult cup.
Material safety is a top priority when choosing any feeding accessory for your baby. Always check the product label for safety indicators, ensuring the cup is made from food-grade silicone and BPA-free plastics. In the warm, humid climate of the Philippines, choosing high-quality, durable materials is especially important to ensure the cup can withstand frequent washing and sterilization without degrading.
Hygiene is another crucial factor to consider during your selection process. Look for straw cups that are designed to be easily disassembled, with minimal hidden crevices where moisture and milk residue can hide. Mold can quickly build up in complex valves and double-walled lids if they cannot be thoroughly cleaned and dried. Prioritizing simple, straightforward designs with fully removable parts will save you time and protect your baby’s health.
Step-by-Step Guide to Transitioning From Bottle to Straw Cup
A successful transition relies on a gradual, step-by-step approach that allows your baby to adapt at their own pace. The first step is familiarization, which involves introducing the empty straw cup as a toy. Let your baby hold, explore, and play with the cup during non-meal times. Allowing them to chew on the soft silicone straw helps them get used to its texture and removes the pressure of having to perform a new skill immediately.
Once your baby is comfortable holding the cup, you can demonstrate how it works. Babies learn by imitation, so let them watch you take sips from a similar straw cup while making exaggerated, cheerful sipping sounds. Another effective technique is the safe pipette method: dip a clean, removable silicone straw into breast milk or formula, place your finger over the top opening to trap a small amount of liquid, and let your baby suck the liquid from the bottom of the straw. This helps them connect the action of sucking on the straw with receiving a tasty reward.
Timing is everything when introducing the cup with liquid for the first time. Offer the straw cup when your baby is slightly thirsty, such as midway through a play session or shortly after waking up from a nap. Avoid offering it when they are overly hungry, tired, or cranky, as they will likely demand the immediate comfort of their familiar bottle and reject any new feeding method. Keep the initial sessions short, positive, and free of pressure.
To complete the transition, implement a gradual replacement strategy rather than switching overnight. Start by replacing just one bottle feed a day with the straw cup, typically a mid-day feed when your baby is usually more alert and cooperative. Once they comfortably accept the straw cup for this feed, you can gradually replace the morning feed, and finally, the bedtime feed, which is often the hardest bottle for babies to give up due to its comforting association with sleep.
Troubleshooting Common Transition Challenges
It is completely normal to encounter a few hurdles during the weaning process, but most challenges can be resolved with minor adjustments. If your baby completely refuses the cup, try adjusting the temperature of the liquid. Some babies prefer their milk slightly warm, just like their usual bottle, while others might be intrigued by cool water, especially during hot and humid afternoons. You can also try a different straw shape or thickness, as some babies prefer flatter, nipple-like straws over round ones.
Coughing or gagging during the first few attempts usually indicates that the liquid is flowing too quickly for your baby’s current swallowing coordination. Ensure your baby is sitting fully upright in their high chair rather than reclining, as a reclined position makes it difficult to manage the flow of liquid. You should also check if the cup features a spill-proof valve that limits the flow, or consider switching to a slower-flow straw designed specifically for younger infants.
Another common challenge is when babies treat the straw cup as a toy to throw from their high chair. While this behavior is a normal part of exploring cause and effect, you can set gentle boundaries by calmly removing the cup for a moment when they throw it. Utilizing cups with ergonomic, easy-to-grip handles can help them maintain a secure hold, while cups with suction bases can keep the cup firmly attached to the high chair tray during meals to minimize messes.
Cleaning and Maintaining the Straw Cup
Proper cleaning and maintenance are vital to keep your baby’s straw cup hygienic and safe for daily use. Because milk and juice can easily spoil and harbor bacteria, you must fully disassemble all components of the cup after every use. This includes removing the straw from the lid, separating any weighted components, and taking apart multi-piece valves. Leaving these parts assembled during washing can trap moisture and lead to mold growth.
To clean the hard-to-reach interior of the straw, always use a specialized, narrow cleaning brush. These tiny wire brushes are often included with baby straw cups or can be purchased separately at local baby stores. Run warm water and mild, baby-safe dishwashing liquid through the straw, then gently scrub the inside with the brush to clear out any stubborn milk residue or buildup.
Regularly inspect all silicone parts, including the straw and valves, for signs of wear and tear. Babies who are teething may bite down on the soft silicone, which can cause tears, cracks, or loose pieces that could pose a choking hazard. If you notice any bite marks, discoloration, or damage during your inspection, replace the damaged components or the entire cup immediately to ensure your baby’s safety.
Frequently Asked Questions (FAQ)
Can I put hot liquids in a baby straw cup?
No, you should avoid putting hot liquids in a baby straw cup. Always check the product label and manufacturer instructions for the maximum safe temperature threshold of your specific cup. Pouring hot liquids into a sealed straw cup can create pressure buildup inside the container, causing hot liquid to suddenly spray or expel through the straw when the lid is opened or when the baby takes a sip. To prevent burns, warm your baby’s milk or beverage in a separate container first, test the temperature on your wrist to ensure it is lukewarm, and then transfer it to the straw cup.
What if my baby completely refuses the straw cup?
If your baby completely refuses the straw cup despite your best efforts, it is best to take a temporary break. Forcefully insisting on the cup can create a negative association and lead to a feeding aversion, so put the cup away for a few days to reset before trying again with a fresh, relaxed approach. During this break, you can explore interim alternatives, such as offering small sips from an open cup or trying a different spout design, if recommended by your pediatrician. However, if you notice any signs of dehydration, such as fewer wet diapers, dry lips, or extreme lethargy, or if your baby exhibits a persistent feeding aversion, consult a qualified healthcare professional immediately.

Community discussion
Share your experience or ask a question. Comments are reviewed before publication.