
To sterilize a Hello Kitty feeding bottle set without damaging its printed design, you must match your sanitizing method to the specific bottle material and protect the exterior ink from excessive friction, extreme localized heat, and harsh chemicals. While keeping your baby’s feeding equipment sanitary is the top priority, preserving the beloved character graphics requires a gentle, controlled approach. By identifying the bottle’s heat tolerance and using the correct sanitizing routine, you can maintain both hygiene and the vibrant design.
In the warm, humid climate of the Philippines, proper sterilization is crucial to prevent the rapid growth of bacteria and mold on baby gear. However, the high humidity and frequent washing can also put extra stress on printed bottle designs if they are not handled correctly. Caregivers must balance rigorous hygiene with protective care to ensure the bottle remains safe for feeding and visually appealing. Protecting your investment of several hundred pesos (‑₱) per bottle starts with understanding the physical properties of your baby’s feeding set.
Check Your Bottle Material and Print Details
Before applying any heat or sanitizing solution, examine the packaging or the bottom of the bottle to identify the exact plastic or glass polymer. Common materials include Polypropylene (PP), Polyphenylsulfone (PPSU), borosilicate glass, and food-grade silicone. Each material has a distinct thermal threshold; for instance, PP typically tolerates lower temperatures than highly durable PPSU or heat-resistant glass. Knowing the material helps you avoid overheating, which can warp the bottle and melt the printed design.
Products mentioned in this guide
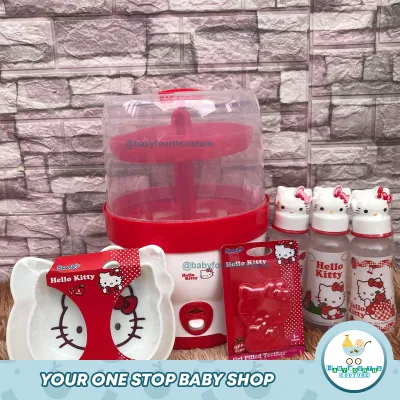
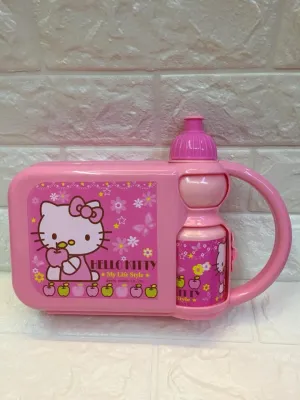
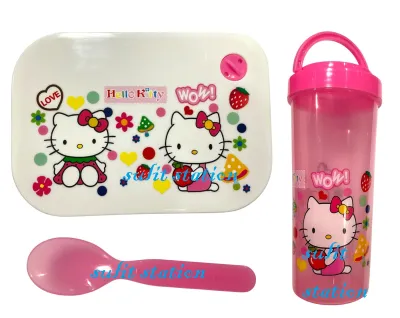
Prices are valid at publication and may change. Please refer to the product page for the latest price.
Next, inspect the Hello Kitty graphic itself to determine how it was applied. Most high-quality feeding bottles feature external silk-screen printing or organic ink transfers. Look closely to see if the design is printed directly onto the outer surface, embedded within a multi-layer wall, or applied as an exterior decal or sticker. Direct outer prints are the most vulnerable to scratching, peeling, and thermal degradation during intense sterilization cycles.
Always locate and read the manufacturer’s official care leaflet or packaging instructions. This document specifies the maximum temperature limit—often ranging from 100°C to 180°C depending on the polymer—and lists approved sanitizing methods. Never assume that two bottles with the same character design share the same material properties or care requirements. Verifying these details beforehand prevents accidental damage and ensures you follow the safest path for your specific bottle set.
Evaluate Sterilization Methods for Printed Designs
Boiling is a traditional and highly accessible sanitizing method, but it poses significant risks to printed graphics. When bottles are submerged in boiling water at 100°C, they can easily bump against the metal sides or bottom of the pot. This physical friction, combined with intense heat, can soften the ink and cause the Hello Kitty design to scrape off or fade rapidly. If you choose this method, ensure the bottle material is rated for boiling and prevent the bottle from directly touching the hot metal surfaces of the cookware.

Electric steam sterilizers use high-temperature steam to eliminate pathogens. While this method avoids the physical agitation of boiling in a pot, the sustained exposure to hot, humid air can still weaken the adhesive bonds of decals or degrade delicate surface coatings over time. It is essential to verify that the bottle’s specific plastic type can withstand continuous steam cycles without warping or causing the exterior print to become tacky. Always arrange the bottles securely in the sterilizer rack so they do not rub against each other during the cycle.
UV sanitizing devices offer a low-heat alternative that is highly appealing for preserving delicate prints. Because they rely on ultraviolet light rather than high-temperature steam or boiling water, they minimize the risk of thermal ink degradation. However, prolonged exposure to UV light can cause certain plastics, particularly PP, to age faster, become brittle, or discolor. Check if your bottle manufacturer explicitly approves UV sterilization for the specific model to avoid premature material wear and ensure the print remains intact.
Cold-water chemical sterilization involves submerging the disassembled bottle parts in a diluted sterilizing solution. This method completely eliminates heat-related damage, making it highly protective of the printed design. However, some harsh chemical solutions can react with specific printing inks, leading to gradual fading or a sticky residue. Caregivers must carefully measure the dilution ratio according to the product instructions, monitor the contact time, and rinse the bottle thoroughly with cooled, sterilized water before feeding.
Follow a Safe Sterilization Routine
To begin the sterilization process, completely disassemble the feeding bottle set. Separate the silicone nipple, the plastic retaining ring, the protective cap, and any anti-colic valves from the printed bottle body. Sanitizing the parts individually ensures that moisture and heat do not get trapped in the crevices, which could otherwise harbor bacteria or cause localized heat buildup that damages the print.
Strictly adhere to the timing guidelines provided by both the bottle manufacturer and the sterilizer manufacturer. If boiling, do not exceed the recommended duration—usually a few minutes is sufficient to sanitize the surfaces. Leaving a printed bottle in a boiling pot or an active steam cycle for longer than instructed increases the risk of thermal damage to the decorative ink and accelerates the degradation of the plastic.
Monitor the condition of the bottle closely during and after each cycle. If you observe any signs of color bleeding, peeling edges on the Hello Kitty graphic, or warping of the plastic body, stop using that sterilization method immediately. Switch to a gentler, lower-temperature sanitizing option or consult the manufacturer’s customer service for guidance. Continuing to sterilize a degrading bottle can lead to ink particles flaking off into your baby’s environment.
Once the sterilization cycle is complete, use clean, sanitized tongs to lift the bottle parts out of the sterilizer or pot. Avoid touching the printed area while it is still hot and wet, as the ink is highly vulnerable to scratching in this state. Place the components on a clean, dedicated drying rack in a well-ventilated area, allowing them to air-dry completely without rubbing the exterior graphics with a towel.
Protect the Design During Daily Cleaning
Daily maintenance plays a vital role in preserving the Hello Kitty design between sterilization cycles. When washing the bottle, always use a soft sponge, silicone brush, or microfiber cloth. Avoid abrasive scouring pads, stiff-bristled brushes, or steel wool, which will quickly scratch and wear down the printed graphics, leaving the bottle looking worn and potentially creating micro-scratches where bacteria can hide.
Avoid leaving the printed bottle submerged in hot, soapy water for extended periods. Prolonged soaking can cause water to penetrate beneath the edges of the print or soften the ink’s adhesion to the plastic surface. Instead, wash the bottle promptly using a mild, baby-safe dishwashing liquid, rinse it thoroughly under running water, and proceed directly to drying or sterilizing.
In the tropical climate of the Philippines, high humidity can prolong drying times, making a well-ventilated drying area essential. Once the bottle set is completely dry, store it in a cool, shaded cupboard or a dedicated closed container away from direct sunlight. Continuous exposure to harsh sunlight through a window can bleach the vibrant pinks and reds of the Hello Kitty design and accelerate the aging of the bottle’s plastic material.
Frequently Asked Questions (FAQ)
Can I wash a printed Hello Kitty bottle in the dishwasher?
Washing a printed Hello Kitty bottle in a household dishwasher is generally not recommended unless the manufacturer explicitly states it is safe and displays a dishwasher-safe symbol on the packaging. Dishwashers utilize extremely high water temperatures, prolonged heating cycles, and highly abrasive detergents. This combination can rapidly degrade, fade, or peel the exterior printed design. If the bottle is labeled as dishwasher-safe, place it only on the top rack, away from the heating element, and use a gentle, baby-safe detergent cycle.
What should I do if the print starts peeling off?
If you notice the Hello Kitty print beginning to peel, flake, or wear off, you should stop using the bottle for infant feeding immediately. Peeling ink or plastic flakes pose a safety hazard, as small particles could accidentally enter the milk or be transferred to your baby’s hands and mouth during feeding. To ensure your baby’s safety, replace the damaged bottle with a new set. You can repurpose the old bottle for non-food storage or decorative keepsakes, keeping it out of the daily feeding routine.

Community discussion
Share your experience or ask a question. Comments are reviewed before publication.