
Transitioning to reusable diapers is a practical, eco-conscious, and budget-friendly choice for many families. If you are a new parent looking to make the switch, learning how to use a modern Moose gear lampin is an excellent way to reduce household waste while keeping your baby comfortable. While the concept of cloth diapering might seem complex at first, modern designs have simplified the process significantly. By understanding the basic components, mastering the fit, and establishing a consistent washing routine, you can easily integrate cloth diapers into your daily parenting schedule.
Every baby is unique, and finding the right balance of absorbency, fit, and washing frequency requires a small amount of trial and error. This guide breaks down the essential steps to help you confidently start your cloth diapering journey in the Philippines, ensuring your baby stays dry and comfortable through tropical weather and daily adventures.
Understanding Moose Gear Cloth Diaper Components
Before putting a cloth diaper on your baby, it is helpful to understand how the system is put together. Modern cloth diapers are vastly different from the traditional square cotton cloths of the past. They are engineered with specialized fabrics designed to keep wetness away from your baby’s skin while preventing leaks from escaping onto their clothes.
Products mentioned in this guide
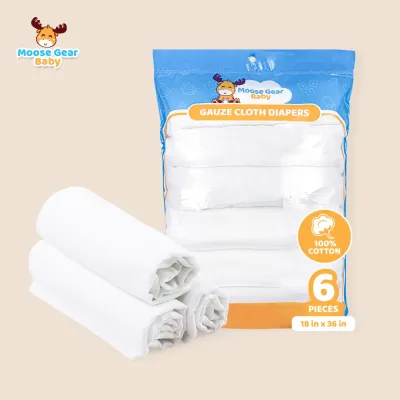
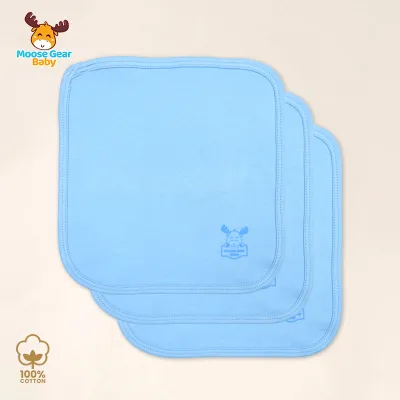
Prices are valid at publication and may change. Please refer to the product page for the latest price.
The system consists of two primary parts: the waterproof outer shell and the absorbent inner layers. The outer shell is typically made of Polyurethane Laminate (PUL), a breathable yet waterproof fabric that acts as a barrier against moisture. The inside of this shell is lined with a soft, stay-dry fabric, such as microfleece or suede cloth, which allows liquid to pass through quickly while remaining dry to the touch against your baby’s skin.
Most modern reusable options utilize a pocket diaper system. In this design, a opening or “pocket” is located at the back or front of the diaper shell. You insert the absorbent pads, known as inserts, directly into this pocket. This configuration ensures that the absorbent material stays securely in place and does not shift as your baby crawls or walks. It also keeps the damp insert from directly touching your baby’s skin, reducing the likelihood of wetness-induced irritation.
When unboxing your diapers, take a moment to inspect the specific product tags and manufacturer instructions. Different models may feature unique snap configurations, pocket openings, or specialized material blends. Familiarizing yourself with these details before the first wash ensures you assemble and use the diapers exactly as intended.
Estimating How Many Diapers You Need to Buy
One of the most common questions beginners ask is how many diapers they need to purchase to get started. Building a starter collection, often referred to as a “stash,” requires balancing your baby’s age, daily output, and your intended washing frequency. Overbuying can be expensive, while underbuying leads to laundry emergencies.

To calculate your daily diaper needs, start with your baby’s age and typical daily change frequency. Newborns generally require frequent changes, often needing 10 to 12 clean diapers every 24 hours. As infants grow and develop better bladder control, this number typically decreases to about 6 to 8 changes per day.
Your washing schedule directly dictates the total number of diapers you need in your rotation. If you plan to wash your diapers every single day, you will need enough diapers for one full day plus a few extras to use while the clean batch is drying. If you prefer to wash every two to three days, you must multiply your daily usage accordingly. For a two-day washing cycle, a stash of 18 to 24 diapers is generally recommended for older infants, while newborns may require 24 to 30 diapers.
Local weather conditions also play a significant role in determining your ideal stash size. In the Philippines, high humidity and rainy seasons can significantly prolong line-drying times. Because thick inserts take longer to dry than the waterproof outer shells, having a few extra inserts in your collection ensures you do not run out of dry options during wet weather.
Rather than buying a massive collection upfront, it is highly recommended to start with a small trial batch of 3 to 6 diapers. This allows you to test the fit on your baby, evaluate the absorbency of different inserts, and see how the washing routine fits into your lifestyle before making a larger financial commitment.
Step-by-Step Guide to Fitting and Securing Your Moose Gear Lampin
Achieving a proper fit is the most critical factor in preventing leaks and ensuring your baby’s comfort. Even the most absorbent diaper will leak if there are gaps around the legs or waist. Follow these steps to secure the diaper correctly every time.
Prep the Insert
Begin by selecting your insert and smoothing it out completely. Slide your hand inside the diaper’s pocket opening, holding the insert flat, and push it all the way to the front of the diaper. Ensure the insert lies completely flat from front to back without bunching, folding, or twisting, as uneven surfaces can cause localized pressure leaks and discomfort.
Positioning the Diaper
Lay your baby down on a safe changing surface and slide the prepped diaper underneath them. The back panel of the diaper should sit at a comfortable height, typically aligned with your baby’s belly button or slightly above the hips. Make sure the fabric is centered symmetrically beneath your baby’s body before you begin fastening the snaps.
Fastening the Snaps
Modern cloth diapers feature a grid of snaps on the front face, known as rise snaps, which adjust the length of the diaper to fit babies of different weights and development stages. Adjust these rise snaps first to set the overall height of the diaper. Next, pull the front panel up over your baby’s belly and secure the waist snaps symmetrically. The fit should be snug but comfortable, allowing your baby to move freely.
The Fit Check
Once the diaper is fastened, perform a quick physical check. Use the “two-finger rule” by sliding two fingers easily into the waistband at the front; if you cannot fit two fingers, the waist is too tight, and if there is a large gap, it is too loose. Additionally, inspect the edges of the diaper to ensure no inner absorbent fabric or insert material is poking out, as any exposed inner fabric will draw moisture outward onto your baby’s clothing.
Adjusting the Leg Gussets
Finally, pay close attention to the leg openings. Gently run your finger along the elastic leg gussets, tucking the elastic fabric inward so it sits snugly in the natural creases of your baby’s groin, much like underwear. This step is essential to seal any gaps around the thighs and properly contain liquid and solid messes.
Establishing a Safe and Effective Washing Routine
Maintaining a clean and hygienic washing routine is essential to preserve the absorbency of your cloth diapers and protect your baby’s skin. Because cloth diapers undergo heavy soil exposure, they require a more thorough washing process than regular baby clothes.
Pre-wash and Storage
When changing a soiled diaper, handle solid waste immediately. For breastfed infants, the waste is water-soluble and can go directly into the washing machine. For babies eating solid foods, shake or spray the solid waste into the toilet using a bidet or diaper sprayer. Store the soiled diapers in a dry, breathable wet bag or a well-ventilated plastic laundry pail. In hot, humid tropical climates, avoid keeping soiled diapers in airtight containers, as trapped moisture promotes mold growth and strong ammonia odors; try to wash your diapers every two days.
The Wash Cycle
Always use a two-step washing method to ensure deep cleaning. First, run a short, cold pre-wash or rinse cycle with a small amount of detergent to flush out surface urine and loose soil. Once this initial cycle is complete, run a heavy-duty main wash cycle using warm or tap water and a full dose of cloth-safe detergent. This second cycle thoroughly deep-cleans the fabric fibers.
Detergent Selection
Choosing the right detergent is crucial for maintaining fabric performance. Strictly avoid fabric softeners, as they coat the fabric fibers with a water-repellent layer that ruins absorbency. Do not use chlorine bleach regularly unless specifically recommended by the manufacturer for sanitizing, as it can degrade the waterproof PUL layer over time. Opt for standard, enzyme-rich detergents without added fabric softeners or heavy optical brighteners.
Drying Methods
Whenever possible, hang your diaper shells and inserts to line dry. Hanging them outdoors in the sun provides natural sanitizing and helps fade stubborn stains. However, be cautious with the waterproof outer shells; extreme heat can damage the PUL lining. If you use a machine dryer, always check the manufacturer’s specific heat tolerance limits, and use a low-temperature setting to prevent delaminating or melting the waterproof barrier.
Troubleshooting Common Cloth Diaper Issues
If you encounter challenges during your first few weeks of cloth diapering, do not discourage yourself. Most issues are easily resolved with minor adjustments to your fit or washing routine.
If you experience frequent leaks, start by identifying the type of leak. Compression leaks occur when an insert is completely saturated and acts like a wet sponge, releasing liquid when your baby sits down; this indicates you need to change the diaper sooner or add a more absorbent insert. If the inserts are dry but liquid is escaping, check for gaps around the legs or verify if your fabric is “repelling” water due to detergent or fabric softener buildup.
Skin irritation can occasionally occur and is usually caused by either prolonged moisture exposure or detergent residue trapped in the fabric. Ensure you change your baby’s diaper every two to three hours during the day. If you suspect detergent buildup, try adding an extra rinse cycle to your washing routine. Always consult a pediatrician if a diaper rash persists, becomes bright red, or shows signs of infection.
As your baby grows, their wetting patterns and body shape will change. If a setup that previously worked well suddenly begins to leak, it is time to reassess. You may need to adjust the rise snaps to a larger setting, or upgrade your inserts to more absorbent materials, such as bamboo or hemp, to accommodate your baby’s increasing bladder capacity.
Frequently Asked Questions (FAQ)
Can I use standard diaper rash creams with Moose Gear cloth diapers?
Standard diaper rash creams containing petroleum, mineral oil, or high concentrations of zinc oxide should not be used directly with cloth diapers. These ingredients create a thick, waterproof barrier on the fabric fibers that is highly difficult to wash out, causing the diaper to repel liquid instead of absorbing it. If your baby requires a barrier cream, choose a product explicitly labeled as cloth-diaper-safe, or place a reusable fleece liner inside the diaper to protect the fabric from the cream.
Do I need to prep new Moose Gear diapers before the first use?
Yes, prepping new cloth diapers is essential to unlock their full absorbency. Synthetic inserts, such as microfiber, typically only require a single wash with a small amount of detergent to remove manufacturing residues before their first use. However, natural fiber inserts made of cotton, bamboo, or hemp contain natural plant oils that must be washed away to become fully absorbent. These natural inserts generally require three to five wash-and-dry cycles before they reach their maximum absorbency capacity.

Community discussion
Share your experience or ask a question. Comments are reviewed before publication.