
Transitioning to cloth diapers is a rewarding choice for many families in the Philippines, offering significant environmental benefits and long-term financial savings. While the initial shift from single-use options can feel intimidating, mastering the basics of cloth diapering is entirely manageable once you understand the different styles, proper fitting techniques, and washing routines. By establishing a consistent system, you can keep your baby comfortable, minimize household waste, and significantly reduce your monthly baby care expenses.
Starting this journey requires a small amount of preparation, but the benefits for your baby’s skin and your household budget are well worth the transition. With a clear understanding of the components and a simple maintenance routine, you can confidently integrate cloth diapers into your daily parenting workflow.
Understanding Cloth Diaper Types and Components
To build a successful cloth diapering system, you must first understand the primary styles available on the market. The most straightforward option is the All-in-One (AIO) diaper, which features a waterproof outer layer and an absorbent inner layer sewn together as a single piece. While AIOs offer the highest level of convenience because they require no assembly, they typically take the longest to dry, which can be a challenge during the humid rainy season.
Products mentioned in this guide
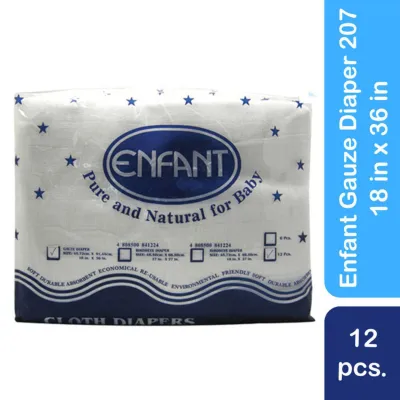
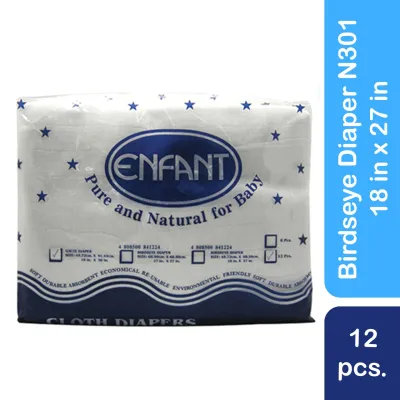
Prices are valid at publication and may change. Please refer to the product page for the latest price.
Pocket diapers are another highly popular style, consisting of a waterproof outer shell and a stay-dry inner lining that forms a pocket. You insert absorbent pads, known as inserts, into this pocket before putting the diaper on your baby. This design allows you to customize the absorbency by adding more inserts for nighttime use or heavy wetters, and the separate pieces dry much faster after washing.
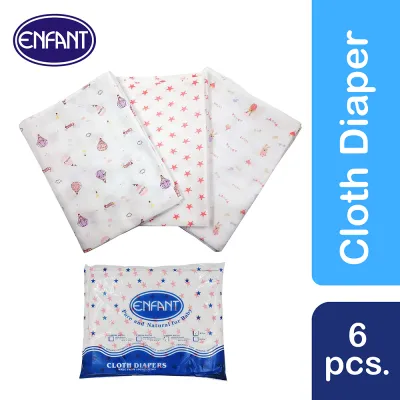
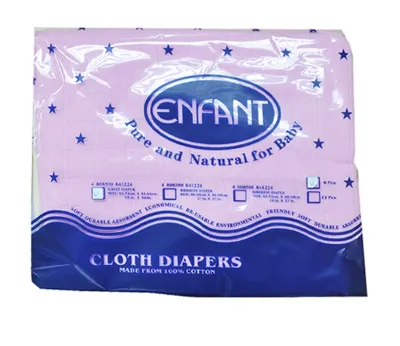
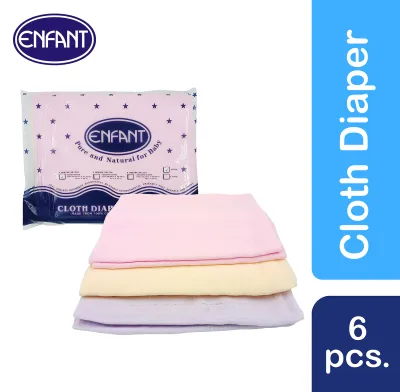
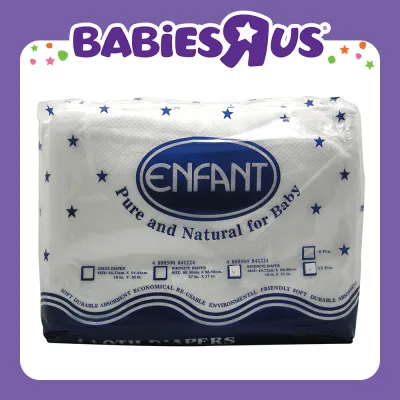
Prefolds and fitted diapers represent more traditional approaches to cloth diapering. Prefolds are rectangular pieces of fabric, often made of cotton, that require folding and securing with a fastener before covering them with a separate waterproof shell. Fitted diapers are shaped like modern diapers and have elasticized legs but are entirely absorbent, meaning they also require a waterproof cover. Traditional options like the Enfant lampin cloth diaper system offer a highly breathable, classic prefold approach that many parents prefer for newborns due to its simplicity and ease of washing.
Regardless of the style you choose, managing moisture effectively relies on three main components: inserts, reusable liners, and waterproof covers. Inserts are the core absorbent pads made from materials like microfiber, bamboo, or hemp. Reusable liners can be placed on top of the diaper to catch solid waste, making cleanup much easier, while the waterproof cover prevents moisture from leaking onto your baby’s clothes. When selecting these parts, always verify specific brand features and component compatibility directly on the manufacturer’s product label to ensure a proper fit.
How to Choose the Right Cloth Diaper for Your Baby
Selecting the right cloth diaper system involves balancing your family’s daily routine, laundry capacity, and budget. While All-in-One systems require a higher upfront financial investment, they save valuable time during diaper changes, making them ideal for busy caregivers or daycare settings. On the other hand, multi-part setups like prefolds and covers are highly economical, allowing you to reuse the waterproof cover multiple times by simply swapping out the wet inner cloth.

Sizing is another critical decision point when building your stash. One-size adjustable diapers feature rows of snaps on the front, allowing you to resize the diaper as your baby grows from infancy through toddlerhood. While these adjustable options offer excellent long-term value, they can sometimes look bulky on tiny newborns. Sized diapers, which are tailored to specific weight ranges, provide a sleeker fit but must be replaced as your baby grows. To avoid leaks and discomfort, always cross-reference your baby’s current weight with the specific ranges indicated on the product packaging.
Before finalizing a bulk purchase of any diaper style, it is essential to consider your baby’s skin sensitivity and the local climate. High humidity can trap moisture against the skin, making breathable fabrics like cotton or bamboo highly desirable. Check the manufacturer’s guidelines for material composition and look for any skin sensitivity warnings on the packaging. Purchasing a few individual diapers of different styles to test on your baby before investing in a complete set is a practical way to ensure compatibility with your lifestyle and your baby’s skin.
Step-by-Step Guide to Putting on a Cloth Diaper
Achieving a leak-free fit starts with proper preparation of your chosen diaper system. If you are using pocket diapers, stuff the inserts smoothly into the pocket, ensuring they lie completely flat without bunching or folding, which can cause gaps. For prefolds or traditional lampin, fold the fabric into your preferred shape—such as the classic trifold—and place it securely inside the waterproof cover.
To put the diaper on your baby, slide the prepared diaper under their bottom, ensuring the back edge sits level with their belly button. Pull the front of the diaper up over your baby’s tummy, keeping the fabric flat against their skin. Secure the snaps or hook-and-loop closures symmetrically on both sides, starting with the waist snaps and then adjusting the thigh snaps to secure the leg openings.
Once the diaper is fastened, run your fingers around the leg gussets to ensure the elastic sits snugly in the underwear line, rather than on the thighs. Any fabric from the absorbent insert or inner lining must be tucked completely inside the waterproof cover to prevent moisture from wicking onto clothing. Check the waist tightness using the standard “two-finger rule”: you should be able to slide two fingers easily between the diaper and your baby’s tummy to ensure comfort when they sit or crawl.
For newborns, special care must be taken to protect the healing umbilical cord stump. Many newborn-specific cloth diapers feature a snap-down front design to keep the fabric from rubbing against this sensitive area. If your diaper does not have this feature, fold the front waist panel downward to keep the umbilical cord stump completely clear, uncovered, and dry until it naturally falls off.
Establishing a Safe and Effective Washing Routine
Maintaining a clean and hygienic washing routine is vital to preserve the absorbency and longevity of your cloth diapers. The process begins with removing solid waste; for breastfed babies, the waste is water-soluble and can go straight into the washing machine, while solid waste from formula-fed babies or toddlers eating solids must be sprayed or scraped into the toilet. Store dirty diapers in a dry pail or a breathable wet bag until wash day, which should ideally occur every two to three days to prevent odor and mold growth in warm, humid climates.
When wash day arrives, start with a cold pre-rinse or short wash cycle without detergent to flush out residual urine and loose waste. Follow this with a heavy-duty main wash cycle using warm water and an appropriate amount of cloth-safe detergent. Ensure the diapers are thoroughly rinsed at the end of the cycle to remove all soap residue, which can otherwise build up and cause skin irritation or diaper odors.
To protect the delicate waterproof layers and elastics, always check the manufacturer’s care label for specific water temperature limits and drying instructions. While line-drying in the sun is an excellent, natural way to sanitize and bleach out stains, excessive heat from a clothes dryer can melt or degrade the polyurethane laminate (PUL) waterproof backing. If you must use a dryer, select a low-temperature setting to preserve the integrity of the materials.
To maintain optimal absorbency, avoid using fabric softeners, liquid bleach, or standard laundry additives, as these substances coat the fabric fibers and cause them to repel liquid. Similarly, avoid using standard diaper rash creams unless they are explicitly approved by the diaper manufacturer or used with a protective liner. These creams often contain petroleum or zinc oxide, which create a waterproof barrier on the diaper fabric that is incredibly difficult to wash out.
Troubleshooting Leaks and Fit Issues
Encountering occasional leaks is a common part of the learning curve for new parents, but most issues can be resolved with a few simple adjustments. If you notice leaks around the legs, the most likely cause is an improper fit or a gap in the leg gussets. Ensure the elastics are tucked into the groin crease and that the rise snaps are adjusted correctly to eliminate any loose fabric around the thighs.
Another frequent cause of leaks is saturated inserts, which occur when the diaper’s absorbency cannot keep up with your baby’s wetting patterns. If the diaper is completely soaked through within two hours, consider upgrading to more absorbent insert materials, such as swapping microfiber for bamboo or hemp, or adding a booster pad for naptime. Conversely, if the diaper leaks but the insert feels dry, you may be experiencing liquid repelling caused by detergent buildup or incompatible rash creams.
If you suspect detergent buildup is causing your diapers to repel moisture, follow the manufacturer’s guidelines for deep cleaning or stripping the diapers to restore their absorbency. However, if your baby develops a persistent, severe, or spreading diaper rash, stop using your current cloth diaper setup immediately. Switch to a temporary alternative and consult a pediatrician to rule out yeast infections or specific material sensitivities.
Frequently Asked Questions (FAQ)
How many cloth diapers do I need for a newborn?
Newborns typically require 10 to 12 diaper changes per day because of their frequent feeding schedules. To calculate your ideal starting stash, multiply this daily average by your planned wash frequency, then add a few extra diapers as a safety buffer. For example, if you plan to wash your diapers every two days, you will need a minimum of 24 to 30 diapers to ensure you do not run out while a load is in the laundry. Remember to adjust your final count based on your washing machine’s capacity and the expected drying time of your chosen diaper style, especially during the humid or rainy seasons when line-drying takes longer.
Can I use regular diaper rash cream with cloth diapers?
Using standard diaper rash creams directly on cloth diapers is not recommended because petroleum-based or high-zinc oxide formulas coat the fabric fibers. This coating creates a water-resistant barrier that prevents the diaper from absorbing urine, leading to immediate leaks. To protect your diapers, always check the manufacturer’s approved cream list for cloth-safe alternatives, which are typically made from natural oils that wash out easily. Alternatively, you can place a reusable fleece liner inside the diaper to act as a physical barrier, protecting the absorbent fibers from the cream while keeping your baby’s skin dry.

Community discussion
Share your experience or ask a question. Comments are reviewed before publication.