
Starting the journey of using reusable diapers can feel overwhelming for new parents, but transitioning to modern cloth diapers is a highly manageable and rewarding process. While traditional cotton squares, locally known as lampin, have been a staple in households for generations, modern designs offer convenient, leak-resistant alternatives that fit seamlessly into a busy routine. By understanding the different types of diapers, establishing a straightforward washing routine, and learning the mechanics of a proper fit, you can confidently make the switch. This guide walks you through the essential steps to build your stash, manage daily changes, and care for your diapers in a tropical climate where humidity and drying times play a key role.
Understanding Modern Cloth Diaper Types
To choose the right system for your family, it helps to understand how modern designs differ from traditional flat lampin. Traditional flat lampin are single layers of cotton or gauze fabric that require manual folding, safety pins or ties, and a separate plastic cover to prevent leaks. Modern cloth diapers, on the other hand, feature built-in waterproof layers, adjustable snaps, and highly absorbent inner materials that mimic the shape and convenience of disposable options.
There are three primary styles of modern cloth diapers to consider:
Products mentioned in this guide




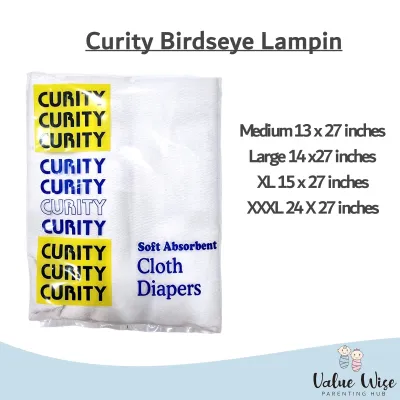

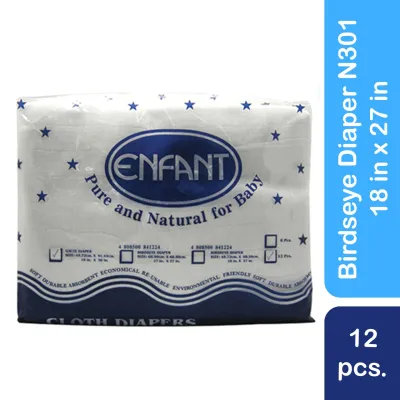

Prices are valid at publication and may change. Please refer to the product page for the latest price.
- All-in-One (AIO) Diapers: These are the closest equivalent to a disposable diaper. The absorbent inner layers are sewn directly to the waterproof outer shell. They require no assembly, making them highly convenient for babysitters or grandparents. However, because all layers are attached, they take the longest to dry, which is an important consideration in humid tropical climates.
- Pocket Diapers: This style features a waterproof outer layer and a stay-dry inner lining that forms a pocket. You insert absorbent pads, known as inserts, into this pocket before use. Pocket diapers dry relatively quickly because the inserts are washed and dried separately from the shell, and they allow you to customize absorbency by adding more inserts as your baby grows.
- Fitted Diapers with Covers: A fitted diaper is made entirely of absorbent material and goes on the baby first, requiring a separate waterproof cover over the top. This combination offers excellent containment and is highly favored for nighttime use, though it requires a two-step fastening process.
When selecting diapers, you will also choose between sized options and one-size-fits-most designs. Sized diapers are tailored to specific weight ranges and offer a trim fit for newborns. One-size diapers feature rows of adjustable snaps, called rise snaps, along the front. These snaps allow the diaper to expand and adjust according to your baby’s weight and development stage, typically lasting from early infancy through potty training. Always consult the manufacturer’s specific weight guidelines to ensure a proper fit.
Building Your Starter Stash and Supplies
Calculating how many diapers you need depends on your baby’s age and how often you plan to run the laundry. Newborns require frequent changes, often needing 10 to 12 diaper changes per day. Older infants typically go through 6 to 8 changes daily. If you plan to wash your diapers every other day, a starter stash of 20 to 24 diapers is ideal to ensure you have enough clean diapers on hand while the washed ones are drying. If you prefer to wash daily, a smaller stash of 12 to 15 diapers can suffice.

Beyond the diapers themselves, several essential accessories make daily management much easier:
- Wet Bags: These are zippered, waterproof bags made of polyurethane laminate (PUL) designed to store soiled diapers. A large wet bag is useful next to your changing station, while smaller, travel-sized wet bags are essential for outings.
- Diaper Liners: Placed directly against the baby's skin, liners catch solid waste for easier cleanup. You can choose between disposable, biodegradable liners or reusable fleece liners that keep moisture away from the skin.
- Cloth-Safe Diaper Creams: Standard diaper creams containing petroleum or high levels of zinc oxide can coat fabric fibers, creating a barrier that repels moisture and causes leaks. Look for creams explicitly labeled as cloth-safe, or use a liner to protect the fabric.
Before purchasing any diapers, always check the product labels for material composition. Natural fibers like cotton, bamboo, and hemp offer excellent absorbency and hold onto moisture well under pressure. Synthetic fibers like microfiber absorb liquid very quickly but can cause compression leaks if squeezed. Note that microfiber should never be placed directly against your baby’s skin, as it can dry out and irritate sensitive skin; always place it inside a pocket or under a stay-dry liner.
Step-by-Step: Fitting and Using the Diaper
Achieving a proper fit is the most important factor in preventing leaks and ensuring your baby’s comfort. Before putting the diaper on your baby, prepare it by inserting the absorbent pads flat inside the pocket or snapping them into place, ensuring there are no bunches or folds. If you are using a one-size diaper, adjust the front rise snaps to the appropriate height setting for your baby’s current size.
To secure the diaper, follow these steps:
- Position the Diaper: Slide the prepared diaper under your baby. The back elastic should sit right at the waistline, just above the hips, aligned with the belly button.
- Pull Up and Fasten: Bring the front of the diaper up between your baby's legs. Fasten the waist snaps or hook-and-loop tabs. The waist should be snug but comfortable; you should be able to slide two fingers easily between the diaper and your baby's tummy.
- Check the Leg Gussets: This is the critical step for leak prevention. Ensure the elastic of the leg gussets sits tucked neatly into the groin crease, similar to the fit of underwear, rather than resting on the outer thighs. If the elastic sits on the thighs, moisture can wick outward onto clothing.
- Tuck Excess Fabric: If using a snapped-down rise, push any excess fabric between the rise snaps upward to keep the front of the diaper flat and prevent sagging.
Always supervise your baby during diaper changes and inspect their skin afterward. Light pink marks from the elastics are normal and harmless, similar to the marks left by a pair of socks. However, if deep red, irritated marks or chafing appear, stop using that specific snap setting and adjust the fit to be looser, or consult the manufacturer’s sizing guide for troubleshooting.
Establishing a Safe Washing and Care Routine
Establishing a consistent washing routine is essential to maintain the absorbency and hygiene of your cloth diapers. In warm, humid climates, a proper wash routine prevents mold, mildew, and ammonia buildup. Always check the manufacturer’s specific care labels for water temperature limits and detergent restrictions before washing.
A standard, highly effective washing routine consists of a two-step process:
- The Pre-Wash: Run a short, cold or warm cycle with a small amount of detergent. This cycle flushes out the bulk of the urine and organic waste, ensuring that the subsequent main wash is done in clean water.
- The Main Wash: Run a long, heavy-duty cycle using warm water (within manufacturer limits) and a full dose of detergent. This thoroughly cleanses the fabric fibers and removes deep-seated residues.
When choosing a laundry detergent, select a standard, high-quality option that does not contain fabric softeners, optical brighteners, or heavy perfumes. Fabric softeners leave a greasy coating on fabric fibers that repels water, leading to immediate leaks and odor retention. Avoid using bleach regularly unless recommended by the manufacturer for sanitizing, as frequent use can degrade the waterproof laminate and elastics.
For drying, line drying in the sun is highly effective, as natural sunlight helps sanitize fabrics and fade light stains. However, avoid leaving waterproof shells or covers in direct, intense tropical sunlight for extended periods, as extreme heat can warp the waterproof lining and damage the elastics. If using a clothes dryer, always use a low-heat setting to protect the delicate waterproof layers.
Managing Daily Life: Nighttime and On-the-Go
Managing cloth diapers outside your standard daytime routine requires minor adjustments but is highly achievable with the right preparation. Because babies sleep for longer stretches at night, they require increased absorbency to prevent leaks. To boost your diaper’s capacity for overnight use, add a highly absorbent insert made of bamboo or hemp behind a fast-absorbing cotton or microfiber insert. Ensure the diaper still fits snugly around the legs without gaping when stuffed with these extra layers.
When traveling or running errands, preparation is key. Pack a clean, zippered wet bag, several pre-stuffed pocket diapers, and cloth-safe wipes. When changing your baby in public spaces, place the soiled diaper directly into the wet bag and zip it shut. High-quality wet bags are designed to seal in moisture and odors effectively, allowing you to transport the diapers home safely without any mess.
While cloth diapers are gentle on sensitive skin, diaper rashes can still occur due to teething, dietary changes, or prolonged moisture contact. If a persistent rash develops, consult your pediatrician to identify the root cause and obtain appropriate treatment. Do not assume the diaper material is the sole cause, but do verify that your washing routine is thoroughly removing all detergent residues from the fabric.
Frequently Asked Questions (FAQ)
Can I use regular diaper rash cream with cloth diapers?
Standard diaper rash creams, especially those containing petroleum, mineral oil, or high concentrations of zinc oxide, can create a waterproof barrier on cloth diaper fabrics. This barrier prevents the diaper from absorbing liquid, causing urine to run off and leak. If you must use a traditional cream, always place a disposable liner or a reusable fleece liner between the baby’s skin and the diaper to protect the fabric. Alternatively, look for creams explicitly labeled as cloth-diaper-safe, which typically wash out easily with standard detergents.
How do I handle solid waste before washing?
Managing solid waste depends on your baby’s diet. For exclusively breastfed babies, the waste is completely water-soluble and can go directly into the washing machine without pre-rinsing. Once your baby starts solid foods or formula, the waste must be removed before the diaper goes into the wash. You can use biodegradable paper liners that catch the waste for easy disposal, or install a diaper sprayer attached to your toilet to rinse the waste directly into the bowl. Always store wet or rinsed diapers in a dry pail or wet bag with adequate ventilation to prevent mold growth before wash day.

Community discussion
Share your experience or ask a question. Comments are reviewed before publication.