
Carrying your newborn close provides an invaluable sense of security and fosters deep bonding during those precious early weeks of life. When using a babybjorn carrier, achieving the correct positioning from day one is essential to ensure your infant’s airway remains completely unobstructed and their developing joints are safely supported. Properly positioning a newborn requires adjusting the carrier to sit high on your chest, securing the head support, and ensuring their hips rest in an ergonomic “M-position.”
In the tropical climate of the Philippines, babywearing also requires special attention to airflow and heat management. High humidity levels mean that both you and your little one can warm up quickly, making correct structural alignment and fabric choice critical for comfort. By mastering a few fundamental safety checks and adjustment techniques, you can confidently carry your baby while keeping them safe, cool, and comfortable.
Pre-Carry Safety Checks and Setup
Before you even pick up your infant, you must perform a series of essential safety checks on your baby carrier. Every model—whether it is the Mini, Free, Move, or Harmony—has unique structural requirements, so your first step must always be to read the specific manufacturer manual. Never assume suitability based on your baby’s age alone; instead, verify that your newborn meets the specific minimum weight and height requirements outlined in your product’s documentation. Using a carrier before your baby reaches the minimum weight threshold can lead to slipping, structural instability, or compromised breathing.
Products mentioned in this guide
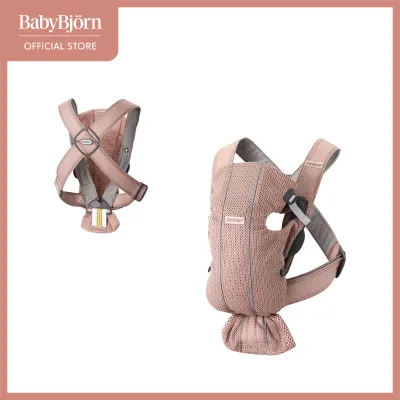

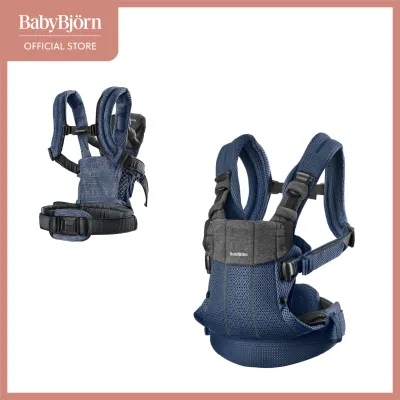
Prices are valid at publication and may change. Please refer to the product page for the latest price.
Next, conduct a thorough physical inspection of the carrier’s components. Check all plastic buckles, safety latches, and sliding adjusters to ensure they snap securely into place and show no signs of cracking or stress. Inspect the fabric, seams, and shoulder straps for any frayed threads, tearing, or weakened stitching. If you notice any damage or structural wear, do not use the carrier; instead, contact the manufacturer or a qualified babywearing professional for advice.
Newborns lack the muscle strength to support their own heads, making the carrier’s built-in head and neck support features absolutely critical. Before placing your baby inside, locate the adjustment straps or buttons designed to tighten the upper portion of the carrier panel. Familiarize yourself with how these mechanisms work so you can easily adjust them once your baby is in position, ensuring their head remains stable and cannot slump backward or sideways.
Step-by-Step Guide to Positioning Your Newborn in a BabyBjörn Carrier
Adjusting the Carrier for a Newborn
Preparing the carrier’s structure on your own body first ensures a smooth, stress-free transition when you lift your baby. Begin by putting on the harness and fastening the waist belt, if your specific model includes one. Position the waist belt high up on your torso—typically just under your bust or at your natural waistline—and tighten it securely so that the weight of the carrier is evenly distributed across your hips and lower back.

Next, adjust the shoulder straps so that the back panel or cross-piece sits comfortably between your shoulder blades. The carrier should feel snug against your chest, with minimal slack in the adjustment straps. If your model features adjustable height settings, zipper tracks, or internal infant inserts designed specifically for newborns, configure these to the smallest settings according to the manufacturer’s instructions. Adjusting these settings narrows the seat and shortens the front panel, preventing your tiny infant from sinking too deep into the fabric.
Placing the Baby and Securing the Head
When you are ready to place your baby, maintain a secure, supportive hold on their body at all times. Cradle your newborn against your chest with one hand supporting their bottom and the other supporting their neck and head. Gently slide them into the carrier’s inner harness or fabric seat, ensuring their legs slide naturally through the designated leg openings on either side.
Once your baby’s weight is resting in the seat, fasten the side buckles or safety attachments one at a time while keeping a reassuring hand on their back. Locate the adjustable head support straps on the upper sides of the carrier panel. Tighten these straps so that the top edge of the fabric supports your baby’s head just below their ears and at the nape of the neck. The support must be firm enough to prevent their head from wobbling or tilting backward, but it should never push their head so far forward that their chin is pressed against their chest, nor should it cover their nose or mouth.
Achieving the "M-Position" for Hip Health
Proper hip alignment is vital during the first few months of life when a baby’s hip joints are still developing and highly malleable. To promote healthy hip development, you must guide your newborn’s legs into the ergonomic “M-position,” also known as the frog-leg position. In this position, the baby’s knees should be bent and positioned naturally higher than their bottom, with their thighs spread wide and fully supported by the carrier’s fabric.
To achieve this, gently reach inside the carrier and scoop your baby’s bottom, tilting their pelvis slightly inward toward your body. This pelvic tuck naturally encourages their knees to rise and their spine to curve gently. Adjust the seat width or fabric panels of your carrier so that the material supports their thighs from knee crease to knee crease. Never pull, force, or stretch your baby’s legs into an unnaturally wide or straight position; the carrier should simply support the natural, relaxed posture your baby assumes when held against your chest.
Verifying Airway Safety and Carrier Fit
Once your baby is secured, you must perform immediate and continuous safety checks to verify their airway is completely clear and the carrier fits correctly. A primary rule of babywearing is keeping the baby’s face fully visible and “kissable” at all times. You should be able to easily look down and see your baby’s nose and mouth without needing to move any fabric, clothing, or your own body. Their head should be positioned high enough on your chest that you can easily bend your head forward and kiss the top of their forehead.
Ensure there is always a gap of at least one to two adult fingers between your baby’s chin and their chest. If their chin is resting flat against their chest, their airway can become restricted, which is a severe safety hazard for newborns who cannot lift their heads to breathe. Additionally, check that the carrier is snug enough to hold your baby’s body close to yours in an upright position. If the carrier is too loose, your baby may slump down, causing their spine to curve excessively and potentially compromising their breathing; if it is too tight, it may restrict their chest expansion or cause discomfort.
In the warm and humid environment of the Philippines, monitoring your baby’s temperature is a critical part of safe carrying. To check if your little one is overheating, do not rely on their hands or feet, which naturally feel cooler. Instead, gently slide your hand inside the carrier and feel the back of their neck or their upper back. If the skin feels hot, sweaty, or clammy, your baby may be overheating; you should transition to a cooler environment, loosen outer clothing, or take a break from the carrier. Consider choosing a 3D mesh or highly breathable fabric version of the carrier to facilitate better airflow in tropical climates.
If you are looking to purchase a new model, prices in the Philippines typically range from around ₱5,000 to ₱12,000 depending on the specific model and fabric type, making it a significant but worthwhile investment for your child’s early months.
Common Positioning Mistakes and When to Stop
Even experienced caregivers can make mistakes when adjusting to a new carrier, so being aware of common pitfalls is essential. One of the most frequent errors is allowing the baby’s legs to dangle straight down without proper thigh support, which places undue stress on their developing hip joints. Another critical mistake is letting the baby slump downward into a curved, C-shape posture where their face is pressed against your chest or the carrier’s fabric, blocking their access to fresh air.
You must immediately stop carrying and adjust the setup if you observe any warning signs. If your baby shows signs of breathing difficulty—such as rapid breathing, grunting, flaring nostrils, or a blue tint around the lips—remove them from the carrier immediately and seek emergency medical attention. Other signs that warrant an immediate pause include excessive, inconsolable fussiness from your baby, or if you experience sharp or persistent back, neck, or shoulder pain, which indicates the carrier is not adjusted correctly to your body.
If you are ever unsure about the safety of your baby’s hip alignment, or if your baby has pre-existing physical or medical conditions such as hip dysplasia, consult your pediatrician or a certified babywearing educator before using the carrier. Additionally, if your newborn consistently rejects the carrier despite your best efforts to adjust it, do not force them; take a break, consult a professional, and try again when they are slightly older or more settled.
Frequently Asked Questions (FAQ)
How do I know if my newborn is too small for the carrier?
To determine if your newborn is ready for the carrier, rely strictly on the manufacturer’s minimum weight and height specifications printed on the product label or detailed in the user manual. Never estimate suitability based on age alone, as babies grow at vastly different rates. If your baby was born prematurely, had a low birth weight, or has any underlying health conditions, you must consult your pediatrician for professional clearance and personalized guidance before using any baby carrier.
How long can I keep my newborn in the carrier at one time?
There is no strict, universal time limit for how long a newborn can remain in a carrier, but it is highly recommended to take regular breaks every 1 to 2 hours. These breaks allow you to check your baby’s skin for pressure marks, monitor their temperature, change their diaper, and let them stretch their limbs freely. Always pay close attention to your baby’s subtle comfort cues—such as squirming or fussing—and listen to your own body’s physical fatigue; if either of you feels uncomfortable, it is time to take a rest.

Community discussion
Share your experience or ask a question. Comments are reviewed before publication.