
Sterilizing your baby’s feeding equipment is a fundamental step in protecting their developing immune system from harmful pathogens. For parents using Pigeon slim neck nipples, proper sterilization involves a careful balance of thorough pre-cleaning, selecting a safe heat-based or chemical-free method, and ensuring the delicate silicone or rubber material does not degrade during the process. By mastering these steps, you can maintain a high standard of hygiene while preserving the structural integrity and flow rate of the nipple.
While several sterilization methods are available—including boiling, electric steam, and microwave steam—each requires specific precautions to prevent material damage. The slim neck design, characterized by its narrow profile and precise ventilation system, demands close attention during both cleaning and sterilization. Understanding how to execute these methods safely ensures that your baby’s feeding accessories remain clean, functional, and safe for daily use.
Why Proper Sterilization Matters for Slim Neck Nipples
Newborns and young infants have immune systems that are still maturing, making them highly susceptible to bacteria that rapidly multiply in milk residue. When breast milk or formula remains on a feeding nipple, it creates an ideal breeding ground for pathogens. Proper sterilization eliminates these microscopic threats, providing a clean and safe feeding experience.
Products mentioned in this guide
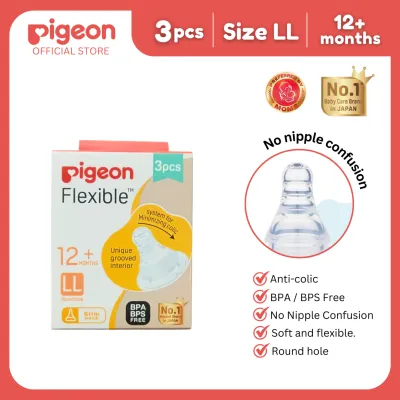
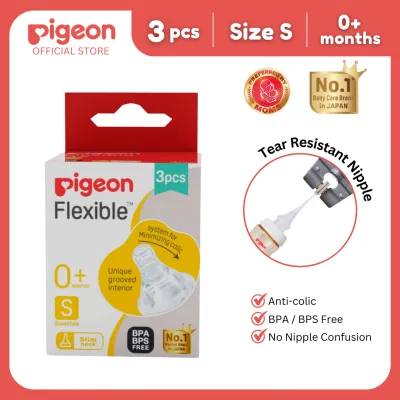
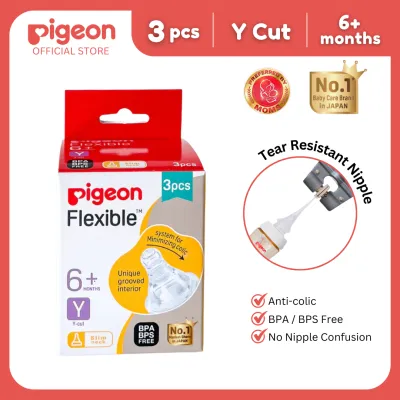
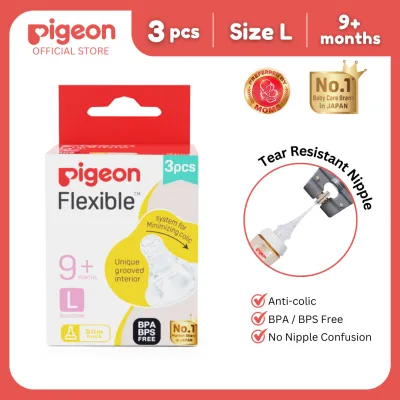
Prices are valid at publication and may change. Please refer to the product page for the latest price.
However, the materials used to manufacture these nipples—typically high-grade silicone or natural rubber—are sensitive to environmental factors. Subjecting them to excessive heat, prolonged boiling, or harsh chemical agents can accelerate the breakdown of the material. This degradation can manifest as micro-tears, structural softening, or a sticky texture, which compromises the safety and usability of the nipple.
The unique physical structure of the slim neck design features a narrower profile and a specialized ventilation valve designed to regulate air pressure. This compact shape means that milk fats and proteins can easily become trapped in tight crevices around the base and the valve. If these areas are not thoroughly cleaned and sterilized, the trapped residue can harden, block the air valve, and harbor bacteria.
Preparation: Cleaning and Inspecting Before Sterilization
Sterilization is only effective on surfaces that are completely free of physical debris. Before initiating any sterilization cycle, you must fully disassemble the feeding bottle. This means pulling the slim neck nipple completely out of the plastic cap and screw ring, as bacteria and milk residue frequently hide in the overlapping threads where these parts connect.

Once disassembled, wash all parts thoroughly in warm, soapy water using a mild, baby-safe dishwashing liquid. Use a dedicated nipple brush designed for narrow openings to gently clean the interior of the slim neck nipple. Pay close attention to the tip and the anti-colic ventilation valve at the base, ensuring you remove all greasy milk film without puncturing or stretching the silicone.
After washing, inspect each nipple closely under bright light before proceeding to sterilization. Look for early signs of wear, such as physical stretching, discoloration, hairline tears, or a sticky surface texture. If you notice any of these structural changes, discard the nipple immediately rather than sterilizing it, as damaged silicone can harbor bacteria or pose a choking hazard.
Step-by-Step Sterilization Methods
Before choosing a sterilization method, always consult the manufacturer’s packaging or instruction manual to verify the maximum temperature limits of your specific nipple model. Different materials, such as silicone and natural rubber, have distinct heat tolerances that must not be exceeded. Adhering to these guidelines prevents premature material failure and ensures the sterilization process remains safe.
Boiling Water Method
The boiling water method is a traditional, highly accessible option that requires no specialized equipment beyond a clean pot and water. Begin by filling a deep pot with enough water to fully submerge all the bottle parts, and bring it to a rolling boil. Only after the water has reached a full boil should you carefully lower the pre-cleaned slim neck nipples into the pot.
To prevent damage, you must ensure that the silicone nipples do not make direct contact with the hot bottom or sides of the pot. The intense heat of the metal surface can easily melt, scorch, or warp the delicate silicone. You can use clean plastic or silicone-tipped tongs to gently stir the water and keep the parts suspended away from the pot’s surfaces.
Refer to the product manual for the exact recommended boiling duration, which is typically between three and five minutes. Over-boiling does not make the parts cleaner; instead, it rapidly degrades the silicone, causing it to lose its elasticity. Once the time is up, use sterilized tongs to remove the nipples immediately and place them on a clean surface to cool.
Electric Steam Sterilizer
An electric steam sterilizer offers a convenient, automated way to sanitize baby bottle components using high-temperature steam. To begin, pour the exact volume of water recommended by the sterilizer manufacturer into the heating reservoir. Using too little water can cause the cycle to end prematurely, while too much water can prevent the unit from reaching the correct operating temperature.
When loading the sterilizer, place the slim neck nipples upside down or secure them within the designated small-parts basket. This orientation allows the rising steam to enter the interior cavity of the nipple directly, ensuring all internal surfaces are thoroughly sanitized. Avoid stacking other bottle parts on top of the nipples, as this can block the path of the steam.
Do not overcrowd the sterilizer basket, as tight packing creates cold spots where steam cannot circulate freely. Once the sterilizer is loaded, close the lid securely and start the cycle. After the machine completes its cycle, leave the lid closed for the duration specified in the manual to maintain sterility, and allow the parts to cool completely before handling them.
Microwave Steam Sterilization
Microwave steam sterilizers, which utilize specialized plastic boxes or bags, provide a rapid sterilization option suitable for busy households. Start by measuring and adding the precise amount of water specified in the sterilizer’s instruction manual. Operating a microwave sterilizer without sufficient water can melt both the container and the silicone nipples inside.
Position the slim neck nipples securely within the tray so they remain upright and do not flip over during handling. If a nipple tips over, it can trap a pocket of air inside its narrow cavity, preventing the hot steam from making contact with the inner surfaces. Ensure that the container is sealed according to the manufacturer’s directions before placing it in the microwave.
Set your microwave to the correct wattage and heating time as outlined in the sterilizer’s manual. Once the heating cycle finishes, do not open the microwave or the sterilizer immediately. The steam inside is extremely hot and can cause severe burns; allow the container to sit undisturbed for several minutes to cool down safely before retrieval.
Sterilization Methods to Avoid or Verify First
While modern convenience offers many ways to clean household items, certain methods are unsuitable for delicate slim neck nipples. Avoid placing these nipples in a standard household dishwasher. The combination of high-pressure water jets, extremely high drying temperatures, and harsh, abrasive dishwashing detergents can rapidly break down the silicone structure, leading to micro-tears and premature wear.
Chemical sterilization using cold-water tablets or liquid solutions should only be used if the nipple packaging explicitly states it is safe for the material. These chemical solutions can leave behind a strong odor or residue that may irritate your baby’s sensitive mouth. Furthermore, prolonged exposure to chemical sterilizing agents can degrade natural rubber or specific silicone blends over time.
Ultraviolet (UV) sterilizers have grown in popularity, but they require careful verification before use with silicone nipples. UV light can break down the chemical bonds in silicone, causing it to yellow, become brittle, or lose its natural elasticity much faster than heat-based methods. Check your specific nipple model’s documentation to confirm if it is certified as UV-safe before exposing it to UV sanitizing cycles.
Drying, Storage, and Knowing When to Replace
The sterilization process is not complete until the parts are dried and stored in a manner that prevents recontamination. In warm, humid climates like the Philippines, moisture left on feeding equipment can quickly encourage the growth of mold and bacteria. After sterilization, place the nipples on a clean, dedicated drying rack positioned in a well-ventilated area away from direct sunlight and household dust.
Never use cloth towels or paper napkins to dry the sterilized nipples, as these materials can transfer lint, dust, and bacteria back onto the clean surfaces. Allow the parts to air-dry completely. Once dry, store the nipples in a clean, airtight container, or reassemble them onto fully dried, sterilized bottles and seal them with their protective caps to keep them hygienic until the next feeding.
Even with meticulous care, feeding nipples have a limited lifespan and must be replaced regularly to ensure baby safety. Inspect the nipples daily for replacement triggers, such as a change in texture where the silicone feels sticky, soft, or swollen. Other warning signs include persistent cloudiness that does not wash away, thinning of the slim neck base, or an altered milk flow rate that causes your baby to sputter or struggle during feeds.
Frequently Asked Questions (FAQ)
Can I sterilize Pigeon slim neck nipples with the bottle cap and ring attached?
No, you should never sterilize the nipples while they are still attached to the bottle cap and screw ring. When these parts remain assembled, tight spaces and overlapping threads trap air pockets that prevent steam or boiling water from reaching all surfaces. Completely separating each component ensures that every crevice is fully exposed to the sterilizing heat, eliminating hidden bacteria.
How often should I sterilize these nipples if my baby is older than six months?
For newborns and infants under six months, daily sterilization is highly recommended due to their fragile immune systems. As your baby grows older and begins exploring their environment, their immune system strengthens, and the frequency of sterilization can often be reduced. For older infants, washing thoroughly with warm, soapy water after every feed, combined with periodic sterilization, is generally sufficient, though you should always consult your pediatrician and consider local water quality.
Why did my silicone nipple turn yellow after boiling?
Silicone is a porous material that can absorb natural fats and pigments present in breast milk and infant formula. Over time, exposure to these fats during feeding, combined with the heat of boiling, can cause the silicone to develop a slight yellowish tint. While minor discoloration is normal, severe yellowing accompanied by cloudiness, a sticky texture, or a loss of elasticity indicates that the material is breaking down and the nipple must be replaced.

Community discussion
Share your experience or ask a question. Comments are reviewed before publication.