
To keep your baby’s feeding equipment safe, you must treat the bottle brush as an extension of the bottle itself. A dirty brush can harbor milk fats, proteins, and moisture, turning it into a breeding ground for bacteria and mold. Properly cleaning and sanitizing your bottle brush involves a disciplined routine of immediate rinsing, thorough daily washing with baby-safe soap, material-appropriate sanitization, and complete air-drying. By understanding the physical limits of your brush’s materials—whether nylon, silicone, or sponge—you can maintain a hygienic tool that protects your infant’s health.
Many parents focus entirely on sterilizing the bottles while overlooking the very tool used to clean them. If a bottle brush is left damp in a dark sink corner, it can transfer harmful microorganisms back onto the bottles during the next wash. Establishing a consistent care routine for your cleaning tools is just as critical as sanitizing your baby’s nipples and pacifiers.
What You Need for Effective Bottle Brush Cleaning
Before you begin cleaning your bottle brush, gather the appropriate tools and cleaning agents based on your specific brush material. Using the wrong cleaning setup can introduce cross-contamination or damage the brush fibers.
Products mentioned in this guide
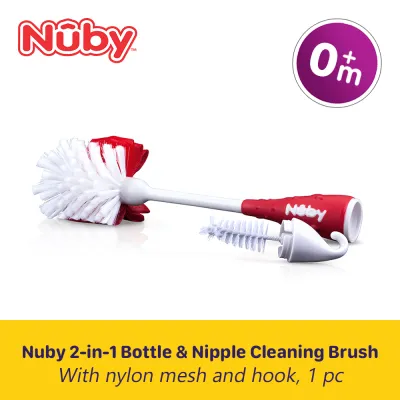
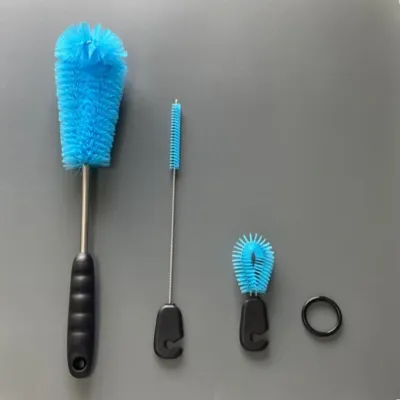
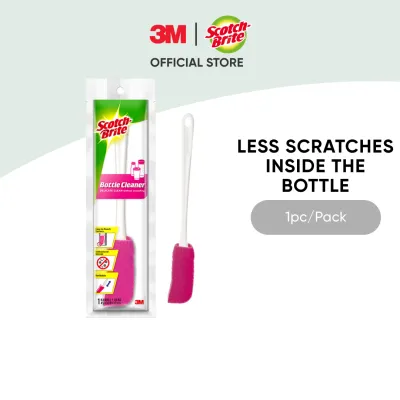


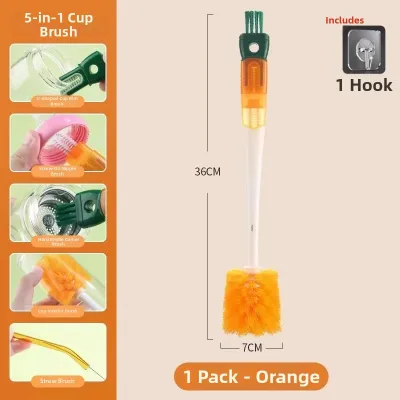
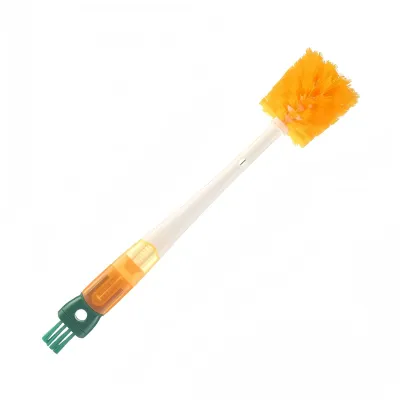
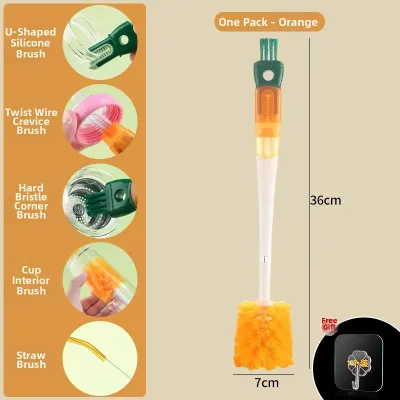
Prices are valid at publication and may change. Please refer to the product page for the latest price.
First, secure a mild, baby-safe dish soap. Standard household dishwashing liquids often contain strong synthetic fragrances, dyes, and harsh surfactants that can leave a stubborn residue on baby gear. A dedicated baby-safe dish soap is formulated to break down breast milk and formula fats without leaving chemical residues.
Next, use a dedicated clean basin or sink area. Never wash baby bottles or cleaning brushes directly in a general-use kitchen sink, which is a common harbor for foodborne pathogens like Salmonella or E. coli from raw food preparation. A separate, clean plastic basin reserved solely for baby items prevents cross-contamination.
You will also need sanitizing equipment compatible with your brush material. Depending on the manufacturer’s instructions, this may include a boiling pot, a steam sterilizer, or a UV sterilizer unit. Because different materials react uniquely to heat and light, verifying compatibility is essential to prevent melting or chemical breakdown.
Finally, prepare a well-ventilated, elevated drying rack. In tropical climates like the Philippines, high humidity can delay drying times significantly. An elevated rack keeps the brush head off wet countertops and allows air to circulate freely around the bristles or sponge.
Step-by-Step Daily Cleaning Routine
Executing an immediate post-use wash is the most effective way to remove milk residue and prevent initial bacterial growth. Milk contains fats and proteins that quickly dry and adhere to surfaces, forming a stubborn biofilm if left untreated.

Start by rinsing the brush immediately under warm running water after you finish washing your baby’s bottles. Do not let the brush sit in the sink or basin with dirty dishwater. A quick, immediate rinse flushes away loose milk residue and soap suds before they can settle deep into the brush head.
Next, apply a small amount of baby-safe dish soap directly to the brush head. Using your clean hands, thoroughly scrub all bristles, sponge heads, or silicone edges. Work the soap into the base of the bristles where milk fats are most likely to become trapped. If your brush has a detail cleaner in the handle for nipples, unscrew or expose it and wash that section with equal care.
After scrubbing, rinse the brush thoroughly under clean, running water. Rotate the brush under the stream to ensure all soap residue and dislodged milk particles are completely flushed out. Squeeze sponge heads gently under the running water to release trapped soap.
Finish the daily routine with a close visual inspection. Hold the brush up to a bright light and check between the bristles or inside the sponge pores for any hidden debris, discoloration, or cloudy film. If you detect any remaining residue, repeat the soaping and scrubbing process immediately.
How to Sanitize Your Bottle Brush Safely
Sanitizing goes beyond daily washing by reducing microbial levels to a safe standard. However, because bottle brushes are made from various plastics, rubbers, and foams, you must apply the correct sanitizing method to avoid melting, warping, or degrading the materials.
Always check the manufacturer’s label or packaging for specific heat tolerance guidelines before applying boiling water or steam. Some brushes are designed to withstand high temperatures, while others will warp or release chemical odors when exposed to extreme heat.
Adjust your sanitizing method based on the specific material of your brush:
- Silicone Brushes: Silicone is generally highly heat-resistant. Many silicone brushes can safely undergo boiling for a few minutes or be placed in a steam sterilizer. However, you must still verify the manufacturer's limits, as the plastic handle may have a lower melting point than the silicone head.
- Nylon Bristle Brushes: Nylon bristles can warp or lose their structural integrity if exposed to boiling water for too long. If the manufacturer permits heat sanitization, keep the exposure brief. Alternatively, some nylon brushes are compatible with cold-water chemical sterilizing tablets.
- Sponge Brushes: Sponge heads are highly sensitive to heat and moisture retention. High-temperature steam or boiling water can break down the adhesives holding the sponge to the handle or degrade the polyurethane foam itself. For sponge brushes, gentle washing with warm soapy water followed by thorough air-drying is often the only recommended care, making frequent replacement necessary.
If you notice any signs of melting, warping, stickiness, or unusual chemical odors during the sanitizing process, stop immediately. Consult the product manual or contact the manufacturer. Never use a brush that shows signs of physical or chemical breakdown, as degraded materials can shed microparticles into your baby’s bottles.
Drying and Storage to Prevent Mold and Bacteria
Establishing a proper storage environment is critical to eliminating moisture, which is the primary driver of mold and bacterial growth. This step is especially vital in humid tropical regions where stagnant water evaporates slowly.
After washing and sanitizing, shake off excess water vigorously. For sponge-headed brushes, squeeze the foam head gently between your clean fingers to expel trapped water. Avoid twisting or wringing the sponge, as this can tear the delicate material away from the plastic core.
Store the brush upright in a heavy-bottomed, ventilated cup or hang it by its handle hook on a dedicated drying rack. This ensures 360-degree airflow around the brush head, allowing it to dry quickly and completely.
Never store a wet bottle brush in closed containers, dark under-sink cupboards, or damp corners of the kitchen sink. Enclosed, dark, and humid spaces create an ideal microclimate for mold spores to colonize the brush fibers, rendering the tool unsafe for subsequent uses.
Signs It Is Time to Replace Your Bottle Brush
Even with meticulous daily cleaning and sanitizing, bottle brushes are temporary tools that wear out over time. Recognizing the physical signals of wear and contamination is essential to maintaining a safe feeding environment.
Inspect your brush regularly for physical damage. Look for frayed, bent, or falling-out nylon bristles, torn or crumbling sponge edges, or a cracked plastic handle. Damaged bristles lose their scrubbing efficiency and can create microscopic scratches on the inner walls of plastic baby bottles. These tiny scratches provide a perfect hiding place for bacteria and milk residue, making the bottles themselves harder to clean.
Watch for signs of contamination that survive the sanitizing process. If your brush develops a persistent sour odor or displays visible dark spots of mold at the base of the bristles or deep within the sponge, it must be discarded immediately. Mold spores are highly resilient and can easily transfer to your baby’s feeding equipment.
As a general rule, follow the manufacturer’s recommended replacement timeline, which typically ranges from one to three months depending on the frequency of use and the brush material. If you observe any physical degradation before that timeline, replace the brush immediately to ensure your baby’s bottles are always cleaned with a hygienic tool.
Frequently Asked Questions (FAQ)
Can I put my bottle brush in the dishwasher?
Whether you can wash your bottle brush in the dishwasher depends entirely on the manufacturer’s specifications. You must check the packaging or the brush handle for a dishwasher-safe symbol before attempting this. If the brush is cleared for dishwasher use, place it securely in the top rack or inside the utensil basket. Ensure it is positioned away from the dishwasher’s heating element, which is typically located at the bottom of the machine. The intense direct heat from the heating element can easily melt plastic handles, warp nylon bristles, or degrade sponge attachments.
Are silicone bottle brushes easier to keep clean than sponge ones?
Silicone bottle brushes generally offer distinct hygienic advantages over traditional sponge brushes due to their physical properties. Silicone is a non-porous material that does not absorb water, milk fats, or liquid soap, allowing it to dry much faster and making it highly resistant to bacterial colonization and mold growth. Sponge brushes, by contrast, are highly porous and retain moisture for extended periods, creating an environment where bacteria can multiply. While sponges are excellent for creating rich soap suds, they require more meticulous washing, gentler sanitizing methods, and much more frequent replacement to remain safe for baby-feeding accessories.

Community discussion
Share your experience or ask a question. Comments are reviewed before publication.