
Packing a bag for baby travel requires a systematic approach that balances preparation with mobility. The key to an organized diaper bag lies in zoning: placing high-frequency items within arm’s reach, grouping related supplies into dedicated pouches, and distributing weight to prevent physical strain during long walks. By treating your diaper bag as a modular travel command center, you can handle diaper changes, feeding times, and sudden weather shifts without rummaging through a chaotic mess.
A well-organized bag reduces travel anxiety and ensures you can respond to your baby’s needs in seconds. Whether you are navigating a crowded shopping center, boarding a flight, or taking a road trip, the way you structure your gear directly impacts your comfort and efficiency. Transitioning from a cluttered, overstuffed tote to a streamlined, balanced backpack is a straightforward process that begins with a clear assessment of your journey.
Assess Your Trip to Determine Packing Needs
Before placing a single item into your bag, evaluate the specific parameters of your outing. A quick trip to a local neighborhood park requires a completely different setup than a full-day excursion to an outdoor market or an overnight family visit. Overpacking is a common pitfall that leads to unnecessary physical fatigue and makes finding essential items much more difficult. Match your supply volume directly to the hours you expect to be away from home, adding only a small safety margin for unexpected delays.
Products mentioned in this guide
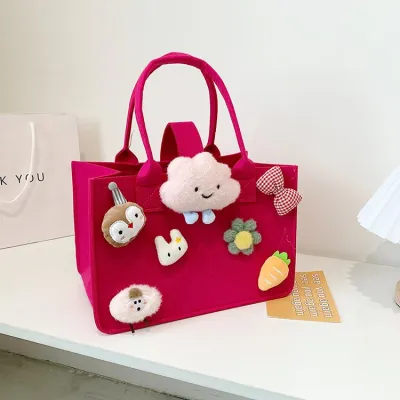
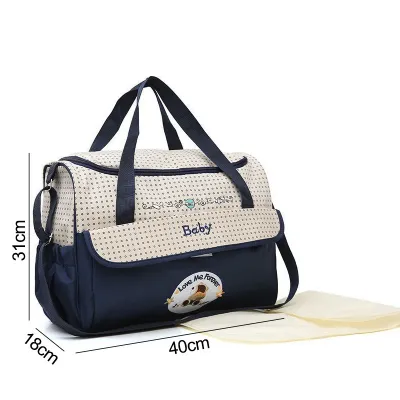
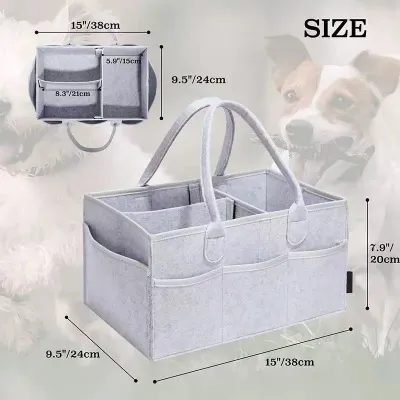
Prices are valid at publication and may change. Please refer to the product page for the latest price.
Your baby’s age, feeding method, and developmental stage dictate the specific inventory you must carry. A newborn baby relies on frequent diaper changes and milk feedings, requiring multiple changes of clothes, extra burp cloths, and specialized feeding gear. An older infant or toddler, on the other hand, needs solid snacks, spill-proof water cups, and small toys to keep them occupied. If you are breastfeeding, your packing list will look very different from a caregiver who uses infant formula or carries prepared baby food purées.
The facilities available at your destination also play a major role in your packing strategy. If you are visiting a modern shopping mall with dedicated nursing rooms, clean changing tables, and hot water access, you can afford to pack lighter. Conversely, if you are heading to an outdoor park, a beach, or an area with limited public facilities, you must carry a more robust, padded portable changing mat, extra sanitizing wipes, and waste disposal bags. In warm, humid tropical climates, you must also account for sweat and heat, which means packing extra breathable clothing and additional hydration options for both yourself and your baby.
Build Your Customizable Baby Travel Checklist
A structured checklist prevents the dual headaches of forgetting a critical item and carrying dead weight. Divide your checklist into four distinct categories: diapering, feeding, health and comfort, and caregiver essentials. This categorization ensures that every item has a clear purpose and a designated place within your travel system.

For diapering essentials, the golden rule is to pack one diaper for every two hours you plan to be out, plus two or three extra diapers as a buffer for emergencies. Along with the diapers, pack a travel-sized pack of baby wipes, a small tube of diaper rash barrier cream, and a clean, foldable changing pad. It is also wise to include a few disposable diaper disposal bags to wrap up soiled diapers when trash bins are not immediately accessible.
Feeding supplies must be organized based on your baby’s current diet. If you use infant formula, carry pre-measured formula powder in a multi-compartment dispenser alongside clean bottles filled with sterilized water. For breastfed babies, pack breast pump accessories, storage bags, or prepared bottles in an insulated compartment with a small ice pack. If your baby has transitioned to solid foods, pack lightweight, leak-proof containers of purées, a soft silicone spoon, a travel bib that can be easily wiped clean, and a few healthy snacks to keep fussiness at bay.
Health and comfort items protect your baby from environmental changes and minor mishaps. Always pack at least one complete change of clothes for your baby, opting for lightweight, breathable cotton fabrics that roll up tightly to save space. It is equally important to pack a spare shirt for yourself, as spit-ups and spills can happen at any moment. Include a small first-aid pouch with baby-safe adhesive bandages, a digital thermometer, and any necessary personal medications. A pacifier with a clip and a small, familiar comfort toy can help soothe your baby during stressful transit moments.
Do not forget to designate a secure section for caregiver necessities. Your diaper bag often replaces your personal purse or wallet during outings, so you need quick access to your phone, keys, wallet, and personal hygiene items. Pack a reusable water bottle and a few high-energy snacks for yourself to maintain your stamina throughout the day. Keeping your personal items separated from the baby’s gear prevents you from having to dig past diapers and bottles to find your keys or transit card.
Organize and Compartmentalize for Quick Access
The secret to maintaining order inside a diaper bag is strict compartmentalization. A bag with a single, open main compartment quickly becomes a black hole where small items sink to the bottom. To prevent this, utilize the built-in pocket structure of your bag and supplement it with external organizing accessories.
Built-in exterior and interior pockets should be reserved exclusively for high-frequency items. The outer pockets of your bag are ideal for items you need to grab in under five seconds, such as hand sanitizer, a pack of tissues, a pacifier, or a travel pack of wet wipes. Many modern travel diaper bags feature dedicated, insulated exterior pockets designed to keep bottles warm or cool; use these to isolate liquids from the dry compartments of your bag.
For the main compartment, use color-coded pouches or small packing cubes to create modular kits. For example, place all diapering supplies—diapers, wipes, and cream—into a blue pouch, and all feeding gear into a yellow pouch. This modular system allows you to pull out only the specific kit you need for a task, keeping the rest of the bag perfectly organized. It also makes it incredibly easy to hand the diapering kit to a partner or helper without handing over the entire heavy bag.
Always carry a waterproof wet bag or a few reusable zip-top bags to isolate messy, soiled, or wet items. If your baby has a diaper blowout or gets their clothes wet, place the soiled garments directly into the wet bag to protect the clean supplies in your main compartment. This simple step prevents cross-contamination and keeps odors contained until you return home.
Safety must be a priority when organizing your bag’s interior. Keep potentially hazardous items, such as diaper creams, hand sanitizers, medications, and small toys with loose parts, in secure, zippered compartments that are completely out of your baby’s reach. Ensure these items are stored upright to prevent accidental leaks that could ruin your clean clothing and feeding supplies.
Pack Step-by-Step for Balance and Efficiency
How you physically load your diaper bag determines how heavy it feels on your shoulders and how stable it remains when placed on a flat surface. Proper weight distribution protects your back from strain and prevents the bag from tipping over when you open it. Follow a bottom-to-top packing order based on weight and frequency of use.
Start by placing the heaviest and least-used items at the very bottom of the bag, positioned as close to the back panel as possible. This includes items like extra formula tins, heavy water bottles, spare shoes, or a thick blanket. Keeping the heaviest items close to your spine aligns the bag’s center of gravity with your body, making the load feel significantly lighter and reducing shoulder fatigue.
Next, place medium-weight items and your organized modular pouches in the central compartment. Pack these items snugly against one another to prevent them from shifting or sliding around while you walk. If there are empty spaces, fill them with soft items like spare clothing rolls or burp cloths to create a solid, supportive structure inside the bag.
Position your immediate-need items at the very top of the main compartment or in the easiest-to-reach external pockets. Your portable changing pad, a single diaper, and a travel pack of wipes should always sit right at the top of the bag. When you need to perform a quick diaper change in a cramped public restroom, you should be able to unzip the bag and pull these three items out instantly without disturbing the rest of your packing.
Before lifting the bag or putting it on your back, secure all loose straps and zip every compartment completely. Loose straps can easily catch on door handles, stroller wheels, or public transit barriers, posing a safety hazard. Lift the bag by the top handle to check its overall balance; if it leans heavily to one side, adjust the internal items to distribute the weight more evenly.
Adapt Your Packing for Different Travel Scenarios
Your packing strategy should adapt to your specific mode of transportation to ensure maximum convenience and safety. Different travel environments present unique challenges that require minor adjustments to your bag choice and organization.
For air travel, focus on speed and compliance with airport security guidelines. Keep all liquids, gels, and aerosols in travel-sized containers that comply with local aviation authority limits, and place them in a clear, easily removable pouch at the top of your bag. Choose a diaper bag with a trolley sleeve that slides securely over the handle of your rolling suitcase, allowing you to navigate busy airport terminals hands-free. Opt for a compact, easily foldable changing pad that can be wiped down quickly after use on cramped airplane changing tables.
When traveling by car, you have the luxury of space, which allows you to split your supplies. Keep your primary diaper bag in the trunk or cargo area to avoid cluttering the passenger cabin. Inside the cabin, keep a small, lightweight “jump kit” containing just one diaper, a travel pack of wipes, and a changing pad within arm’s reach of the caregiver’s seat. Use a separate, dedicated insulated cooler bag to store temperature-sensitive breastmilk, formula, or fresh baby food, ensuring they remain cool and safe throughout the drive.
For public transit or walking trips, prioritize a lightweight, hands-free bag style, such as an ergonomic diaper backpack. Walking long distances or navigating stairs in transit stations requires your hands to be completely free to hold handrails, push a stroller, or carry your baby safely. Minimize the overall bulk of your bag by packing only the absolute essentials, and avoid hanging heavy bags directly onto stroller handlebars, as this can cause the stroller to tip backward and injure your child.
Frequently Asked Questions (FAQ)
How many diapers should I pack for a full-day trip?
For a full-day trip lasting approximately eight to ten hours, a reliable rule of thumb is to pack one diaper for every two hours of travel, plus an additional two to three diapers as a safety buffer. For example, for a ten-hour outing, you should pack five diapers for regular intervals and add three extra diapers, bringing the total to eight. If you are traveling with a newborn, you may need to increase this estimate, as younger infants require more frequent changes than older babies. Always monitor your baby’s typical daily usage patterns before setting out to ensure you have an adequate supply.
What is the best way to pack formula or breastmilk for travel?
To safely transport formula or breastmilk, utilize insulated bottle pockets lined with reusable ice packs to maintain a cool temperature. If you are using infant formula, it is highly recommended to carry sterilized water in your bottles and keep the dry formula powder in a separate, pre-measured dispenser, mixing them only when it is time to feed. For breastmilk, ensure it is stored in sealed, leak-proof bottles or storage bags placed directly against the ice packs. Always consult the guidelines provided by your formula manufacturer or local health authorities regarding safe storage times and temperature limits for prepared milk to prevent spoilage, especially when traveling in warm climates.

Community discussion
Share your experience or ask a question. Comments are reviewed before publication.