
Keeping a diaper bag organized while on the go requires a strategic approach to hygiene, especially when managing soiled items alongside clean baby essentials. The key to maintaining a sanitary environment inside your bag is a reliable separation system. By utilizing reusable wet bags and disposable diaper trash bags, you can isolate wetness, contain unpleasant odors, and prevent cross-contamination. This guide explains how to establish a practical, zone-based packing system that keeps your clean supplies pristine and your dirty items safely contained.
In warm, humid climates like the Philippines, managing soiled items quickly is crucial. High humidity accelerates odor development and mold growth on damp fabrics. Using a structured separation system is not just about neatness; it is a vital step in maintaining hygiene and protecting your baby’s health during daily outings.
Understanding the Roles of Wet Bags and Diaper Trash Bags
To build an efficient system, you must first understand the distinct functions of reusable wet bags and disposable diaper trash bags. While both are designed to contain messes, they serve different purposes and feature distinct material properties.
Products mentioned in this guide
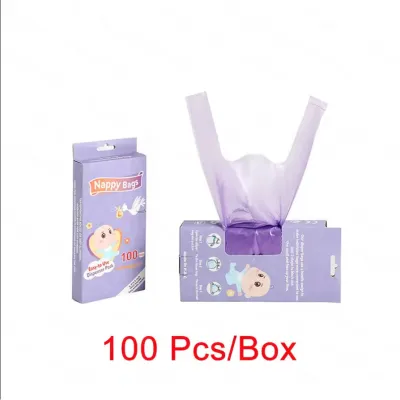
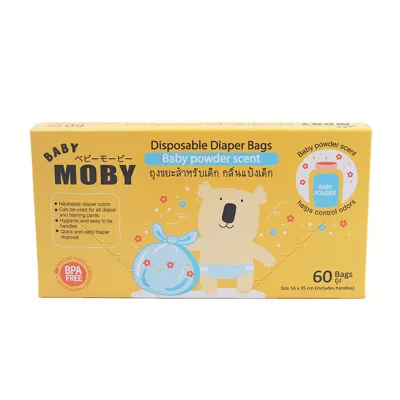
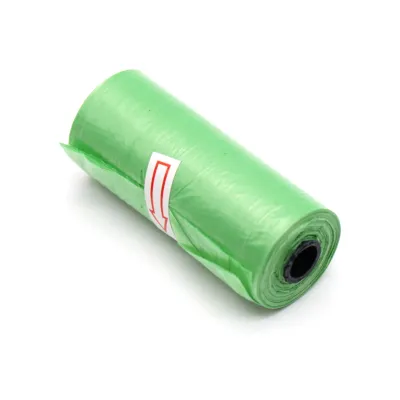
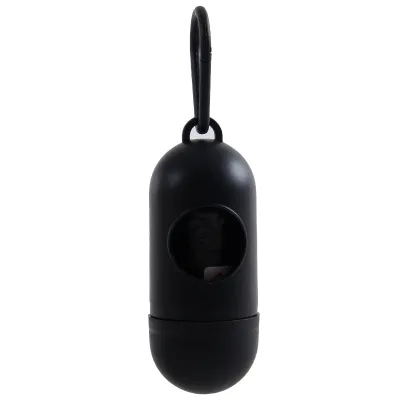
Prices are valid at publication and may change. Please refer to the product page for the latest price.
Reusable wet bags are typically constructed from woven fabrics like polyester or nylon, bonded with a waterproof inner lining made of polyurethane laminate (PUL) or thermoplastic polyurethane (TPU). This design allows the bag to hold damp items—such as wet clothes, used cloth diapers, damp washcloths, or soiled bibs—without letting moisture seep through to the rest of your diaper bag. Because they are washable and breathable, they are ideal for managing moisture-rich, non-solid messes.
In contrast, disposable diaper trash bags are thin, single-use plastic bags designed specifically to contain solid waste and heavily soiled disposable diapers. These bags are engineered to be highly tear-resistant and are often treated with scent-blocking properties or odor-neutralizing agents. They provide a quick, sanitary way to wrap up a dirty diaper, trapping odors and bacteria inside a sealed plastic barrier until you can find a proper waste bin.
Using these bags interchangeably can lead to hygiene issues. Placing a heavily soiled, stool-covered diaper directly into a reusable wet bag creates a difficult cleaning chore and risks staining the fabric or degrading the waterproof lining over time. Conversely, using disposable plastic bags for lightly damp clothes is inefficient, generates unnecessary plastic waste, and can trap heat, leading to rapid bacterial growth in warm climates.
Essential Supplies for a Separated Diaper Bag System
Selecting the right sizes and styles of bags ensures your organization system remains functional during long outings. For wet bags, a medium-sized bag (approximately 30 by 40 centimeters) is generally the most versatile option for daily trips, as it can easily hold a full change of clothes and a couple of damp bibs. If you are using cloth diapers, you may want to carry a slightly larger wet bag or a dual-pocket wet bag, which features separate zippered compartments for clean and dirty items.

When shopping for diaper trash bags, look for rolls that come in compact dispensers. These dispensers can be clipped directly to the exterior of your diaper bag or stroller for immediate access. Opt for bags that feature tie-handles or drawstrings, which make sealing the bag much easier when you are managing a squirming baby. Opacity is another important feature; choosing dark-colored or opaque bags ensures that the contents remain discreetly hidden from view.
To complement these bags, consider adding a few simple organization tools to your kit. Lightweight carabiners are incredibly useful for clipping wet bags to the outside of your stroller or diaper bag, saving valuable internal space. Color-coded packing cubes or small mesh pouches can also help you categorize your clean supplies, making it easy to locate items without rummaging through the main compartment of your bag.
Always verify the manufacturer warnings on diaper disposal products before use. Plastic diaper trash bags pose a suffocation hazard, so they must always be stored out of reach of infants and young children, and used only under close caregiver supervision.
Step-by-Step Guide to Packing and Separating Items
Implementing a structured packing routine minimizes the risk of clean items coming into contact with bacteria or moisture. By dividing your diaper bag into distinct zones, you can maintain a clean environment even during chaotic diaper changes.
The foundation of this system is the three-zone method: the Clean Zone, the Dry Dirty Zone, and the Wet Dirty Zone. Each zone has a designated space within your diaper bag, ensuring that soiled items never share a compartment with clean clothes, diapers, or feeding supplies.
Setting Up the Clean Supply Zone
The Clean Zone should occupy the most accessible and protected areas of your diaper bag, such as the main interior compartment or dedicated front pockets. This zone houses your clean diapers, fresh clothes, wipes, and feeding essentials. To keep these items sanitary, pack them inside clean packing cubes or zip-top pouches before placing them in the bag. This extra layer of protection keeps them safe from accidental spills or dust.
Your portable changing pad requires special care. Because the bottom of the pad touches public changing tables, it must never be stored directly against clean diapers or clothes. Fold the changing pad so that the side touching the baby faces inward, and slide it into a dedicated exterior slip pocket or a separate sleeve. This keeps any external germs isolated from the rest of your clean gear.
Before leaving the house, always run through a quick restocking checklist. Ensure you have enough clean diapers for your outing—a good rule of thumb is one diaper for every two hours you plan to be away, plus two extra for emergencies. Verify that your wipes dispenser is full, and pack at least one complete change of clothes, including socks, to handle unexpected spills or spit-ups.
Managing Solid Waste with Diaper Trash Bags
When it is time to change a dirty diaper, having your diaper trash bags easily accessible is crucial. Start by preparing your changing station and pulling out a single trash bag from your dispenser before you begin the diaper change. This prevents you from having to search through your bag with soiled hands.
Once the diaper is changed, roll the dirty diaper tightly from front to back, wrapping the adhesive tabs around the roll to secure it into a compact bundle. Place the rolled diaper inside the diaper trash bag. Gently squeeze out any excess air to minimize the bag’s volume, then tie the handles or drawstrings into a tight, secure knot. This knot is your primary defense against escaping odors.
If a trash can is nearby, dispose of the sealed bag immediately. If you are in a location without public waste bins, place the sealed trash bag into a designated “dirty” pocket on the exterior of your diaper bag, or clip it to the outside of your stroller using a carabiner. Always finish the process by applying hand sanitizer to your hands and ensuring the sealed bag is stored away from any clean baby items.
Containing Damp Items and Cloth Diapers with Wet Bags
Damp items like sweat-soaked onesies, wet bibs, or used cloth diapers require a different containment strategy. In tropical climates where humidity is high, leaving damp cotton items loose in a diaper bag can quickly ruin clean supplies and create an unpleasant, musty environment.
To store these items, gently wring out any excess liquid if they are heavily saturated, then fold them and place them flat inside your reusable wet bag. Zip the bag completely, ensuring the zipper is fully closed to trap moisture. If you are using a dual-pocket wet bag, you can store clean spare clothes in the dry pocket and transfer them to the wet pocket once they become soiled.
To maximize space inside your diaper bag and keep odors isolated, use a carabiner to clip the wet bag to the stroller handlebar or the exterior loops of your diaper bag. This keeps the damp items completely outside the main compartment, allowing the wet bag to hang freely. Remember that damp fabrics should not remain sealed in a wet bag for extended periods; aim to empty and wash the contents within 12 to 24 hours to prevent mold, mildew, and stubborn stains from developing.
Daily Maintenance and Odor Control for Your Bags
Maintaining your organization system requires a consistent daily routine. The moment you return home from an outing, make it a habit to empty your diaper bag completely. Remove any sealed diaper trash bags and dispose of them in your household waste bin, and transfer the contents of your wet bags directly to the laundry area.
To clean your reusable wet bags, turn them inside out to expose the waterproof lining to the wash cycle. Machine wash them on a gentle cycle using a mild, baby-safe detergent. Avoid using bleach, fabric softeners, or harsh stain removers, as these chemicals can degrade the PUL or TPU lining and compromise the bag’s waterproof capabilities. Line dry the wet bags in a well-ventilated area away from direct, intense sunlight, which can cause the waterproof membrane to crack or peel over time.
If your wet bags begin to develop a lingering odor, you can neutralize it by adding a half-cup of white vinegar to the rinse cycle or soaking the bag in a mixture of warm water and baking soda before washing. Regularly inspect the inner lining of your wet bags for signs of wear, such as peeling, cracking, or thinning of the laminate. If you notice moisture seeping through the seams or fabric during use, it is time to replace the wet bag to ensure your diaper bag remains dry and sanitary.
Investing a small amount—typically around ₱150 to ₱500—in a few high-quality wet bags and a reliable roll of diaper trash bags will save you from ruined clothes and stressful cleanups, keeping your baby gear fresh and ready for any adventure.
Frequently Asked Questions (FAQ)
Can I use regular plastic grocery bags instead of specific diaper trash bags?
While regular plastic grocery bags can serve as a temporary backup in an emergency, they are generally less effective than purpose-built diaper trash bags. Grocery bags are often made of thin, low-density plastic that is prone to punctures, tears, and leaks, especially when stretched by bulky diapers. They also lack the specialized odor-neutralizing properties and tight-sealing mechanisms of dedicated diaper bags. Additionally, grocery bags are often semi-transparent, failing to provide the privacy and discretion that opaque diaper trash bags offer during disposal.
How many wet bags should I pack for a full day out?
For a full day away from home, packing two medium-sized wet bags is highly recommended. This allows you to dedicate one bag exclusively to damp clothes, bibs, and washcloths, while reserving the second bag for heavily soiled items or used cloth diapers. Separating these items prevents clean but damp clothing from coming into contact with more significant messes. If you are using cloth diapers exclusively, you may need to pack an additional large wet bag to accommodate the extra volume of multiple diaper changes.
What should I do if a wet bag starts holding a persistent odor?
If a reusable wet bag retains a musty or sour smell even after a standard wash, it requires a deep cleaning treatment. Soak the bag inside out in a basin of warm water mixed with a quarter-cup of baking soda for about thirty minutes, then wash it with a mild detergent and a splash of white vinegar in the fabric softener compartment. Ensure the bag dries completely in a well-ventilated space. If the odor persists after deep cleaning, or if you observe any peeling or cracking in the waterproof lining, the laminate has likely degraded, and the bag should be replaced to maintain proper hygiene.

Community discussion
Share your experience or ask a question. Comments are reviewed before publication.