
Fumbling through a cluttered diaper bag while holding a crying baby is one of the most stressful moments a parent can face during an outing. When your little one needs an immediate diaper change or a bottle, every second spent digging past loose toys, crumpled receipts, and stray wipes feels like an eternity. Establishing a logical, repeatable organization system transforms your diaper bag from a chaotic black hole into a highly efficient mobile nursery. By structuring your bag around accessibility, frequency of use, and the unique demands of your environment, you can confidently handle any mid-outing emergency with one hand free.
Assess Your Diaper Bag's Layout and Compartments
Before packing a single item, take a close look at the anatomy of your diaper bag. Different designs serve different parenting styles and stages of development. Backpack-style diaper bags distribute weight evenly across your shoulders, which is ideal when navigating crowded malls or outdoor parks, while tote or messenger styles offer wide-open access when hung from a stroller handlebar. Examine the bag’s built-in features, such as external zippered pockets, deep main compartments, and dedicated insulated sleeves. Some bags feature structured, rigid walls that stand upright on their own, while others are soft and flexible, allowing you to cram in extra items at the expense of internal structure.
The material of your bag also plays a significant role in how well it performs in different environments. In tropical climates with high humidity, lightweight and water-resistant materials like nylon or polyester are highly practical because they resist mold growth and are easy to wipe clean. Vegan leather and heavy canvas bags offer durability but may require more careful maintenance to prevent mildew in damp conditions. Understanding these physical boundaries helps you decide whether you need to supplement the bag with external organizers or if the built-in compartments are sufficient.
Products mentioned in this guide
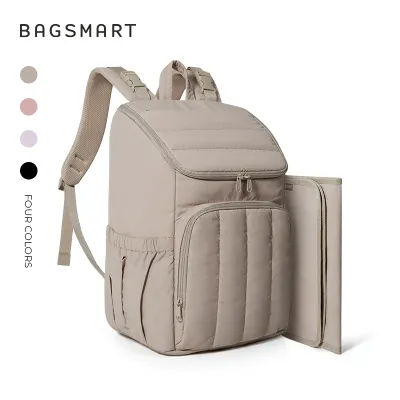
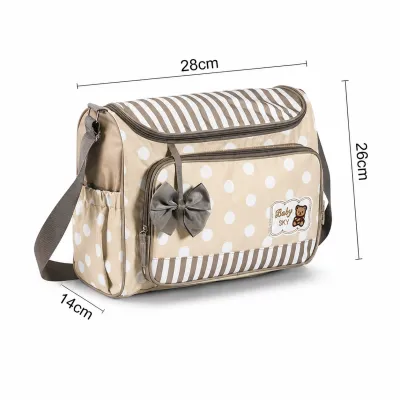
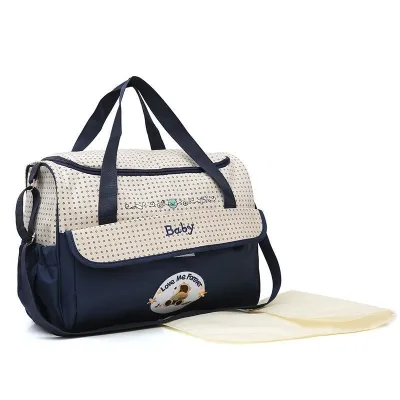
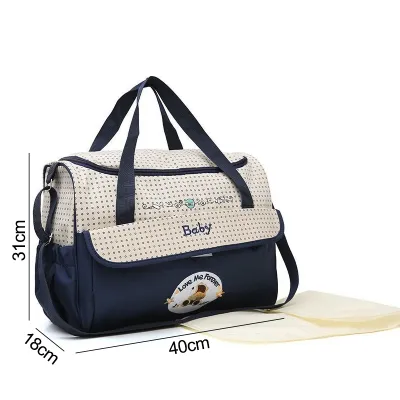
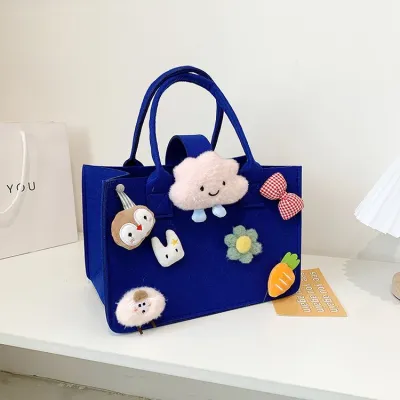
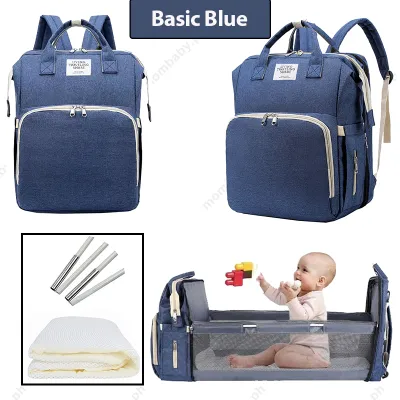
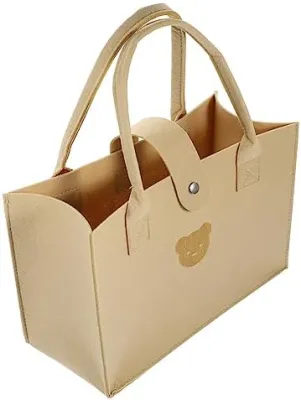
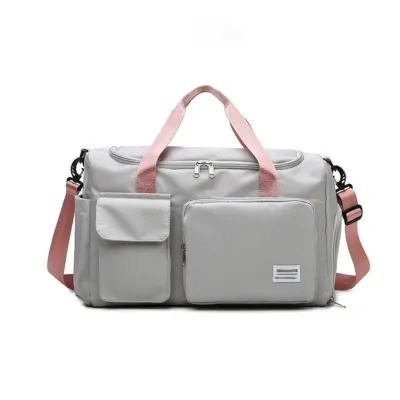
Prices are valid at publication and may change. Please refer to the product page for the latest price.
Additionally, align your bag’s layout with your baby’s current developmental stage. A newborn diaper bag requires quick-access zones for frequent diaper changes and burp cloths, whereas a toddler bag needs dedicated spaces for water bottles, finger foods, and small toys. Regularly reassessing how you use these compartments ensures your setup remains practical as your daily routines evolve. Never assume a bag is suitable for your specific needs based on its name alone; always verify its dimensions, pocket configurations, and weight limits against your daily gear requirements.
Group Essentials by Urgency and Frequency
An organized diaper bag relies on a clear hierarchy of needs. Grouping your items by how quickly and how often you need them prevents the panic of searching for a pacifier or wet wipe during a sudden meltdown. High-frequency items are those you reach for multiple times throughout a single trip, such as hand sanitizer, pacifiers, burp cloths, and baby wipes. These must reside in the most accessible pockets of your bag, ideally reachable without unzipping the main compartment.

Low-frequency items, such as a change of clothes, extra diapers, and a portable changing pad, are essential but only used during specific moments. These can be packed deeper within the main compartment. Your baby’s daily routine and the expected duration of your outing will dictate the exact quantities and types of items you carry. A quick one-hour trip to a local cafe requires a much lighter load than a full-day family gathering.
The nature of your destination also influences your packing list. For instance, visiting an air-conditioned indoor play area requires packing extra layers to keep your baby warm, while an outdoor trip to a park in hot weather demands extra hydration, sunscreen, and insect repellent. As your child transitions from infancy to toddlerhood, your high-frequency items will shift from nursing covers and spit-up cloths to snacks and interactive toys. Adjusting your groups periodically keeps your bag light and functional.
Step-by-Step Packing System for Fast Retrieval
To achieve true efficiency, you must assign a permanent “home” to every item in your diaper bag. This zoning strategy relies on matching the physical zones of your bag to the urgency of the items inside. By dividing your bag into distinct functional areas, you train your muscle memory to reach for the correct pocket instantly, even in low-light environments or stressful situations.
When establishing these zones, safety must remain your top priority. Ensure that small items, such as loose pacifier clips, small toy parts, or travel-sized medication bottles, are securely zipped away in childproof compartments. Never leave loose choking hazards in open pockets where a curious toddler could reach them while you are distracted. Always verify that any teething toys or pacifiers are stored in clean, hygienic environments away from dirty shoes or soiled clothing. Inspect toys regularly for wear and tear, and discard any items with loose parts that could pose a hazard.
Zone 1: Immediate Access (Diapers and Wipes)
The diaper-changing zone is the absolute core of your bag and must be optimized for speed. When a blowout occurs, you do not have the luxury of searching through layers of clothing to find a fresh diaper. Dedicate your bag’s most accessible external pocket or the very top layer of the main compartment to your immediate changing supplies. Keep a travel pack of wipes and two to three diapers in this prime location, separate from your bulk backup supply.
This setup allows for seamless, one-handed access while you keep your other hand securely on your baby. Wipes are not just for diaper changes; they are also your primary tool for cleaning sticky hands, wiping down public high chairs, and cleaning up unexpected spills. Placing them in an exterior side pocket with a magnetic flap or a quick-pull dispenser ensures you can grab a wipe instantly without opening the entire bag. As your baby grows, regularly verify that the diaper sizes in your bag match their current weight range to prevent uncomfortable fits or leaks during outings.
Zone 2: Feeding and Comfort (Bottles, Snacks, Pacifiers)
Feeding items require strict hygiene and temperature control to keep your baby safe and satisfied. Utilize the insulated pockets built into your diaper bag to store prepared formula, breast milk, or warm water. Always consult the manufacturer guidelines for your specific bottles and insulated bags to understand how long they can safely maintain temperatures, especially in warm, tropical climates where heat can accelerate bacterial growth. If you are using expressed breast milk or prepared formula, monitor storage times closely and discard any leftovers that have been sitting out past the recommended safety window.
Pacifiers, teethers, and bottle nipples must be kept in dedicated, sterile pouches to protect them from dust, lint, and loose crumbs. If your baby uses a pacifier, store a backup in a small, clip-on pod attached to the exterior of the bag for instant soothing. For older babies, pack snacks in airtight, rigid containers. Loose snack bags are prone to crushing, which creates a messy layer of crumbs at the bottom of your bag and can attract ants or other pests during outdoor outings in humid environments. Always check the expiration dates on packaged baby food and snacks before heading out.
Zone 3: Emergency and Changing Supplies (Creams, Pad, Spare Clothes)
The deepest part of your diaper bag should be reserved for emergency backups and items used only during a full diaper change. Place your portable changing pad in its dedicated sleeve or flat against the back panel of the bag to provide structural support. Directly next to it, store a complete change of clothes for your baby, along with a spare shirt for yourself in case of major spit-ups or spills.
To maximize space and keep outfits organized, roll the clothing tightly instead of folding it; this prevents wrinkles and allows you to see every piece of clothing at a glance. Diaper creams, lotions, and hand sanitizers should be sealed inside a small, leak-proof plastic or silicone bag. High temperatures and pressure changes can cause tubes of cream to burst, and keeping them double-bagged protects your spare clothing and the interior lining of your diaper bag from greasy, hard-to-clean stains. When purchasing diaper creams, verify the ingredients list for potential allergens or chemical additives that may irritate sensitive skin. If your baby develops sudden skin irritation or an unexplained rash from diaper creams or wipes, stop using the product immediately and consult a pediatrician or qualified healthcare professional.
Use Organizers and Pouches to Prevent Clutter
The secret to maintaining a clean diaper bag over time is modular packing. Instead of letting loose items float freely in a large main compartment, group them into smaller, dedicated pouches. Clear plastic or mesh pouches are highly recommended because they allow you to identify the contents instantly without having to open each one. You can assign a specific color or style of pouch to different categories, such as a blue pouch for medical supplies, a yellow pouch for toys, and a green pouch for feeding accessories.
A high-quality wet bag is an indispensable tool for any parent on the go. These waterproof bags are designed to seal in moisture and odors, making them perfect for storing soiled cloth diapers, wet clothes after a splash pad visit, or sweat-drenched outfits in humid weather. When selecting pouches, be mindful of your bag’s overall dimensions. Avoid buying oversized organizers that force you to cram items in, as this can strain the zippers and make the bag uncomfortably heavy to carry. Spending a few hundred ₱ on a set of lightweight, reusable pouches can save you hours of frustration during your weekly outings.
Maintain Your System Before and After Outings
An organization system is only as good as its maintenance routine. It is easy to let trash, empty wrappers, and half-used packs of wipes accumulate over a busy weekend. To prevent your diaper bag from becoming cluttered and heavy, establish a quick restocking habit immediately upon returning home from an outing. Empty out any dirty diapers, place soiled clothes directly into the laundry, and wash used bottles or food containers to prevent mold and unpleasant odors from developing in the tropical heat.
Take two minutes to check your diaper count and restock what you used, ensuring you are always prepared for an unexpected departure. Wipe down the interior lining of the bag with a damp cloth or a baby-safe sanitizing wipe to remove crumbs, dust, and dried spills. Regularly inspect the seams, zippers, and strap attachments to ensure the bag remains in safe, working condition. If you notice any frayed stitching or failing zippers on your diaper bag or stroller straps, address them immediately to prevent accidents while carrying your baby. By keeping your diaper bag clean and fully stocked at all times, you eliminate the pre-departure rush and can head out the door with peace of mind.
Frequently Asked Questions (FAQ)
How many diapers should I pack for a short outing?
For a typical outing of two to three hours, a reliable rule of thumb is to pack one diaper for every hour you plan to be away, plus two extra diapers for unexpected delays or blowouts. Younger infants require more frequent changes than older toddlers, so adjust this estimate based on your baby’s age, diet, and typical routine. If your baby has a sensitive stomach or is currently teething, carrying a few extra diapers is always a wise precaution.
Should I keep a separate diaper bag for the car?
Keeping a small, secondary emergency kit in your vehicle is an excellent way to lighten your primary diaper bag. This car stash can include a backup pack of wipes, a few diapers, a spare change of clothes, and a lightweight blanket. By keeping these bulky backup items in the car, you can carry a smaller, lighter diaper bag into stores and restaurants while knowing you have a full emergency setup nearby if needed. Always ensure that any items left in the car, such as diaper creams or sanitizers, are stored out of direct sunlight and within safe temperature limits specified by the manufacturer.

Community discussion
Share your experience or ask a question. Comments are reviewed before publication.