
Getting out of the house with a baby can feel like preparing for a major expedition, especially when you are trying to balance a stroller, a car seat, and a crying infant. The secret to stress-free outings lies in how you pack your gear, ensuring that you can grab a fresh wipe or a clean pacifier in a single, blind reach. By structuring your bag into logical zones and using a dedicated diaper storage organizer, you can transform a chaotic, bottomless pit into a highly efficient mobile nursery. This systematic approach saves precious seconds during a sudden diaper blowout or a public feeding emergency, letting you focus on enjoying your time outside with your little one.
Assess Your Diaper Bag and Gather Essentials
Before buying any new accessories, take a close look at the diaper bag you already own. Empty it completely and examine its structural layout, paying attention to the number of built-in pockets, the overall dimensions, and how wide the main compartment opens. A bag with a wide doctor-bag style opening or a full-zip clamshell design offers excellent visibility, whereas a deep drawstring backpack might require more internal structure to keep items from migrating to the bottom. Understanding these natural storage zones helps you decide where to place your most critical items and where you will need extra organizational support.
Next, gather your baseline essentials on a clean table to visualize what actually needs to go into the bag. Your packing list should directly reflect your baby’s current developmental stage, feeding method, and the typical duration of your outings. For newborns, you will need more diapers, change clothes, and burp cloths, while older infants require snacks, small toys, and teething accessories. In tropical climates like the Philippines, high humidity and heat mean you must also account for extra sweat-wicking clothes and baby-safe sun protection.
Products mentioned in this guide
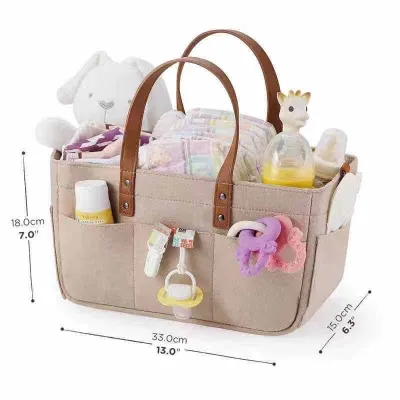
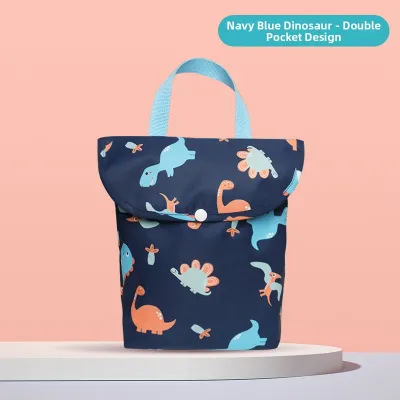
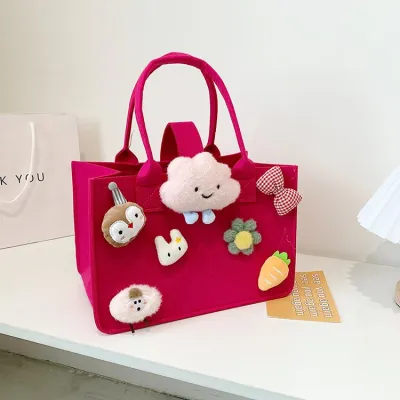
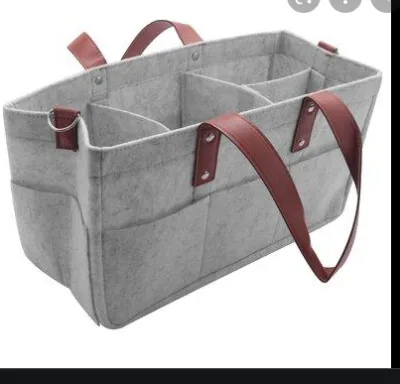
Prices are valid at publication and may change. Please refer to the product page for the latest price.
The key to a comfortable carry is distinguishing between absolute daily necessities and optional items that only add unnecessary weight. It is easy to fall into the trap of packing for every far-fetched scenario, but a heavy bag will quickly strain your shoulders and make stroller travel cumbersome. Keep your “nice-to-haves”—such as bulky toys, multiple heavy books, or excessive spare blankets—in your car trunk or at home, reserving your diaper bag for the true essentials that keep your baby clean, fed, and comfortable.
Choose the Right Diaper Storage Organizer
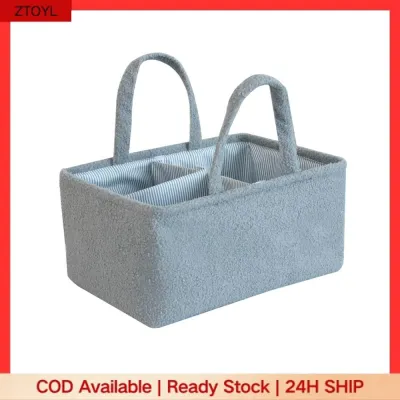
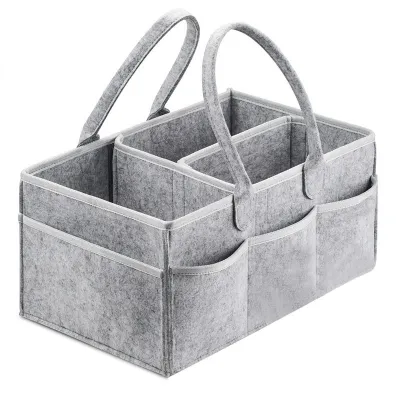
A high-quality diaper storage organizer acts as the structural backbone of your bag, preventing small items from slipping into dark corners. When comparing organizer types, consider how different materials perform under daily wear and tear. Felt inserts are highly popular because they offer structured, upright walls and multiple flexible compartments, though they can be difficult to spot-clean if a bottle leaks. Clear plastic pouches or mesh organizers provide unmatched visibility, allowing you to see exactly what is inside without unzipping them, while lightweight nylon modular cubes are excellent for separating items by category.

Before making a purchase, measure the internal dimensions of your diaper bag’s main compartment and compare them to the organizer’s specifications. The insert should slide in smoothly with a little bit of breathing room on the sides; if it is too tight, it will bulge outward, making it difficult to zip the bag shut or utilize the bag’s built-in side pockets. A well-fitted organizer should sit flat at the bottom of the bag, keeping the overall shape stable even when the bag is placed on an uneven surface like a park bench or a vehicle seat.
Look for practical features that enhance your daily convenience without adding bulk to your shoulders. Insulated bottle holders are incredibly valuable for maintaining the temperature of milk or water during warm afternoons, while secure zippered closures keep small items like pacifiers and nail clippers from spilling out. Choose lightweight, water-resistant fabrics that can be easily wiped down with a damp cloth, as spills and crumbs are inevitable when traveling with young children. Whether you spend ₱500 or ₱2,000 on an insert from an online marketplace, always verify the manufacturer’s guidelines regarding weight limits, material safety certifications, and washing instructions before use.
Step-by-Step Guide to Packing Your Diaper Bag
Organizing your diaper bag is not just about fitting everything inside; it is about placing each item where it makes the most sense logically. By dividing your bag into distinct zones based on how frequently you need each item, you can establish a predictable layout that becomes second nature over time. Additionally, placing heavier items near the bottom and center of the bag keeps the weight balanced, preventing the bag from tipping over when you set it down or causing discomfort during long walks.
Zone 1: Quick-Access Essentials
This zone is reserved for items you need to grab in a split second, often with only one free hand while holding a squirming baby. Your diapers, travel wipes, and a portable changing pad should always occupy the top layer of your diaper storage organizer or the most accessible outer pockets of your bag. When a diaper change is urgent, you do not want to be digging past spare clothes or toys to find your cleaning supplies.
Keep supporting diapering items—such as diaper rash cream, hand sanitizer, and disposable diaper bags—grouped together in small, easily reachable zippered compartments. If your baby has sensitive skin, ensure these topical creams are stored securely so they do not accidentally puncture and contaminate other items. If your baby develops persistent skin irritation or an unusual rash, stop using any new topical products immediately and consult a qualified pediatrician. Having these essentials positioned right at the opening of your bag ensures you can execute a quick change on a public restroom table or in the back of a car with minimal hassle.
Zone 2: Feeding and Hydration
Feeding supplies require careful placement to keep them clean, upright, and at the right temperature. Use the insulated pockets of your diaper bag or dedicated thermal sleeves within your organizer to store bottles of breastmilk, formula, or cool water. This insulation is particularly crucial in warm, tropical environments where milk can spoil quickly if exposed to ambient heat. Always double-check that bottle caps and food containers are tightly sealed before placing them upright in their designated slots.
Store your feeding accessories, such as bibs, burp cloths, and baby spoons, in a separate middle compartment of your organizer so they remain hygienic and free from dust. If your baby has transitioned to solid foods, pack lightweight, leak-proof snack containers in an easy-to-reach spot to quickly soothe a hungry toddler. Keeping these items separated from diapering supplies prevents cross-contamination and ensures that mealtime on the go remains clean and organized.
Zone 3: Emergency and Comfort Items
The deepest parts of your diaper bag should be reserved for items that you hope you will not need often, but must have on hand just in case. Place spare outfits, extra socks, and a waterproof wet bag at the very bottom of the main compartment. If your baby experiences a major blowout or gets soaked in sweat during a humid afternoon, you can easily retrieve the clean clothes and seal the soiled garments inside the waterproof wet bag to contain odors and moisture.
Small comfort items like pacifiers, teething toys, and a basic baby first-aid kit should be kept in secure, dedicated pouches within this deeper zone. Storing pacifiers in a clean, sealed case prevents them from gathering lint or dirt from the bottom of the bag. By keeping these emergency and comfort items tucked away in their own designated spaces, you prevent them from cluttering the top sections of your bag, keeping your daily-use items clear and accessible.
Maintain and Adjust Your Organization System
Even the most meticulously organized diaper bag will eventually descend into chaos without regular maintenance. Establish a quick “reset” routine at the end of every day or immediately after returning from an outing. Take five minutes to discard empty snack wrappers, used receipts, and dirty wipes, and restock any diapers or wipes that you used while you were out. This simple habit ensures that your bag is always packed and ready to go for your next spontaneous trip, saving you from frantic, last-minute packing sessions.
As your baby grows and transitions through different developmental stages, your diaper bag’s contents must evolve as well. A newborn’s bag dominated by burp cloths and multiple changes of clothes will gradually give way to a toddler’s bag filled with solid snacks, water cups, and potty-training supplies. Periodically reassess your diaper storage organizer’s layout, adjusting the removable dividers or swapping out specific pouches to accommodate these changing needs.
Finally, prioritize hygiene by regularly cleaning both your diaper bag and its internal organizer. Check expiration dates on diaper creams, baby sunscreens, and packaged snacks every few weeks to ensure everything is safe for use. Wash or wipe down the organizer according to the manufacturer’s care instructions to remove accumulated crumbs, dust, and spills. Keeping your organization system clean and updated not only protects your baby’s health but also extends the lifespan of your favorite baby gear.
Frequently Asked Questions (FAQ)
How many diapers should I pack for a short outing?
For a short outing of two to four hours, a reliable rule of thumb is to pack one diaper for every two hours you plan to be out, plus one extra diaper for unexpected emergencies. If your baby is a newborn or is currently experiencing digestive changes, you may want to add two extra diapers to your diaper storage organizer just to be safe. Always adjust this estimate based on your baby’s typical daily routine and how frequently they require changes.
Can I use regular pouches instead of a specific diaper storage organizer?
Yes, you can use generic clear pouches or packing cubes, but a dedicated diaper storage organizer offers distinct advantages. Purpose-built organizers typically feature structured, upright walls that prevent the insert from collapsing, along with specialized compartments like insulated bottle holders and elastic loops designed specifically for baby gear. Generic pouches can work well for grouping similar items, but they may lack the quick-access structure and stability needed for rapid, one-handed diaper changes.
What is the best way to prevent leaks in my diaper bag?
To prevent messy leaks, always store liquid containers, such as baby bottles and water flasks, in an upright position within secure, elasticized pockets. Use leak-proof caps or travel seals on all bottles, and place any liquid toiletries like baby lotions or hand sanitizers in sealed, waterproof plastic pouches. Additionally, always keep a high-quality waterproof wet bag in your diaper storage organizer to safely isolate wet clothes or soiled items from the rest of your clean gear.

Community discussion
Share your experience or ask a question. Comments are reviewed before publication.