
Correctly installing a Kikkaboo car seat requires matching the specific model’s installation system—either ISOFIX connectors or the vehicle’s three-point seat belt—to your car’s design, securing any mandatory anti-rotation devices like a top tether or support leg, and verifying the setup with physical stability checks. A car seat can only provide its engineered protection during a sudden stop or collision if it is anchored perfectly according to the manufacturer’s instructions. Taking the time to understand the mechanics of your specific model ensures your child remains secure on every journey.
In the Philippines, road conditions can be unpredictable, and the implementation of the Child Safety in Motor Vehicles Act highlights the critical importance of proper child restraint systems. Because a loose or incorrectly routed car seat can fail during an emergency, mastering the installation process is one of the most vital steps you can take as a caregiver. This guide outlines the essential preparation, step-by-step installation methods, and final safety checks to guarantee your Kikkaboo car seat is securely fitted.
Before You Begin: Vehicle Compatibility and Safety Checks
Before attempting to install your Kikkaboo car seat, you must verify that the seat is appropriate for your child’s current developmental stage. Read the physical user manual provided with your specific Kikkaboo model to check the exact weight, height, and age limits. Never rely solely on the product name or general age categories, as child growth rates vary and individual models have strict structural limits that must not be exceeded.
Products mentioned in this guide
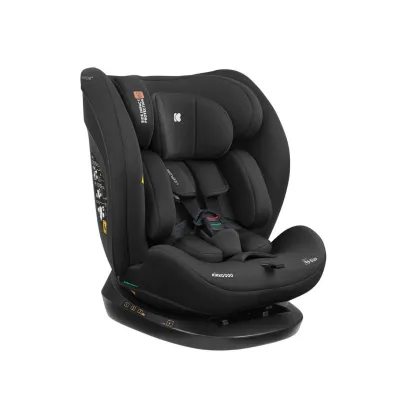

Prices are valid at publication and may change. Please refer to the product page for the latest price.
Next, inspect your vehicle to determine the most compatible seating positions. Look for ISOFIX anchor points, which are typically located in the crease between the vehicle’s seat back and bottom cushion, or consult your vehicle owner’s manual to identify approved seat belt routing paths. Keep in mind that the center rear seat is often the safest location, but many vehicles do not feature ISOFIX anchors in this position, which may require you to use a seat belt installation instead.
Carefully examine the physical condition of the car seat before every installation. Check the plastic shell for hairline cracks, inspect the harness webbing for fraying or loose stitching, and ensure all buckles and adjusters function smoothly. If the car seat has been involved in a moderate to severe vehicle collision, or if it shows any signs of structural compromise, stop using it immediately and consult a qualified professional or the manufacturer for a replacement.
Finally, establish whether your child requires a rear-facing or forward-facing configuration. Infants and young toddlers must always ride in a rear-facing position to protect their fragile heads, necks, and spinal cords. Keep your child rear-facing for as long as possible, transitioning to a forward-facing setup only when they have fully outgrown the maximum height or weight limits specified for the rear-facing mode in your Kikkaboo manual.
Installation Methods: ISOFIX vs. Seat Belt
Kikkaboo car seats are designed to be secured using either the ISOFIX system or the vehicle’s built-in three-point seat belt. Both methods are highly secure and safe when executed correctly, meaning one system is not inherently safer than the other. The choice depends primarily on your vehicle’s features and the specific model of your car seat, as some older vehicles in the Philippines may not be equipped with ISOFIX anchorages.

To locate the ISOFIX anchor points in your vehicle, slide your hand along the crease of the rear passenger seats. You will feel small, horizontal metal bars welded directly into the vehicle’s frame, often marked by plastic guide caps or fabric tags with an anchor symbol. If these anchors are absent, you must use the vehicle’s three-point seat belt to secure the seat.
A critical safety rule to remember is that you must never use both the ISOFIX connectors and the vehicle seat belt simultaneously to install the car seat, unless the Kikkaboo user manual specifically permits a dual-installation method for your exact model. Using both systems when not approved can alter how crash forces are distributed through the seat shell, potentially causing the restraint system to fail during an impact.
Step-by-Step ISOFIX Installation
To begin an ISOFIX installation, locate the release mechanism on your Kikkaboo car seat or its detachable base and extend the rigid ISOFIX connectors outward to their maximum length. If your seat came with plastic insert guides, slip them onto the vehicle’s anchor bars to make alignment easier and protect your vehicle’s upholstery.
Align the extended connectors with the vehicle’s anchor points and push the car seat firmly backward until you hear a loud, distinct click from both sides. Check the physical indicator windows located on the sides of the ISOFIX arms; these indicators must turn completely green. If they remain red or partially red, pull the seat out and repeat the process until both sides are securely locked.
Once the lower anchors are locked, you must secure the seat’s anti-rotation device, which prevents the car seat from pivoting forward during a crash. Depending on your Kikkaboo model, this will be either a top tether or a support leg:
- Top Tether: Route the strap over the back of the vehicle seat and clip it to the designated anchor point in your car (often found on the back of the seat, the parcel shelf, or the trunk floor). Pull the strap tight until the tension indicator turns green.
- Support Leg: Extend the leg downward until it rests flat and firm against the vehicle floorboard. Ensure the leg is locked at the correct height and its base indicator shows green. Never rest the support leg on top of under-floor storage compartments, as these covers can collapse under crash forces.
To finalize the installation, push your body weight into the car seat while pushing it backward against the vehicle seat back. This action compresses the vehicle’s cushions and eliminates any remaining gaps, ensuring a tight, immovable fit.
Step-by-Step Seat Belt Installation
When installing your Kikkaboo car seat with the vehicle’s seat belt, start by identifying the correct belt path on the seat shell. Kikkaboo models typically use color-coded guides to prevent routing errors: blue guides indicate the path for rear-facing installations, while red guides indicate the path for forward-facing setups. Always verify these colors in your specific model’s manual.
Thread both the lap and shoulder portions of the vehicle seat belt through the designated color-coded path, ensuring the belt lies flat without any twists or folds. Insert the metal latch plate into the buckle until you hear a click, and pull on the buckle to confirm it is locked securely in place.
To lock the seat belt and prevent it from slipping, pull the shoulder strap slowly and completely out to its furthest limit. This action engages the vehicle’s Automatic Locking Retractor (ALR) mode. As you let the belt feed back into the wall, you should hear a clicking sound, indicating that the belt is locked and can only retract, not extend.
To remove all slack from the installation, place your hand or knee directly into the center of the car seat, pressing down with your full body weight to compress the vehicle’s seat cushion. While keeping the seat compressed, pull the shoulder belt upward with significant force to feed the excess webbing back into the retractor. If your vehicle’s seat belt does not feature an automatic locking mode, you must use the locking clip provided with your Kikkaboo seat or engage the built-in lock-off clamp on the car seat shell to hold the belt tight.
Securing Your Child: Harness Adjustment and Positioning
Once the car seat is securely anchored to your vehicle, you must correctly adjust the internal harness to protect your child. The height of the shoulder straps must be adjusted relative to your child’s shoulders. For rear-facing installations, the harness straps must emerge from the slots at or slightly below your child’s shoulders. For forward-facing installations, the straps must emerge at or slightly above the shoulders.
In the tropical climate of the Philippines, children rarely wear heavy winter coats, but caregivers must still avoid placing bulky clothing, thick jackets, or folded towels underneath the child or behind their back. Bulky materials compress instantly during a collision, leaving dangerous slack in the harness that can allow a child to be ejected. Dress your child in thin, snug layers; if the vehicle’s air conditioning makes them cold, buckle them in securely first, then drape a light blanket over the outside of the harness.
If your Kikkaboo model is equipped with a chest clip, slide it along the harness straps until it sits level with your child’s armpits. Placing the chest clip too low, such as over the soft abdomen, can cause internal injuries during a crash, while placing it too high can cause neck irritation. Correct placement ensures the harness straps remain positioned over the strong bones of the collarbone and shoulders.
Pull the harness adjustment strap located at the front of the car seat to tighten the system. The straps should feel snug against your child’s body, flat against their chest, and free of any twists. A snug harness distributes crash forces evenly across the strongest parts of the child’s skeletal structure.
Final Verification: The "Inch and Pinch" Safety Tests
Before starting your vehicle’s engine, perform two quick physical checks to guarantee that both the car seat installation and the child’s harness are perfectly secure. These simple tests provide immediate confirmation that the system is ready to protect your child.
First, perform the “Inch Test” on the car seat itself. Firmly grasp the car seat shell at the belt path where it is anchored to the vehicle (either at the ISOFIX points or where the seat belt passes through). Pull the seat side-to-side and front-to-back with reasonable force. The seat should not move more than one inch (2.5 centimeters) in any direction. If you detect excessive movement, you must tighten the seat belt or adjust the ISOFIX connectors and anti-rotation devices again.
Second, perform the “Pinch Test” on the harness straps. Place your thumb and forefinger vertically on the harness webbing at your child’s collarbone level and try to pinch the strap together. If you can pinch any excess webbing between your fingers, the harness is too loose. Pull the adjustment strap at the front of the seat to tighten the harness further, then repeat the test until your fingers slide smoothly off the flat webbing without grabbing a fold.
Conclude with a quick visual sweep of the setup. Ensure that no portion of the harness or vehicle seat belt is twisted, as twisted straps concentrate crash forces onto a narrower area of the body. Additionally, check the car seat’s built-in recline indicator to confirm the seat is tilted at the correct angle for your child’s age, preventing an infant’s head from flopping forward and restricting their airway.
Common Installation Mistakes and How to Avoid Them
One of the most frequent errors in forward-facing installations is omitting the top tether. Many parents believe that the lower ISOFIX connectors are sufficient on their own. However, without the top tether anchored and tightened, the top of the car seat can throw forward violently during a head-on collision, significantly increasing the risk of severe head, neck, and spinal injuries.
Another common mistake is transitioning a child to a forward-facing position or a booster seat too early. Parents often make this switch out of convenience or because they believe the child looks cramped. To maximize safety, keep your child in their current rear-facing Kikkaboo configuration until they reach the absolute maximum weight or height limit designated by the manufacturer.
Never install a rear-facing car seat in the front passenger seat of a vehicle equipped with an active frontal airbag. If the airbag deploys during an accident, it will strike the back of the car seat with explosive force, which can result in fatal injuries. The rear seat is always the safest location for children; if you have no choice but to use the front seat, you must physically deactivate the passenger airbag first and slide the vehicle seat as far back as possible.
Additionally, avoid using unapproved aftermarket accessories, such as custom thick infant inserts, strap cushions, or toys that did not come packaged with your specific Kikkaboo car seat. These items have not undergone rigorous crash-testing with your car seat model and can interfere with the proper function of the harness, compress during an impact, or become dangerous projectiles inside the cabin.
Frequently Asked Questions (FAQ)
Can I use a Kikkaboo car seat in the front passenger seat?
The rear seat of the vehicle is always the safest location for any child restraint system. You should only consider installing a Kikkaboo car seat in the front passenger seat if the rear seats are unavailable or fully occupied by other children. If you must use the front seat for a rear-facing car seat, you must deactivate the vehicle’s passenger airbag. If the airbag cannot be deactivated, front-seat installation is prohibited. For forward-facing installations in the front, slide the vehicle seat back as far as possible to maximize the distance between your child and the dashboard.
How do I clean the car seat covers without damaging the harness?
To clean your Kikkaboo car seat, first remove the fabric cover according to the step-by-step instructions in your user manual. Most fabric covers can be hand-washed or machine-washed on a gentle cycle using mild detergent, then hung to air dry. However, you must never machine wash, submerge, or use harsh chemical bleach on the harness straps. Submerging the straps in water or exposing them to harsh chemicals degrades the high-strength fibers of the webbing, reducing its ability to hold during a crash. Instead, wipe the harness straps clean using a damp cloth and mild soap, and allow them to air dry completely away from direct sunlight.
When does the car seat expire, and where can I find the date?
Car seats have expiration dates because the plastic shell and structural components degrade over time. This degradation is accelerated by extreme heat and humidity, which are common inside parked vehicles in tropical climates like the Philippines. Additionally, safety standards and manufacturing technologies evolve over time, making older seats obsolete. To find your seat’s expiration or manufacturing date, look for a permanent sticker or a molded stamp on the bottom or back of the plastic shell. Do not rely on your purchase date, as the seat may have spent significant time in storage or on retail shelves before you acquired it.

Community discussion
Share your experience or ask a question. Comments are reviewed before publication.