
Installing a child safety seat correctly is one of the most critical steps you can take to protect your little one on the road. Whether you are navigating the congested streets of Metro Manila or embarking on a long family road trip across the provinces of the Philippines, a properly secured car seat dramatically reduces the risk of injury during sudden stops or collisions. Among the various options available to parents, choosing an ISOFIX or ofix car seat offers a highly reliable, standardized system designed to minimize human error during installation.
The core of a successful installation lies in understanding how the rigid connectors of your child seat lock into your vehicle’s built-in anchor points. Unlike traditional seat belt installations, which can be prone to slack and routing mistakes, the ISOFIX system provides a direct, mechanical connection to the chassis of your car. However, simply having an ISOFIX-compatible seat does not guarantee safety; you must execute each step of the installation process with absolute precision to ensure the system functions as intended in an emergency.
To achieve a flawless setup, you must verify compatibility, prepare the vehicle seating area, lock the connectors securely, engage the necessary anti-rotation devices, and perform rigorous physical checks. This guide walks you through each phase of the process, highlighting critical safety boundaries and common pitfalls to avoid so that your child remains completely secure on every journey.
Products mentioned in this guide
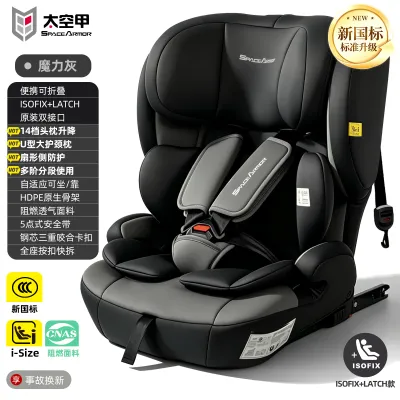
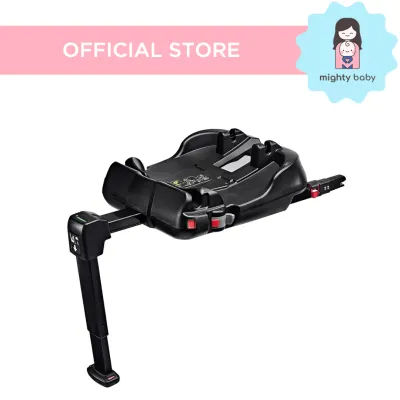
Prices are valid at publication and may change. Please refer to the product page for the latest price.
Before You Start: Checking Vehicle and ofix Car Seat Compatibility
Before attempting to install your ofix car seat, you must confirm that both your vehicle and the child seat are fully compatible. ISOFIX is a standardized international system, but vehicle designs, seat contours, and anchor locations vary significantly. Attempting to force a car seat into an incompatible vehicle can damage the connectors, ruin your car’s upholstery, or lead to an unstable installation that fails to protect your child.
Your first task is to locate the physical ISOFIX anchor points inside your vehicle. These anchors are small, rigid metal bars welded directly into the car’s frame, typically positioned deep within the crevice between the vehicle seat back and the bottom seat cushion. In many modern cars driven in the Philippines, these points are clearly marked with fabric tags, plastic buttons, or embossed symbols depicting a child in a car seat. If you cannot see them immediately, run your hand along the seat crease to feel for the metal bars.
Next, consult your car seat manufacturer’s instruction manual and check their vehicle compatibility list. Many brands maintain an updated database of tested vehicle models to ensure their seats fit the specific angles and dimensions of different car cabins. You must also review your vehicle’s owner’s manual to confirm the exact locations of the anchors and any weight limits associated with them, as some vehicle manufacturers place limits on the combined weight of the child and the seat when using ISOFIX anchors.
An essential part of compatibility is identifying how the car seat manages rotation during a crash. ISOFIX lower anchors secure the base of the seat, but they do not prevent the seat from pivoting forward or tilting. To counteract this, your car seat will require one of two primary anti-rotation devices:
- Top Tether: A heavy-duty strap extending from the top of the car seat that clips into a dedicated anchor point on the back of the vehicle seat, the parcel shelf, or the trunk floor.
- Support Leg: An adjustable load leg that extends downward from the front of the car seat base to rest flat and firm against the vehicle's floorboard.
Safety Boundary: If your vehicle lacks built-in ISOFIX anchors, if the car seat and vehicle manuals provide conflicting instructions, or if you feel unsure about whether the seat fits securely, you must stop immediately. Do not attempt a makeshift installation. Instead, consult a certified child passenger safety technician (CPST) or contact the car seat manufacturer directly for professional guidance.
Step-by-Step Guide to Installing an ISOFIX Car Seat
Once you have confirmed compatibility, you can proceed to the physical installation. Taking your time and working in a well-lit area—ideally out of the intense Philippine sun to prevent metal parts from becoming too hot to handle—will help you focus on securing each connection properly.

Step 1: Prepare the Vehicle Seat and Connectors
Start by clearing the installation area completely. Remove any loose items, debris, or unapproved aftermarket accessories from the vehicle seat, as even small objects can interfere with the flush alignment of the car seat base. In the humid climate of the Philippines, dust and small particles can accumulate quickly in seat crevices, so wiping the area down first is a highly recommended maintenance step.
Next, locate the adjustment mechanism on your car seat to extend the ISOFIX connectors fully from the base. These rigid metal arms slide outward, giving you the necessary clearance to align them with the vehicle’s anchor points.
If your car seat package included plastic ISOFIX guides, insert them onto the vehicle’s metal anchor bars now. These funnel-shaped guides pull the seat upholstery back, creating a clear pathway for the connectors and protecting leather or fabric seats from being torn or scuffed during the attachment process.
Step 2: Attach and Lock the ISOFIX Connectors
Align the extended ISOFIX connectors of the car seat base directly with the vehicle’s lower anchor points. Push the car seat base backward firmly and evenly into the seat crease until you hear a distinct, audible “click” from both sides. This sound indicates that the spring-loaded jaws of the connectors have clamped securely around the vehicle’s metal anchor bars.
Immediately look at the visual indicators located on the sides or top of the ISOFIX arms. Most modern car seats feature color-coded windows that transition from red to green once a secure lock is achieved. You must verify that both the left and right indicators show a solid green status; a single green indicator is not sufficient, as one side may still be loose.
With the connectors locked, place your hands on the car seat base and push it firmly toward the vehicle seat back. This action eliminates any remaining gaps, ensuring a tight, flush fit against the upholstery. The closer and tighter the base is to the vehicle seat back, the more stable the entire system will be during travel.
Step 3: Secure the Anti-Rotation Device (Top Tether or Support Leg)
You must now deploy and secure the anti-rotation device specified by your car seat manufacturer, as neglecting this step leaves the seat highly vulnerable to dangerous forward tipping during a collision.
For Top Tether Systems: Route the tether strap over the top of the vehicle seat back, ensuring it is not twisted or caught on the headrest. Locate the designated top tether anchor point in your vehicle—do not confuse this with cargo hooks or luggage loops in the trunk. Clip the tether hook onto the anchor point and pull the strap tight. Check the tension indicator on the strap; it must show green or indicate that the proper tension has been reached.
For Support Leg Systems: Release the lock on the adjustable support leg and extend it downward until the foot rests flat and solid against the vehicle floorboard. Push down on the leg until you hear it click into place, and verify that the visual indicator at the foot of the leg turns green. The leg should apply firm upward pressure to the car seat base without lifting the base off the vehicle seat cushion.
Safety Boundary: Never allow a support leg to rest on top of an under-floor storage compartment. These hollow compartments, common in some family vehicles, can easily collapse under the extreme downward forces generated during a crash, rendering the support leg useless. If your vehicle features hollow floor storage, you must consult both your vehicle and car seat manuals to find approved workarounds, or switch to a top-tether or seat-belt-based installation.
How to Verify a Safe and Secure Installation
Never assume an installation is correct simply because you followed the steps; you must actively test and verify the security of the car seat before placing your child inside. A minor oversight can significantly reduce the protective capabilities of the seat.
The primary physical test is known as The Shake Test. To perform this test correctly, grasp the car seat firmly at the belt path—the exact area where the ISOFIX connectors attach to the vehicle’s anchors. Attempt to pull the seat side-to-side and front-to-back with reasonable force.
While many people rely on generic rules of thumb regarding acceptable movement, you must refer to your specific car seat manufacturer’s manual to verify the exact allowable limit of play. Generally, a secure seat should have minimal movement at the installation belt path, but checking your manual ensures you are adhering to the precise safety tolerances engineered for your specific model. If you grasp the seat at the top or headrest area, it will naturally move more; this is normal, which is why testing must only occur at the connection base.
Following the physical shake test, perform a final, comprehensive visual sweep of all safety indicators on the seat. Walk around the vehicle to check that:
- Both lower ISOFIX connector windows are showing green.
- The support leg indicator at the floorboard is showing green and resting on a solid surface.
- The top tether tension window shows that the strap is fully tightened.
Safety Boundary: If the car seat moves excessively during the shake test, feels unstable, or if any of the visual safety indicators remain red, you must uninstall the seat entirely and repeat the process from the beginning. If the issue persists, do not use the seat. Seek immediate assistance from a certified child passenger safety technician or contact the manufacturer’s customer support.
Common Installation Mistakes to Avoid
Even experienced parents can make mistakes when installing car seats, often due to misconceptions about how different safety systems interact. Avoiding these critical errors is essential for maintaining the structural integrity of the car seat during a crash.
- Mixing Installation Methods: One of the most frequent mistakes is attempting to secure a car seat using both the ISOFIX connectors and the vehicle's seat belt simultaneously, believing this provides "double" protection. In reality, unless the manufacturer's manual explicitly permits this dual-method installation, doing so can alter the crash dynamics of the seat. The two systems may pull against each other in a collision, causing the plastic shell of the car seat to fail or transferring excessive forces directly to your child. Choose one approved method—either ISOFIX or seat belt—and follow it precisely.
- Skipping the Anti-Rotation Device: Some caregivers attach the lower ISOFIX connectors but neglect to hook the top tether or extend the support leg, often because they find them inconvenient or difficult to reach. Using an ISOFIX seat without its designated anti-rotation device is incredibly dangerous. In a front-end collision, the seat will pivot forward violently, potentially causing your child's head to strike the back of the front vehicle seat, resulting in severe head and neck injuries.
- Using Unapproved Accessories: In the warm and humid climate of the Philippines, parents often want to make their babies more comfortable by adding aftermarket seat protectors, extra cushions, or custom padding under the car seat base. However, these unapproved items can compress dramatically under the force of a crash, creating dangerous slack in the installation. Additionally, materials like pool noodles should never be used to adjust the recline angle unless specifically authorized by the car seat manufacturer. Only use accessories that have been crash-tested and explicitly approved by your car seat brand.
Frequently Asked Questions (FAQ)
Can I use ISOFIX and the seat belt together for extra safety?
No, you should generally not use both ISOFIX and the vehicle’s seat belt at the same time. Mixing these two distinct installation systems can interfere with how the car seat is designed to manage and distribute crash forces. Unless your specific car seat manufacturer’s manual explicitly states that dual installation is allowed and has been crash-tested for your model, you must choose one approved method and follow its instructions strictly.
What if my car does not have visible ISOFIX tags?
If you do not see visible ISOFIX tags or symbols on your vehicle seats, you must consult your vehicle owner’s manual to verify if anchors are present. In some car models, the metal anchor loops are hidden deep within the seat crease, or tucked behind fabric zippers, velcro flaps, or removable plastic covers. If your vehicle was manufactured before ISOFIX became standard or lacks these points entirely, you must secure the car seat using the vehicle’s seat belt system instead, following the manufacturer’s seat belt installation guidelines.
Is it safe to use a seat protector under an ISOFIX car seat?
You should only use a seat protector if it is explicitly tested, approved, and sold by your specific car seat manufacturer. Most brands prohibit the use of generic, aftermarket seat protectors because they can introduce a layer of compression or slip between the car seat base and the vehicle seat. During a collision, this extra material can compress or shift, creating unexpected slack that compromises the tight hold of your ISOFIX installation.

Community discussion
Share your experience or ask a question. Comments are reviewed before publication.