
Installing a child booster seat correctly is one of the most vital steps you can take to protect your growing child during vehicle travel. In the Philippines, where daily commutes involve navigating busy city streets, unpredictable highway traffic, and sudden tropical downpours, ensuring your child’s safety gear is properly set up provides invaluable peace of mind. A booster seat works differently than an infant or toddler car seat; instead of using a built-in harness, it raises your child so that the vehicle’s adult seat belt fits safely and snugly over their smaller skeletal frame.
To achieve a secure installation, you must choose between using the vehicle’s three-point seat belt or utilizing the built-in ISOFIX system. Both methods are highly effective when executed according to the manufacturer’s instructions, but they require careful attention to detail. This guide walks you through the preparation, step-by-step installation processes, and critical safety checks to ensure your child is fully protected on every journey.
Before You Start: Checking Compatibility and Readiness
Before attempting to install any child booster seat, you must verify that your child, your vehicle, and the booster seat itself are fully compatible. Transitioning a child to a booster seat too early is a common mistake that can compromise their safety. A child is generally ready to transition from a forward-facing harness seat to a booster seat only when they have fully outgrown the maximum weight or height limits of their harness seat. Additionally, they must be developmentally mature enough to sit properly for the entire duration of every ride without slouching, leaning over, or playing with the seat belt.
Products mentioned in this guide
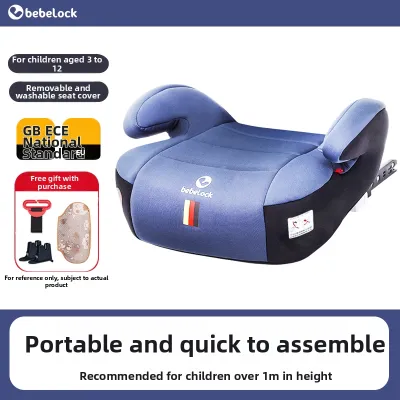
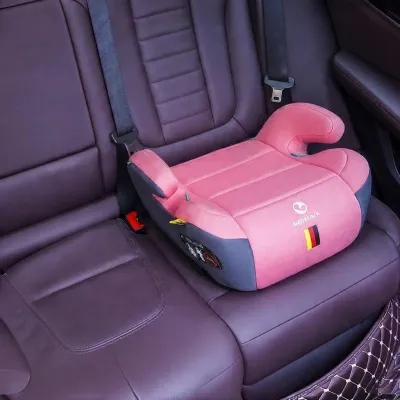
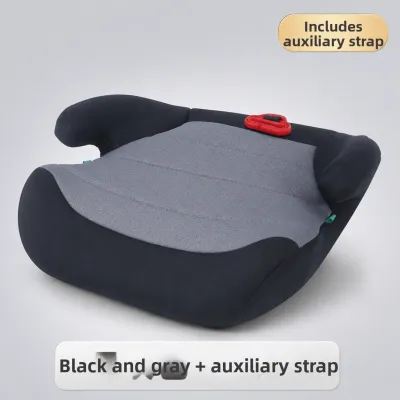

Prices are valid at publication and may change. Please refer to the product page for the latest price.
To confirm compatibility, locate the manufacturer’s registration and safety labels on the body of your child booster seat. These labels specify the exact weight and height ranges for which the seat is certified. Never rely solely on age as a guide, as children grow at vastly different rates.
Next, consult your vehicle owner’s manual to identify the approved seating positions for booster seats. If you plan to use the ISOFIX system, locate the lower anchor points in your vehicle’s rear seats. These are typically marked with small plastic buttons, symbols, or fabric tags positioned in the crease between the seat back and the bottom cushion. Keep in mind that some vehicles have specific weight limits for ISOFIX anchors, which you must verify in the manual before proceeding.
Finally, consider the environmental conditions of your vehicle. In tropical climates with high humidity and intense sun exposure, plastic components and vehicle fabrics can degrade over time. Inspect the booster seat’s shell, straps, and connectors for any signs of cracking, fraying, or sun damage before installation.
Step-by-Step Installation Using the Vehicle Seat Belt
Securing a child booster seat using the vehicle’s three-point seat belt is a highly versatile method compatible with almost all modern vehicles. This method relies on the vehicle’s seat belt to secure both the booster seat and the child simultaneously.

Positioning the Booster Seat Place the booster seat flat against the backrest of the vehicle’s rear seat. Ensure the base of the booster seat sits completely flat on the vehicle’s seat cushion and does not overhang the front edge. If your vehicle’s headrest pushes the booster seat forward and creates a gap between the booster and the vehicle seat back, check your vehicle manual to see if the headrest can be adjusted upward or temporarily removed to allow a flush fit.
Seating the Child and Pulling the Belt Have your child sit comfortably in the booster seat, ensuring their back is flat against the booster’s backrest (or the vehicle’s seat back if using a backless booster). Pull the vehicle’s lap-and-shoulder seat belt across your child’s body.
Routing through the Guides Thread the lap belt portion through the designated lower color-coded guides on both sides of the booster seat base. These guides are typically colored red or green to clearly indicate the correct belt path. The lap belt must sit low and snug across your child’s upper thighs or hips, never across their soft abdomen, to prevent internal injuries in a crash.
Securing the Shoulder Belt If you are using a high-back booster seat, slide the shoulder belt portion through the shoulder belt guide located near your child’s shoulder. If you are using a backless booster seat, use the manufacturer-provided shoulder belt positioning strap to adjust the height of the belt. The shoulder belt must rest flat across the center of your child’s chest and collarbone, away from their neck and face, and must never slip off their shoulder.
Buckling and Removing Slack Insert the seat belt latch plate into the vehicle’s buckle receiver until you hear a distinct click. Pull upward on the shoulder belt to remove all excess slack from the entire system, ensuring the belt is snug but comfortable. Double-check that the seat belt is completely flat and free of twists along its entire path.
Step-by-Step Installation Using ISOFIX or LATCH
Many modern child booster seats feature rigid or flexible ISOFIX connectors that attach directly to the vehicle’s lower anchor bars. This system provides an extra layer of stability, keeping the booster seat firmly in place even when your child is not riding in the vehicle.
Extending the Connectors Locate the ISOFIX adjustment mechanism on the booster seat, which is often a button or strap at the front or sides of the base. Press or pull this mechanism to fully extend the ISOFIX connector arms from the back of the booster seat.
Aligning with the Anchors Position the booster seat on the vehicle’s rear seat and align the extended connector arms with the vehicle’s lower ISOFIX anchor bars hidden in the seat crease. Ensure the path is completely clear of seat belts, toys, or debris.
Clicking into Place Push the booster seat firmly backward toward the vehicle seat back until you hear an audible click from both connector arms. This click indicates that the connectors have successfully locked onto the vehicle’s anchor bars.
Verifying the Indicators Look closely at the visual safety indicators located on the booster seat’s ISOFIX arms. Most models feature color-changing tabs that turn from red to green when a secure connection is achieved. If the indicator remains red or partially red, release the connectors and try the process again.
Attaching the Top Tether (If Required) Some specific high-back booster models may require or recommend the use of a top tether strap. If your model includes a top tether, route the strap over the vehicle seat back and clip it to the designated top tether anchor point in your vehicle. Pull the strap tight to remove all slack, which helps limit forward rotation during a sudden stop.
Final Snug Adjustment Once the connectors are locked, push the booster seat base firmly against the vehicle seat back. Adjust the ISOFIX arms to pull the booster seat as close to the vehicle seat back as possible, ensuring a tight, stable fit.
How to Verify a Secure and Safe Installation
Once you have completed the installation, you must perform a series of quick, practical checks to verify that the booster seat is secure and safe for daily use.
The Inch Test Grab the booster seat firmly near the belt path or the ISOFIX connection points. Pull the seat from side to side and front to back. The booster seat should not move more than one inch (2.5 centimeters) in any direction. If you observe excessive movement, re-tighten the ISOFIX connectors or re-route and pull the vehicle seat belt tighter.
Visual Routing Check Every single time your child buckles into the seat, perform a quick visual check of the seat belt routing. Ensure the belt remains threaded through the designated color-coded guides and has not slipped out. In tropical climates, frequent cabin temperature fluctuations can cause materials to expand or contract slightly, making regular visual checks a crucial habit.
Retraction and Lock Check Slowly pull the vehicle seat belt out and let it retract to ensure the mechanism moves smoothly without binding. If your booster seat design or vehicle manual requires locking the retractor (by pulling the belt all the way out until it clicks and then letting it retract), verify that the locking mechanism engages properly and holds the belt tight against the booster seat.
Common Installation Mistakes and When to Stop
Even with the best intentions, small installation errors can significantly reduce the effectiveness of a child booster seat. Being aware of these common pitfalls helps you maintain a high standard of safety.
Using Aftermarket Accessories Avoid using unapproved aftermarket accessories, such as extra seat cushions, thick comfort padding, or third-party seat belt adjusters. These items are not crash-tested with your specific booster seat model and can interfere with how the vehicle’s restraint system is designed to manage crash forces.
Improper Fit and Alignment Watch out for physical mismatches between the booster seat and your vehicle. If the vehicle seat belt is too short to route properly through the guides, if the vehicle’s built-in anchors are damaged, or if the booster seat’s base does not sit flush against the vehicle seat, do not attempt to force the installation.
When to Stop and Seek Help If you encounter conflicting instructions between your vehicle owner’s manual and the booster seat manufacturer’s manual, or if any part of the booster seat appears cracked, worn, or defective, stop the installation immediately. Do not use the seat. Seek assistance from a certified child passenger safety technician or contact the booster seat manufacturer directly to resolve compatibility or installation issues before allowing your child to ride in the vehicle.
Frequently Asked Questions (FAQ)
Can I install a booster seat in the front passenger seat?
Safety experts strongly recommend placing children in the rear seats of the vehicle, as this is the safest location to minimize injury risks during a collision. In the Philippines, local road safety regulations generally mandate that children of booster-seat age must ride in the rear. If an emergency or extreme circumstance requires front-seat placement, you must first verify that the front passenger airbag can be and is deactivated. Slide the vehicle seat as far back as possible on its tracks to maximize the distance between the child and the dashboard, and ensure the seat belt fits perfectly across the child’s collarbone and hips.
What should I do with the booster seat when my child is not in the car?
An unsecured booster seat can become a dangerous projectile inside the cabin during a sudden stop or collision, potentially injuring the driver or other passengers. When your child is not riding in the car, always secure the empty booster seat. If it is an ISOFIX model, keep the connectors firmly attached to the vehicle anchors. For non-ISOFIX models, buckle the vehicle seat belt over the empty seat just as you would if a child were sitting in it. Alternatively, store the booster seat securely in the vehicle’s trunk when it is not in use for an extended period.

Community discussion
Share your experience or ask a question. Comments are reviewed before publication.