
Cleaning baby bottles is a daily ritual for parents, but a one-size-fits-all scrubbing method can damage your feeding gear. To clean glass, plastic, and silicone baby bottles safely, you must adapt your brushing technique and tool selection to the specific material. Glass requires firm pressure but careful handling to avoid thermal shock; plastic demands a gentle touch with non-abrasive bristles to prevent micro-scratches; and flexible silicone requires manual manipulation to reach deep folds without tearing delicate parts. Using the correct brush for baby bottle cleaning ensures a thorough wash while preserving the integrity of each bottle.
By understanding how these materials react to friction, heat, and moisture, you can establish a highly hygienic routine. This guide details how to match your brush to your bottle type, execute proper scrubbing techniques, and care for delicate accessories to keep your baby’s feeding equipment in excellent condition.
Preparing Your Bottles and Choosing the Right Brush
Before you begin scrubbing, immediate preparation is essential to make the washing process easier and more effective. As soon as a feeding session ends, rinse the bottle and its components with lukewarm water. This quick step prevents milk fats and proteins from drying and hardening against the inner walls. In warm, humid tropical climates, dried milk residue can rapidly become difficult to remove and may encourage bacterial growth if left sitting in the sink.
Products mentioned in this guide
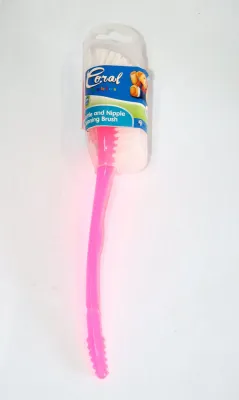
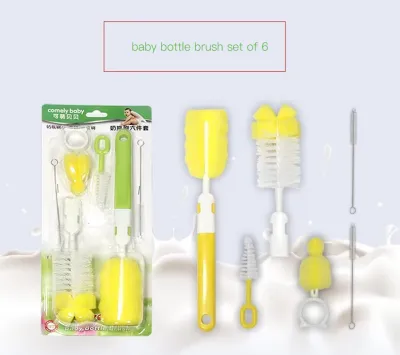
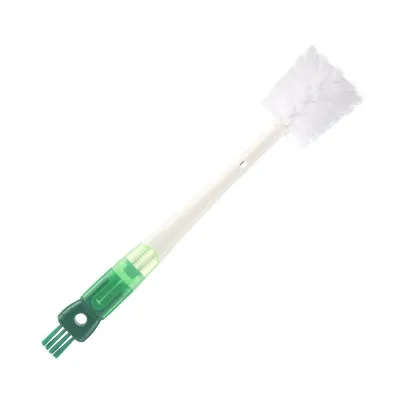

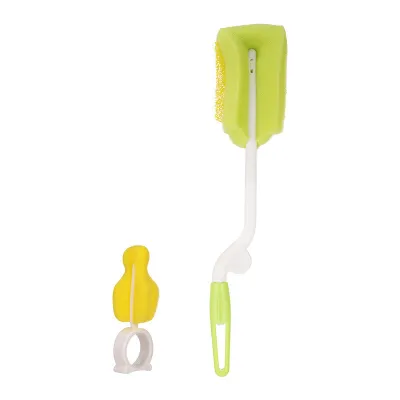

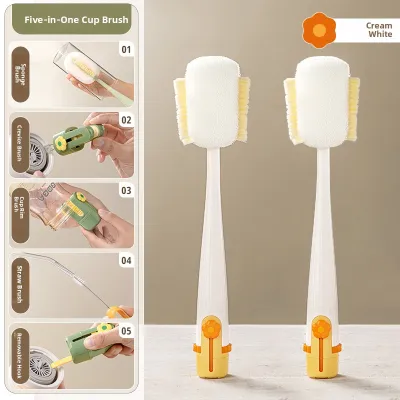
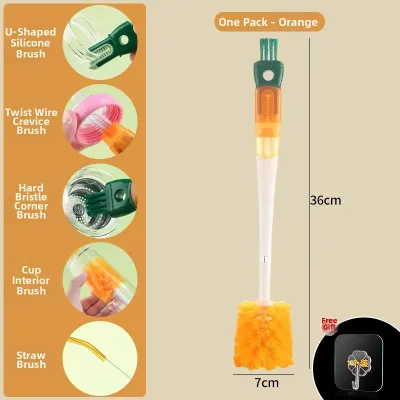
Prices are valid at publication and may change. Please refer to the product page for the latest price.
Selecting the right brush for baby bottle cleaning is your primary defense against physical damage. Different bristle materials serve distinct purposes:
- Nylon Bristles: These are firm and highly durable, making them excellent for scrubbing away stubborn, dried-on milk residue from sturdy glass bottles. However, their stiffness can easily scratch softer materials like plastic.
- Sponge Brushes: These are soft, highly absorbent, and create a rich lather, making them ideal for delicate plastic surfaces. Because sponges retain moisture, they must be thoroughly rinsed and dried in a well-ventilated area to prevent mold and mildew.
- Silicone Bristles: These are gentle, scratch-free, and highly hygienic because they do not absorb water. They are suitable for both plastic and silicone bottles, though they may require slightly more effort to generate a thick soap lather.
Always check the manufacturer care labels on your bottles before washing. These labels provide crucial information regarding maximum temperature limits and any specific tool restrictions. Some materials may degrade if exposed to boiling water, while others might have strict warnings against using stiff-bristled nylon brushes.
Specific Brushing Techniques for Each Bottle Material
Maintaining high hygiene standards starts before the brush even touches the bottle. Always wash your hands thoroughly with soap and clean water for at least 20 seconds before handling clean feeding items. Additionally, use a dedicated washbasin reserved solely for baby items rather than washing directly in the kitchen sink, which can harbor food particles, grease, and household bacteria.

When you begin washing, remember that the physical pressure you apply must adapt to the bottle’s material. Applying uniform, heavy-handed scrubbing across all bottle types can lead to micro-scratches in plastic, tears in silicone, or accidental breakage of glass. Controlled, deliberate movements are far more effective than aggressive scrubbing.
Cleaning Glass Baby Bottles
Glass baby bottles are highly durable, scratch-resistant, and can withstand high temperatures, but they require careful handling to prevent physical accidents. When brushing glass, you can apply firm, controlled pressure to dislodge stubborn milk film. Focus your efforts on the bottom edges and the inner shoulders of the bottle, where liquid naturally pools and dries. A firm nylon or silicone brush is highly effective for sweeping these areas clean.
While glass is tough, it is highly sensitive to rapid temperature changes, a phenomenon known as thermal shock. Avoid transitioning a glass bottle directly from ice-cold rinsing water to boiling hot sterilization water, or vice versa. Sudden temperature swings can cause the glass to crack, weaken, or shatter instantly. Always use consistent, lukewarm to warm water throughout the washing and rinsing process.
After you finish brushing, conduct a thorough visual inspection of the bottle. Hold the glass up to a clear light source and check both the interior and exterior surfaces for any hairline cracks, chips, or deep scratches. Even a minor chip can compromise the structural integrity of the bottle, making it prone to breaking during future use or sterilization. If you detect any damage, discard the bottle immediately.
Cleaning Plastic Baby Bottles
Plastic baby bottles are lightweight and shatterproof, making them a popular choice for daily use, but their soft surface requires a gentle touch. When cleaning plastic, use light, sweeping circular motions rather than aggressive, heavy-handed scrubbing. Avoid using stiff nylon brushes, as they can easily create microscopic scratches on the inner walls of the plastic.
These micro-scratches are more than just an aesthetic issue; they create tiny, rough grooves where milk proteins, moisture, and bacteria can easily hide. Once bacteria become trapped in these scratches, they are incredibly difficult to reach and clean, even with thorough washing. To protect the soft plastic interior, always opt for a soft sponge brush or a gentle silicone brush for baby bottle cleaning.
Over time, plastic bottles will naturally degrade due to repeated washing, heating, and use. Regularly inspect your plastic bottles for signs of wear, such as persistent cloudiness, deep scratches, or lingering odors that do not disappear after washing. If a plastic bottle remains cloudy or has visible interior scratches, it is time to replace it to ensure a hygienic feeding environment.
Cleaning Silicone Baby Bottles
Silicone baby bottles are prized for their soft, squeezable texture, but this flexibility requires a unique cleaning approach. Because the walls of a silicone bottle bend and flex under pressure, standard brushing can cause the material to fold, leaving hidden areas uncleaned. To counter this, gently squeeze or stretch the bottle from the outside with one hand while guiding the brush with the other. This action flattens out the inner surface, ensuring the bristles make direct contact with every crevice.
Many silicone bottles feature specialized designs, such as built-in anti-colic vents, valves, or complex internal rims near the base. These areas are highly delicate and can easily tear if handled roughly. Avoid forcing a large, stiff brush head directly into these small structures. Instead, use light, precise pressure and guide the brush carefully to clear out residue without stressing the thin silicone membranes.
Additionally, pay close attention to the transition zone near the narrow neck of the bottle. Ensure the tip of your brush reaches this area fully without putting excessive outward pressure on the silicone. Forcing a brush that is too wide through a narrow neck can stretch or tear the material over time, leading to leaks during feeding.
Cleaning Nipples, Rings, and Small Accessories
Standard bottle brushes are generally too large to clean small, delicate accessories safely and effectively. To clean the inside of a nipple, always use a dedicated, smaller nipple brush, which is often conveniently stored inside the handle of your primary brush for baby bottle cleaning. Insert the small brush gently into the nipple and rotate it slowly to sweep away the oily milk film that tends to cling to the silicone or latex.
Be extremely careful around the tiny feeding hole at the tip of the nipple. Never force the bristles of a brush, toothpicks, or any sharp objects through this hole. Doing so can easily enlarge or tear the opening, which alters the milk flow rate. An incorrect flow rate can cause your baby to swallow too much air or choke during feeding. Instead, gently massage the tip of the nipple with your fingers under warm, soapy water to clear any blockage.
Finally, do not overlook the screw rings and anti-colic valves. The threaded tracks of screw rings are notorious for trapping milk residue and mineral buildup from water. Use your small accessory brush to scrub along these threads thoroughly. Disassemble all valves, collars, and caps completely before washing, as leaving them assembled allows moisture and milk to pool, creating a perfect environment for mold to develop.
Drying, Inspecting, and Storing Clean Bottles
Once all parts are thoroughly washed and rinsed, proper drying is crucial to maintain hygiene. Place all disassembled bottle components on a dedicated, clean, and well-ventilated drying rack. Avoid using kitchen towels to dry the bottles, as towels can easily transfer lint, dust, and bacteria back onto the freshly cleaned surfaces. In humid tropical environments, ensuring excellent air circulation is vital to help the parts dry quickly and prevent mold growth.
Before assembling or storing the bottles, perform a final visual and tactile inspection. Run a clean finger along the inner surfaces of the bottles and nipples to ensure there is no greasy film, sticky residue, or soapy buildup left behind. If you feel any residue, rinse the part again with warm water. Check once more for any physical damage, such as tears in the nipples or cracks in the bottle bodies.
Store the completely dry, disassembled, or loosely covered bottles in a clean, closed cabinet or storage container. Keep them away from direct sunlight, high heat sources, and potential household pests. Avoid sealing damp bottles tightly, as trapped moisture can quickly lead to musty odors and bacterial growth. Keeping the components disassembled during storage ensures they remain fresh and ready for the next use.
Frequently Asked Questions (FAQ)
How often should I replace my brush for baby bottle cleaning?
You should inspect your bottle brush regularly for physical wear and tear. Replace the brush immediately if you notice frayed, bent, or missing bristles, as worn bristles cannot clean surfaces effectively. If the brush develops a lingering sour milk odor, discoloration, or visible mold that cannot be washed out, discard it right away. Generally, it is best to follow the manufacturer’s replacement guidelines on the packaging, which typically recommend replacing the brush every few months to maintain optimal hygiene.
Can I use the exact same brush for glass and plastic bottles?
You can use the same brush only if it features soft, non-abrasive bristles, such as high-quality silicone or soft sponge, which are safe for both materials. However, using a stiff nylon brush on both is not recommended. A stiff brush that is excellent for scrubbing durable glass will easily scratch plastic bottles. If your collection includes both glass and plastic, keeping separate brushes—a firmer one for glass and a softer one for plastic—helps prevent scratch damage and extends the lifespan of your plastic bottles.
Is it safe to put baby bottles in the dishwasher after brushing?
You must check the manufacturer’s care labels to verify if your specific bottles and components are dishwasher-safe. While glass bottles are generally safe, some plastic and silicone parts can warp or degrade under the high heat of a dishwasher cycle. If they are safe, place small parts like nipples, valves, and rings in a secured top-rack basket to prevent them from falling onto the heating element. Keep in mind that a dishwasher cycle does not replace manual pre-brushing; you should still brush away heavy milk residue beforehand to ensure a thorough clean.

Community discussion
Share your experience or ask a question. Comments are reviewed before publication.