
The ideal travel milk container depends entirely on your trip’s duration and whether you are feeding breastmilk or formula. For short outings under four hours, lightweight portioned dispensers or basic insulated bottles work best to keep components separate and fresh. For full-day trips or extended travel, a dedicated cooler bag packed with contoured ice packs or heavy-duty milk storage bags becomes essential to maintain a safe, cold chain. Matching your container setup to your travel timeline ensures your baby’s milk remains safe, uncontaminated, and easy to prepare while you are away from home.
Assessing Your Travel Needs and Feeding Schedule
Planning a successful outing with your baby starts with a realistic assessment of your travel timeline and your baby’s feeding intervals. If your infant feeds every two to three hours, a simple four-hour trip requires at least two prepared portions, while an eight-hour journey demands a much more robust storage strategy. Always calculate your travel time from the moment you leave your front door to the moment you expect to return, adding a generous buffer for unexpected traffic delays, transit wait times, or sudden schedule changes.
The storage requirements for breastmilk and formula are fundamentally different, and mixing up their handling can lead to safety risks. Expressed breastmilk contains live immunological properties that must be preserved through strict temperature control, making continuous chilling vital for longer trips. Formula, on the other hand, is highly susceptible to bacterial contamination once mixed with water, meaning that keeping dry powder and warm water separate until the exact moment of feeding is the safest approach.
Products mentioned in this guide
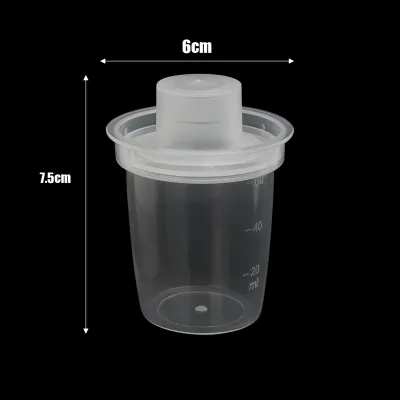
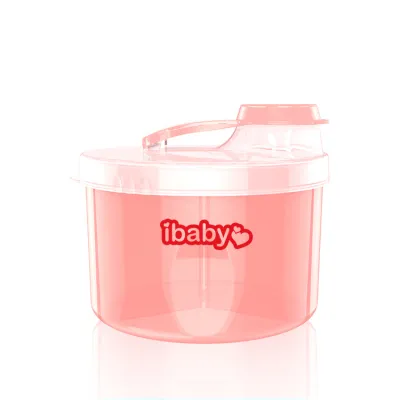
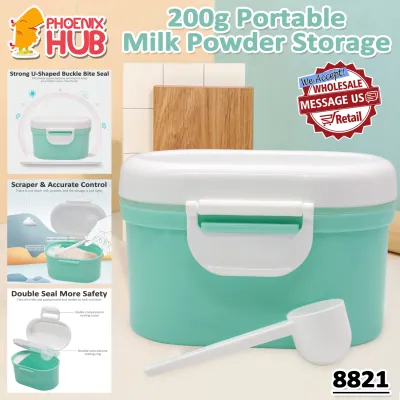
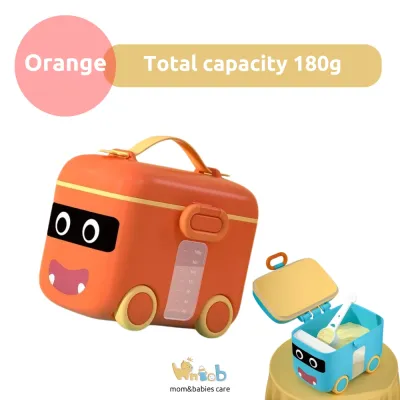
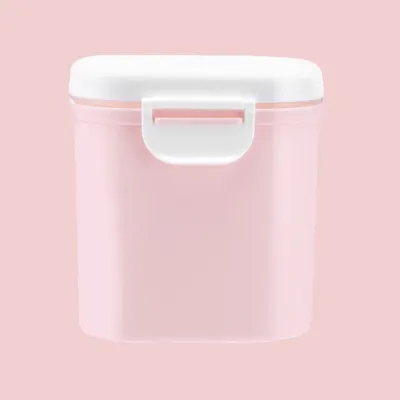
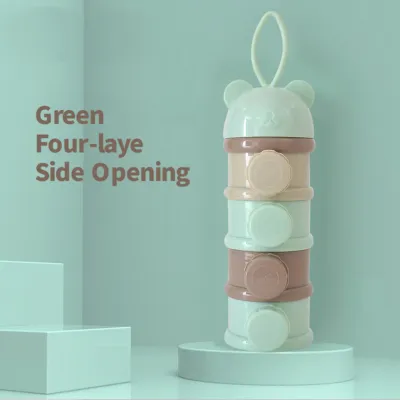
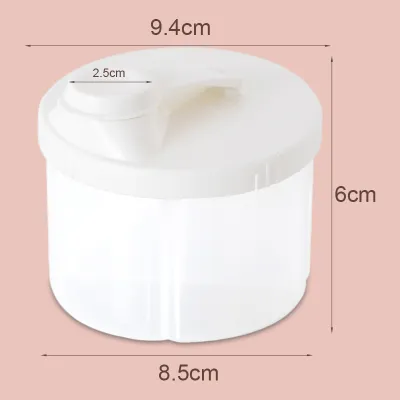
Prices are valid at publication and may change. Please refer to the product page for the latest price.
Your mode of transportation also plays a significant role in determining the best container setup for your journey. If you are traveling by private vehicle, you have the luxury of carrying larger, heavier cooler bags with multiple contoured ice packs that can sit securely on a seat or in the trunk. Conversely, if you are relying on public transport, walking through busy streets, or navigating crowded spaces, you will need compact, lightweight, and highly durable containers that fit easily into a standard diaper bag without adding unnecessary bulk.
Finally, consider the availability of cleaning and sanitation facilities at your destination or along your route. If you are traveling to a location where clean, running water and sterilization equipment are unavailable, you must pack enough pre-sterilized bottles and storage containers to cover every single feed of the trip. Relying on washing bottles in public restrooms is highly discouraged due to contamination risks, so planning your container inventory around your cleaning access is a critical step in protecting your baby’s developing immune system.
Best Container Types for Short Trips (Under 4 Hours)
For brief outings such as doctor appointments, quick grocery runs, or visits to nearby relatives, you do not need to pack heavy, complex cooling systems. Instead, the focus should be on lightweight portability, ease of assembly, and preventing accidental spills while on the move. For these short windows, a combination of insulated bottles and portioned formula dispensers offers the perfect balance of convenience and safety.

Insulated bottles are highly effective for carrying pre-heated water intended for formula preparation. When selecting an insulated bottle, look for double-walled vacuum insulation, which helps maintain the water temperature for several hours regardless of the external weather. However, parents must remember that these bottles are designed to keep plain water warm, not to store pre-mixed liquid formula, as keeping prepared formula warm for hours creates an ideal environment for rapid bacterial growth.
Portioned formula dispensers are an indispensable tool for parents who feed their babies formula. These compact containers typically feature three to four separate compartments, allowing you to pre-measure precise amounts of powder for individual feeds before you leave the house. This design eliminates the need to carry a bulky, heavy formula tin in your diaper bag and prevents the mess of measuring out powder while sitting in a moving vehicle or a crowded public space.
When shopping for a portioned dispenser, pay close attention to the quality of the seals and the lid mechanism. In humid tropical environments, moisture can easily seep into poorly sealed containers, causing the formula powder to clump, lose its nutritional quality, or even spoil before use. Opt for dispensers with secure, threaded lids or tight-fitting silicone seals that keep the powder completely dry and free-flowing until it is poured into the bottle.
It is also vital to understand the safety boundaries of prepared milk during short trips. According to standard pediatric health guidelines, once breastmilk or formula has been warmed or prepared, it should be consumed within one to two hours if kept at room temperature. If your baby does not finish a bottle within this timeframe, the remaining milk must be discarded, as bacteria from the baby’s saliva can quickly multiply in the leftover liquid, making it unsafe for future consumption.
Essential Storage Solutions for Full-Day or Long Trips
When your travel plans extend beyond four hours, maintaining a reliable cold chain becomes the absolute priority for preserving the safety and quality of your baby’s milk. Whether you are taking a long road trip, spending the day at an outdoor park, or traveling between cities, you must transition to heavy-duty storage solutions that can keep expressed breastmilk or pre-prepared feeds chilled at safe temperatures for extended periods.
A high-quality insulated cooler bag is the cornerstone of any long-distance travel feeding plan. When evaluating cooler bags, look for models with thick, high-density foam insulation and heat-sealed, leak-proof inner linings that prevent melted ice or condensation from leaking into your main diaper bag. The bag should be compact enough to carry comfortably but spacious enough to accommodate both your feeding containers and the necessary cooling elements.
The performance of your cooler bag depends entirely on the type and quantity of ice packs you use. For the most efficient cooling, choose contoured gel ice packs that are specifically shaped to curve around baby bottles or storage bags, maximizing the surface area contact. As a general rule of thumb, the volume of ice packs should equal or exceed the volume of milk being stored, ensuring that the internal temperature of the cooler bag remains consistently low throughout the entire journey.
Parents must also decide between using single-use milk storage bags or hard plastic and glass containers for transporting breastmilk. Milk storage bags are incredibly space-efficient because they can be frozen flat and packed tightly together, allowing you to carry a larger volume of milk in a smaller cooler bag. However, these bags are vulnerable to punctures, tears, or seam failures if they rub against sharp objects or are squeezed too tightly during transit.
Hard plastic or glass storage bottles offer superior physical protection, ensuring that your baby’s milk is never lost to an accidental puncture. They are also much easier to stand upright inside a cooler bag, reducing the risk of leaks from poorly sealed zippers. The trade-off is that hard containers are significantly bulkier and heavier than storage bags, and they require thorough washing and sterilization once you reach your destination, which may not always be convenient.
Reheating chilled milk safely while on the go requires a careful approach to avoid destroying beneficial nutrients or burning your baby’s mouth. Never use a microwave to heat breastmilk or formula, as this creates dangerous hot spots in the liquid. Instead, carry a vacuum-insulated thermos filled with hot water from home; when it is time to feed, simply pour the hot water into a wide cup or the thermos lid and submerge the bottle or storage bag for a few minutes until it reaches a comfortable temperature.
Finally, always adhere to strict safety protocols regarding leftover milk when traveling. Once your baby begins drinking from a bottle, bacteria from their mouth enter the milk and begin to multiply rapidly. Any milk left in the bottle after a feed must be discarded within two hours and should never be placed back into the cooler bag for later use, as the cooling process will not destroy the bacteria that have already been introduced.
Key Features to Check Before Buying a Travel Milk Container
Investing in a travel milk container requires looking beyond attractive colors and designs to evaluate the structural integrity, material safety, and overall practicality of the product. Because these containers will hold the primary source of your baby’s nutrition, ensuring they meet strict safety standards is paramount. Taking the time to verify key features before making a purchase will save you from leaks, contamination, and premature product failure.
Material safety should always be your first checkpoint when selecting any baby feeding accessory. Ensure that all plastic components are clearly labeled as BPA-free, phthalate-free, and made from food-grade materials such as polypropylene (PP) or high-quality silicone. If you prefer glass, opt for borosilicate glass, which is highly resistant to thermal shock and less likely to crack when transitioning from a cold cooler bag to a warm water bath.
It is important to look for recognized safety compliance marks on the product packaging, which indicate that the container has undergone testing to meet international food safety standards. Since safety certifications and recalls are dynamic, parents should actively verify the manufacturer’s current compliance status and product warnings. Always verify the age suitability, method of use, and manufacturer warnings from the specific product documentation before using any container for your baby.
A truly leak-proof design is non-negotiable when traveling, as a single spill can ruin your diaper bag, clothes, and baby gear. Inspect the sealing mechanisms of any container you consider, looking for thick, high-quality silicone rings that fit tightly into the lid. Containers with locking latches, threaded screw caps, or double-zipper seals on storage bags provide an extra layer of security against accidental openings caused by the bumps and vibrations of travel.
The durability of the silicone seals is just as important as the container itself. Over time, frequent washing and sterilization can cause silicone rings to warp, stretch, or develop mold if moisture becomes trapped underneath them. Choose containers where the silicone seals are easily removable for thorough cleaning, and check if the manufacturer offers replacement seals so you do not have to discard the entire container if a seal wears out.
Cleaning convenience is another critical factor that directly impacts your baby’s health. Travel milk containers should have wide openings and minimal parts to ensure that every surface can be reached with a standard bottle brush. Avoid designs with complex valve systems, narrow straws, or deep crevices that are difficult to clean on the go, as dried milk residue in these hard-to-reach areas can quickly become a breeding ground for harmful bacteria.
Lastly, verify the sterilization compatibility of the container before buying. The product instructions should clearly state whether the container can safely withstand steam sterilization, boiling water, or dishwasher cycles. If a container cannot tolerate high temperatures, it will be much harder to sanitize effectively, making it less suitable for the rigorous hygiene demands of infant feeding.
Comparing Milk Container Types for Different Trip Lengths
Choosing the right travel milk container involves balancing your need for temperature preservation against your desire for lightweight portability. While some containers excel at keeping milk cold for hours, others are designed to make dry powder transport as effortless as possible. Understanding these trade-offs helps you pack efficiently for any journey.
The table below outlines the key differences between the primary travel milk container options, helping you select the best tool for your specific trip length and feeding method.
| Container Type | Best Trip Length | Key Benefits | Limitations | Ideal Milk Type |
|---|---|---|---|---|
| Insulated Bottles | Under 4 Hours | Keeps water warm for mixing; durable and easy to carry | Heavy; cannot safely keep pre-mixed milk warm for long periods | Formula (water only) or chilled Breastmilk |
| Portioned Dispensers | Under 4 Hours | Extremely lightweight; pre-measured dry portions prevent spills | No temperature control; susceptible to humidity clumping | Formula (powder only) |
| Cooler Bags with Ice Packs | 4 to 12+ Hours | Maintains a safe cold chain; holds multiple feeds securely | Bulky; requires freezing ice packs ahead of time | Breastmilk or pre-mixed Formula |
When making your final decision, let the primary feeding method and trip duration guide you. If you are exclusively breastfeeding and need to transport expressed milk, investing a small amount of ₱ into a high-quality, certified cooler bag with contoured ice packs is the most secure choice. For formula-feeding parents, prioritizing a dry, moisture-proof portioned dispenser for short trips, combined with a reliable insulated water bottle, offers the ultimate convenience without compromising on safety.
Frequently Asked Questions (FAQ)
Can I leave prepared formula in an insulated bottle for the whole day?
No, you should never leave prepared liquid formula in an insulated bottle for an entire day. While insulated bottles are excellent at maintaining the temperature of the liquid inside, they do not prevent bacterial growth; in fact, keeping prepared formula warm actually accelerates the rate at which harmful bacteria multiply. Always consult your specific formula manufacturer’s instructions for maximum holding times, which typically state that prepared formula should be consumed within two hours at room temperature or discarded. For longer trips, the safest and most practical method is to carry plain hot water in your insulated bottle and dry powder in a portioned dispenser, mixing them together only when your baby is ready to feed. If you have concerns about milk safety or your baby’s feeding health, consult a qualified pediatric professional.
How do I clean milk containers while on the go?
Cleaning milk containers while traveling requires a proactive approach to maintain strict hygiene when you do not have access to a kitchen sink or sterilizer. Always pack a dedicated travel cleaning kit, including a small bottle of baby-safe dish soap and a clean bottle brush, stored in a clean, resealable bag. If you must wash a bottle on the go, use bottled or safe drinking water to thoroughly rinse away all milk residue, scrub all parts with soapy water, and perform a final rinse with safe drinking water. Allow the components to air-dry on a clean paper towel in a well-ventilated area, and ensure you perform a thorough wash and sterilization once you return home or reach your destination.

Community discussion
Share your experience or ask a question. Comments are reviewed before publication.