
Starting solids is an exciting milestone for families in the Philippines, marking a transition from exclusive milk feeding to exploring diverse textures and flavors. Introducing a training spoon and fork at the right developmental stage encourages self-feeding, supports fine motor skills, and fosters independence at the dining table. To choose the right utensils, parents must look beyond bright colors and focus on ergonomic design, material safety, and suitability for their baby’s current developmental stage. Selecting the right tools involves evaluating how easily a baby can grip the handle, checking the safety of the materials under local tropical conditions, and matching the utensil’s shape to the baby’s growing motor skills.
Key Design Features for Beginner Self-Feeders
When selecting utensils for a baby who is just beginning to explore self-feeding, the physical design of the spoon and fork plays a critical role in their success. Babies do not feed themselves the way adults do; their motor skills are still developing, and their movements are often uncoordinated. Choosing tools specifically engineered for their physical capabilities can reduce frustration and encourage them to keep trying.
Look for short, chunky, or textured handles that accommodate a full-fist palmar grasp. During the early stages of self-feeding, babies use their entire hand to hold objects rather than their fingers. A short handle prevents the utensil from going too far into the mouth, while a thick, rounded grip fits naturally into a small palm. Textured surfaces, such as raised ridges or silicone bumps, provide extra friction to prevent the utensil from slipping out of soapy or food-covered hands.
Products mentioned in this guide
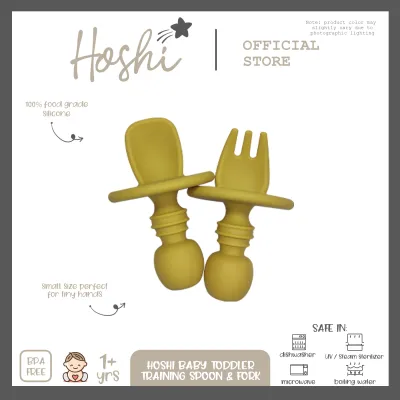
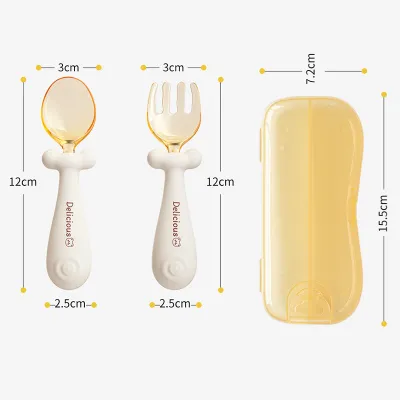
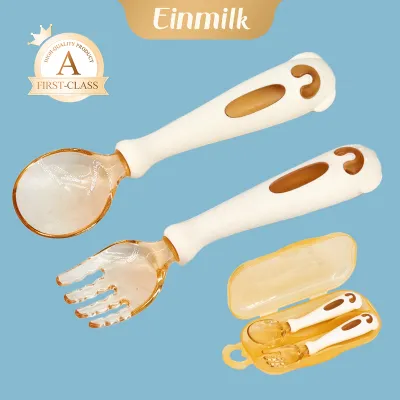
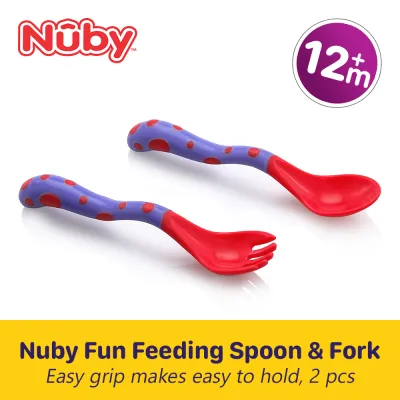
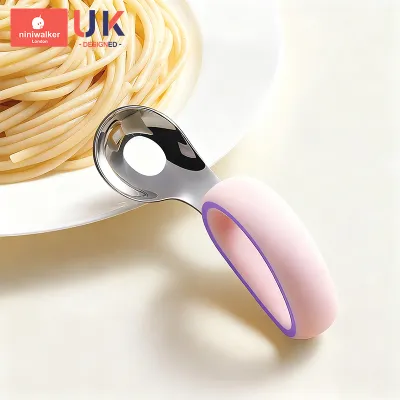
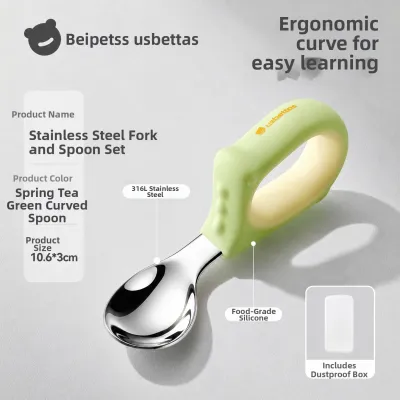
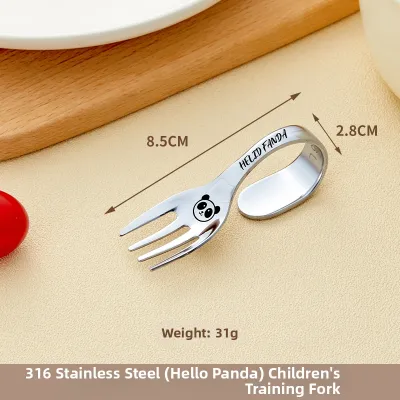
Prices are valid at publication and may change. Please refer to the product page for the latest price.
Check for shallow, narrow spoon bowls that fit comfortably in a small mouth and prevent overfilling. A spoon bowl that is too deep makes it difficult for a baby to clear the food using their upper lip, which can lead to frustration and food waste. A narrow bowl ensures the spoon can enter and exit the mouth easily without stretching the baby’s lips or pressing uncomfortably against their sensitive gums.
Ensure fork tines are blunt, rounded, and slightly textured to hold soft foods without piercing risks. Unlike adult forks, baby training forks are not meant for sharp piercing. The tines should be thick and rounded to prevent accidental pokes to the tongue, cheeks, or gums. Some training forks feature slightly textured tines or wavy designs that help soft foods, like mashed squash or banana slices, cling to the fork without sliding off immediately.
Verify that the utensil is lightweight and balanced so it does not tire small wrists. Utensils must be light enough for a baby to lift repeatedly without fatigue. A well-balanced utensil has a slightly heavier handle relative to the bowl or tines, which naturally guides the utensil toward the mouth and helps the baby understand spatial orientation during feeding.
Material Safety and Care Instructions
Because training utensils go directly into your baby’s mouth, verifying material safety and understanding proper care instructions are essential steps before making a purchase. High-quality materials ensure the utensils remain safe to use over time, even with frequent washing and sterilization.

Check packaging for explicit material declarations and age recommendations. Look for food-grade silicone, BPA-free plastics, or high-quality stainless steel. Avoid products that do not clearly state their material composition. Additionally, verify the manufacturer’s recommended age range, as some utensils are designed specifically for infants aged six months and older, while others are meant for older toddlers with more advanced chewing and gripping capabilities.
Review the product manual or packaging for maximum heat tolerance before using in sterilizers or microwaves. In the warm, humid climate of the Philippines, keeping baby gear sanitized is a priority to prevent bacterial growth. However, different materials have varying heat tolerances. Some silicone items can handle high heat, while certain plastics may warp, degrade, or release chemicals when exposed to boiling water, steam sterilizers, or microwave heat.
Look for clear symbols or text confirming whether the item is dishwasher safe or requires hand washing. If you use a steam or UV sterilizer, confirm that the materials are compatible with these devices. Some materials can discolor or degrade under prolonged UV exposure, so following the manufacturer’s care guidelines is essential for maintaining the structural integrity of the utensils.
Plan regular visual checks for deep bite marks, discoloration, or peeling that could harbor bacteria or pose choking hazards. Regularly examine the utensils before every meal. In humid environments, tiny crevices caused by wear can trap moisture and food particles, leading to mold or bacterial growth. Discard any utensil showing signs of structural damage to ensure your baby’s safety.
Matching Utensils to Developmental Milestones
As your baby grows, their motor skills and feeding abilities will change rapidly. Matching the style of the training spoon and fork to your baby’s current developmental stage ensures they have the right level of support at every step of their feeding journey.
During the early self-feeding stage, focus on spoons with very short, thick handles designed for a full-fist grip. When babies first start solids around six months, they lack the coordination to scoop food. At this stage, pre-spoons or flat starter spoons with textured heads are highly effective. These designs allow food, such as smooth rice porridge or mashed vegetables, to cling to the spoon regardless of how the baby dips it, accommodating their natural full-fist palmar grasp.
As your baby transitions to the developing pincer grasp stage, look for slightly longer handles with subtle contours to encourage finger placement. As babies begin to use their thumb and index finger to pick up smaller objects, their grip on utensils evolves. Transitioning to slightly longer handles with ergonomic curves helps them move away from a fist grip and start holding the utensil closer to the neck, preparing them for mature cutlery use.
When introducing the fork, wait until the baby can successfully scoop with a spoon and has teeth to manage soft, forkable foods. A training fork is typically introduced after the baby has gained basic control over a spoon. Wait until your baby can consistently bring a loaded spoon to their mouth and has begun showing interest in picking up solid food pieces. Ensure they have the oral motor skills and teeth necessary to chew the soft, solid foods that are suitable for fork feeding.
Match the utensil to the meal to help your baby practice different feeding techniques. For runny purees, smooth porridges, or mashed squash, a shallow spoon with a soft silicone edge is ideal. For thicker foods, soft fruit chunks like ripe mangoes, or small pieces of well-cooked vegetables, a blunt training fork helps them practice the stabbing motion safely without sliding off the plate.
Shopping Strategies in the Philippines
Finding the right training utensils involves knowing where to shop and how to evaluate products effectively, whether you are browsing in a physical store or looking through online listings.
Use in-person shopping at physical baby stores and supermarkets to test the handle grip, check the actual size of the spoon bowl, and feel the material texture. Visiting physical stores allows you to physically assess the utensils. You can test the flexibility of the silicone, feel the weight of the handle, and visually confirm if the spoon bowl is small enough for your baby’s mouth. This hands-on evaluation helps avoid buying items that are too large or heavy for your baby.
When shopping on online marketplaces, filter for official brand stores or authorized mother and baby retailers to ensure authenticity. This reduces the risk of purchasing counterfeit products made from sub-standard materials. Look for verification badges or official store labels on the seller’s profile to ensure you are buying genuine, food-safe items.
Rely on buyer-uploaded photos to gauge true size and color, and read reviews specifically mentioning durability and ease of cleaning. Take time to read customer reviews, focusing on those that include real-life images and videos. These provide a better sense of the product’s actual size and texture compared to polished marketing photos. Look for feedback regarding how well the utensils hold up after multiple sterilization cycles and whether they retain food odors.
Verify the seller’s policy on returning defective items or incorrect sizes before checking out. Before finalizing your purchase online, review the return and exchange policies. Ensure there is a clear process for returning items that arrive damaged, have manufacturing defects, or do not match the product description. This precaution protects your budget and ensures you receive only high-quality, safe feeding tools.
When to Replace or Upgrade Training Utensils
Training utensils are not designed to last forever. Recognizing the signs that indicate it is time to replace or upgrade your baby’s spoon and fork helps maintain hygiene and supports their ongoing developmental progress.
Discard items with deep teeth marks, torn silicone, or loose parts that cannot be thoroughly cleaned. No baby utensil lasts indefinitely, especially during the teething phase when babies tend to chew on their spoons. Damaged areas are difficult to clean thoroughly and can harbor harmful bacteria, while loose parts pose an immediate choking risk. Regular inspections help you catch these issues early.
Observe if the baby struggles to scoop effectively or drops food frequently due to outgrowing the utensil size. If you notice your baby becoming frustrated during meals, they may have outgrown their current set. A spoon bowl that is too small will not hold enough food for an older baby’s appetite, while a handle that is too short can limit their reach as they try to feed themselves from deeper bowls.
Look for cues like a refined pincer grasp and the ability to eat a wider variety of family foods to introduce longer, standard-sized cutlery. As your child’s motor skills refine and they begin eating a wider variety of family meals, it is time to transition to toddler-sized cutlery. Transitioning to longer, stainless steel utensils with rounded plastic handles helps them mimic adult eating habits safely and comfortably.
Frequently Asked Questions (FAQ)
When should I introduce a fork alongside the spoon?
Forks are typically introduced after the baby masters scooping with a spoon and has enough teeth to bite soft foods. This transition usually occurs around 12 months of age, though it depends on individual motor development. Ensure your baby can sit upright independently, has the coordination to target food pieces, and has developed the oral motor skills to chew soft, solid foods safely. Always supervise your baby closely during meals and start with blunt, rounded tines and soft, easily pierceable foods like banana slices or well-cooked squash.
How do I properly clean and maintain silicone training spoons?
To clean silicone training spoons, always start by checking the manufacturer’s care label for specific temperature limits and dishwasher safety. Wash the utensils promptly after meals using warm, soapy water and a mild, fragrance-free dish soap to prevent food odors from clinging to the silicone. Use a soft bottle brush to clean any textured grips or crevices where food residue might hide. Rinse thoroughly with clean water, and allow the utensils to air-dry completely in a well-ventilated area to prevent moisture buildup and mold growth, which is especially important in humid tropical climates.

Community discussion
Share your experience or ask a question. Comments are reviewed before publication.