
Introducing solid foods to your baby is an exciting milestone, but the transition requires more than just preparing the perfect puree. Matching the right spoon to your baby’s developmental stage is essential for a smooth, tear-free transition to solids. Using a spoon that fits their current oral motor skills and grip strength helps prevent gagging, encourages proper swallowing, and fosters a positive relationship with food. By understanding how your baby’s mouth and hands develop, you can confidently select utensils that support their growth from their very first bite to independent self-feeding.
Understanding Your Baby's Feeding Stages and Spoon Needs
Before purchasing any feeding utensils, observe your baby’s physical readiness rather than relying solely on age guidelines. Babies typically show readiness for solid foods when they can sit upright with minimal support, maintain excellent head control, and show active interest in meals. Another critical developmental sign is the gradual disappearance of the tongue-thrust reflex, which naturally pushes solid objects out of the mouth. Observing these milestones ensures that your baby’s oral motor skills are mature enough to handle spoon-feeding.
As your baby grows, their oral motor skills and hand-eye coordination undergo rapid changes. In the early months, their primary oral movement is a forward-and-backward sucking motion, which requires a highly flexible, soft utensil. Over time, they develop the ability to use their upper lip to clear food off a spoon, move food from side to side with their tongue, and eventually chew chunkier textures. Simultaneously, their grip transitions from a primitive palmar grasp to a more refined pincer grasp, allowing them to hold and manipulate smaller items.
Products mentioned in this guide
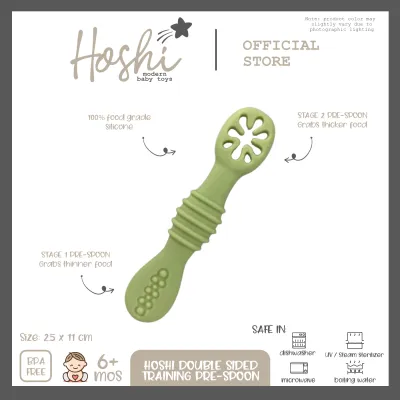
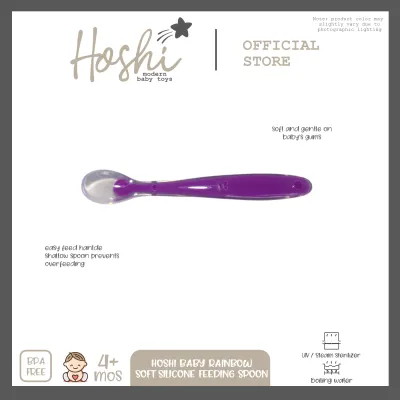
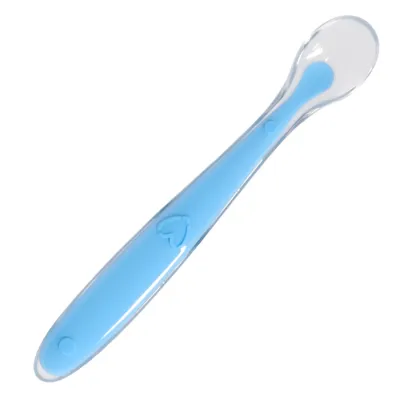
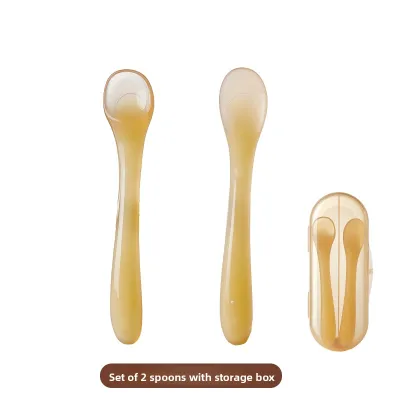
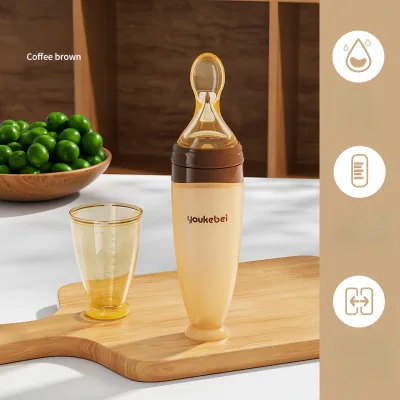
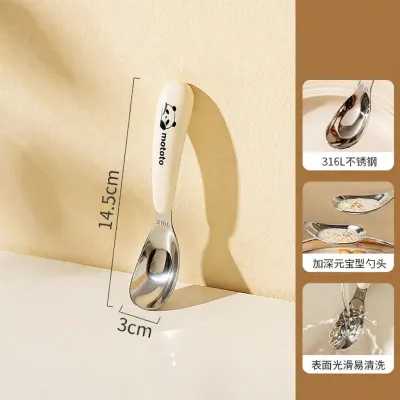
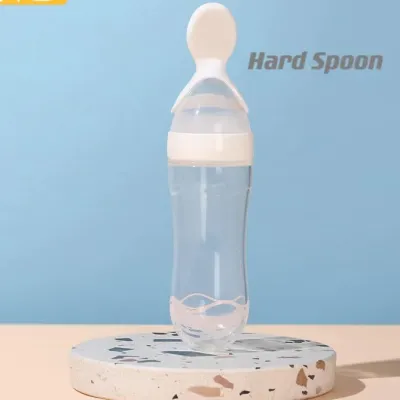
Prices are valid at publication and may change. Please refer to the product page for the latest price.
Using an inappropriate spoon during these transitions can hinder progress and cause distress. A spoon that is too deep can trap food, making it difficult for a beginner to clear the bowl, while a spoon that is too wide can trigger a sensitive gag reflex. Hard materials, such as standard metal, can also bruise sensitive, teething gums, leading to food refusal. Selecting a spoon designed specifically for their current stage helps minimize these challenges, turning mealtime into a comfortable learning experience.
Stage 1: First Purees and Early Tastes (Around 4 to 6 Months)
When introducing your baby’s first tastes of smooth, runny purees—such as blended local papaya, squash, or thin lugaw—the ideal spoon must prioritize comfort. For this initial stage, look for a spoon with an extremely shallow bowl and a narrow width. A shallow bowl ensures that the tiny portion of puree sits right on the surface, allowing your baby to easily clear the food using only their upper lip. The narrow shape fits comfortably within their small oral cavity without stretching their lips or touching the back of their throat, which helps prevent gagging.

When shopping for these early utensils, carefully inspect the product packaging for soft, flexible materials. Food-grade silicone coatings are highly recommended for beginners because they bend easily and feel gentle against tender, swollen gums that may be preparing for teething. Some manufacturers offer temperature-sensitive spoons that change color when food is too hot. If you choose these, verify the manufacturer’s instructions to see how the color indicator works and check that the material remains stable when exposed to warm temperatures.
Your feeding technique during this stage is just as important as the spoon itself. To encourage safe swallowing, dip the tip of the spoon into the puree, gathering a very small amount, and hold it horizontally at the level of your baby’s lips. Allow your baby to notice the food, open their mouth voluntarily, and draw the puree in. Avoid dumping the food into their mouth or scraping the spoon against their upper gums, as this can cause discomfort. Let them set the pace, keeping sessions short and positive.
Stage 2: Thicker Textures and Mashed Foods (Around 6 to 9 Months)
As your baby approaches the middle of their first year, their oral motor skills will advance to handling thicker, mashed consistencies like mashed saba bananas, avocados, or thicker vegetable purees. At this stage, you can transition to a spoon with a slightly deeper and wider bowl. This design accommodates larger, more cohesive bites of food that do not slip off a flat surface as easily. The deeper bowl also encourages your baby to practice active lip closure, as they must use their lips more deliberately to draw the thicker food out of the spoon.
Because meals become larger and feeding sessions last longer during this stage, caregiver comfort becomes a key factor. Look for spoons with long, ergonomically designed handles that feature non-slip grips. A longer handle allows you to reach the bottom of deep baby food jars or blending containers without getting food on your fingers. It also gives you better leverage and control when guiding the spoon toward an enthusiastic baby who may be eager to reach for the food.
During this period, you will likely observe your baby reaching out to grab the spoon while you are feeding them. This is a natural sign of developing curiosity and hand-eye coordination. To encourage this milestone without creating a chaotic mealtime, you can practice the “two-spoon method.” Give your baby a clean, empty spoon to hold and explore while you use a second spoon to deliver the actual food. This keeps their hands occupied, builds their grip strength, and allows them to practice bringing a utensil to their mouth in a low-pressure way.
Stage 3: Early Self-Feeding and Chunkier Meals (9 to 12+ Months)
Between nine and twelve months, many babies transition to chunkier meals and show a strong desire to feed themselves independently. Spoons designed for this stage look significantly different from early caregiver-led utensils. Self-feeding spoons typically feature short, thick, and textured handles that are easy for a baby’s small hands to grasp using a palmar grip. Many also feature contoured or angled bowls, which help guide food into the mouth even if the baby has not yet mastered the wrist rotation required to keep a standard spoon level.
When selecting self-feeding utensils, it is vital to read the product packaging for age-appropriateness and safety warnings. Look for spoons that include built-in safety shields or collars, which prevent the baby from inserting the spoon too far into their mouth and choking. Ensure the packaging explicitly states that the product is free from small, detachable parts that could pose a choking hazard if they break loose during vigorous chewing.
As your baby’s coordination improves and they successfully navigate chunkier textures, you can gradually introduce toddler-sized utensils. These transition spoons often feature slightly firmer materials, such as high-quality plastics or stainless steel tips with rounded, blunt edges, paired with easy-grip silicone handles. Transitioning away from soft silicone baby spoons is appropriate when your baby can consistently scoop food, bring it to their mouth without spilling, and chew a variety of table foods safely.
Key Safety and Material Checks Before Buying
Before purchasing any baby spoon, conducting a thorough material and safety check is essential to protect your child’s health. Always read the product labels to verify that the utensils are made from non-toxic, food-grade materials. Look for clear labels indicating that the product is free from Bisphenol A (BPA), phthalates, lead, and PVC. If the spoon is made of silicone, ensure it is labeled as 100% food-grade or platinum-grade silicone, which does not leach chemicals or retain strong odors over time.
Next, physically inspect the design of the spoon for potential structural hazards. Run your fingers along the edges of the bowl and handle to ensure there are no sharp plastic seams, rough spots, or manufacturing defects that could scratch your baby’s mouth. Avoid spoons with complex, multi-piece designs that have deep crevices, weak joints, or glued-on decorative elements. These joints can weaken over time, creating small parts that can break off and present a choking hazard, or trapping food particles that foster bacterial growth.
Finally, verify the manufacturer’s care instructions regarding heat resistance and cleaning compatibility. In tropical climates where high humidity can encourage microbial growth, being able to sanitize utensils easily is highly beneficial. Check whether the spoons are dishwasher-safe, microwave-safe, or compatible with steam sterilizers. Never assume a plastic or silicone spoon can withstand high heat; always follow the specific temperature limits printed on the packaging to prevent warping, melting, or material degradation.
How to Clean, Store, and Inspect Baby Spoons
Proper hygiene and storage are critical to maintaining the safety and longevity of your baby’s spoons, especially in warm, humid environments. After every meal, wash the spoons immediately in warm, soapy water using a mild, baby-safe detergent and a soft sponge. Avoid using abrasive scrubbing pads or harsh chemical cleaners, which can scratch plastic and silicone surfaces, creating microscopic grooves where bacteria can hide. If the manufacturer’s instructions allow, sterilize the spoons periodically using boiling water, steam, or a dedicated UV sterilizer, adhering strictly to the recommended exposure times.
Storage practices must also account for environmental factors like humidity, which can promote mold and mildew growth. After washing, dry the spoons thoroughly with a clean cloth or let them air-dry completely on a clean, elevated drying rack in a well-ventilated area before storing them. Store the dry utensils in a clean, closed drawer or container away from direct sunlight, high heat sources, and household pests. Avoid storing damp utensils in airtight containers, as trapped moisture is a prime breeding ground for mold.
Routine inspections are necessary to ensure the spoons remain safe for continued use. Before every feeding, examine each spoon closely under good lighting. Flex the silicone tips and pull gently on the handles to check for structural integrity. Look for visible signs of wear, such as deep bite marks, tears, cracks, discoloration, or a sticky texture, which indicates that the material is breaking down. If you detect any damage, warping, or persistent odors that do not wash away, stop using the spoon immediately and discard it safely.
Frequently Asked Questions (FAQ)
Can I use a regular metal teaspoon for my baby's first purees?
It is generally best to avoid using standard metal teaspoons when your baby is first learning to eat solids. Metal is highly rigid and conducts heat quickly, which can easily bruise your baby’s sensitive, developing gums or accidentally burn their mouth if the food is slightly warm. Additionally, standard household teaspoons often have bowls that are too deep and wide for a young baby’s mouth, making it difficult for them to clear the food and increasing the risk of gagging. For a safe and comfortable start, choose soft-tipped silicone or plastic spoons designed specifically for infants, and consult your pediatrician or a pediatric feeding specialist for personalized guidance.
Are color-changing heat-sensitive spoons necessary?
While color-changing, heat-sensitive spoons can be a convenient visual aid, they are not strictly necessary for safe feeding. The most reliable way to ensure your baby’s food is at a safe temperature is to stir the puree thoroughly to eliminate hot spots, place a tiny drop on the inside of your wrist, and test it yourself. If you do use heat-sensitive spoons, keep in mind that they require careful maintenance. The temperature-sensitive pigments can degrade over time if exposed to extreme heat, direct sunlight, or harsh dishwashing cycles, so always check the manufacturer’s care label to preserve their functionality.

Community discussion
Share your experience or ask a question. Comments are reviewed before publication.