
Transitioning your toddler from a traditional nipple bottle or a spout cup to a baby bottle with straw is a significant milestone in their weaning journey. This transition supports healthy oral motor development, helping your child learn to coordinate their lips, tongue, and jaw in a way that differs from sucking on a standard bottle. Choosing the right baby bottle with straw requires a careful balance of material safety, straw mechanics, leak prevention, and ease of cleaning. By focusing on these core dimensions, you can find a bottle that not only keeps your toddler hydrated but also fits seamlessly into your daily routine.
As your child grows, their hydration needs change, especially in warm, tropical climates where active play can quickly lead to thirst. A straw bottle encourages independent drinking and helps bridge the gap between babyhood and preschool years. However, because the market is filled with various designs, materials, and valve types, finding a suitable match requires looking closely at how each feature aligns with your child’s developmental stage and your household’s cleaning habits.
Recognizing Readiness for a Straw Transition
Before purchasing a baby bottle with straw, it is helpful to observe your toddler for specific developmental signs that indicate they are ready for this new drinking method. Unlike traditional bottles where a child tilts their head back, straw drinking requires the child to keep their head upright or slightly forward while drawing liquid upward. Look for signs of strong hand-eye coordination, such as your toddler easily grasping objects and bringing them directly to their mouth without hesitation.
Products mentioned in this guide
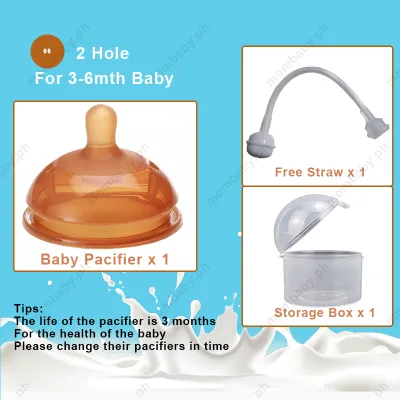
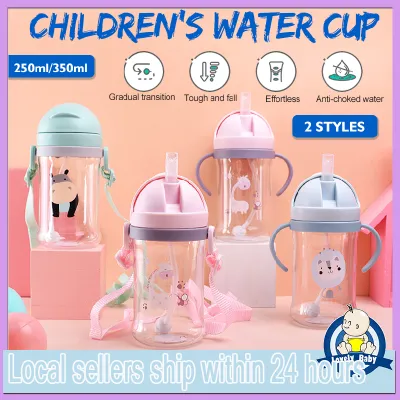
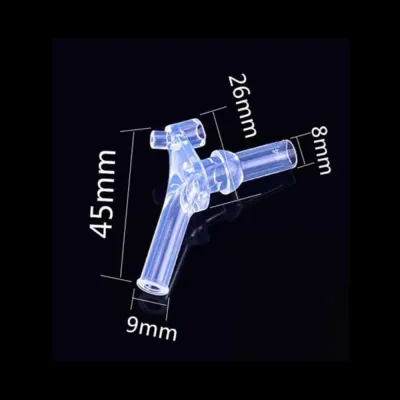
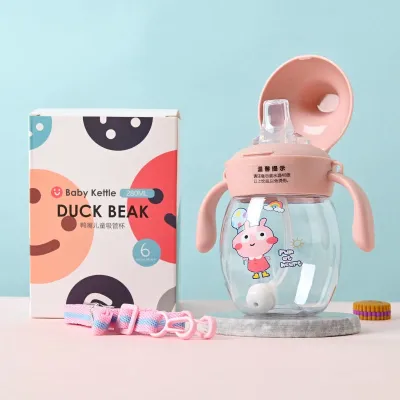
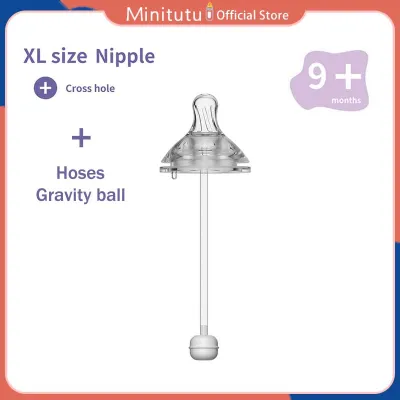
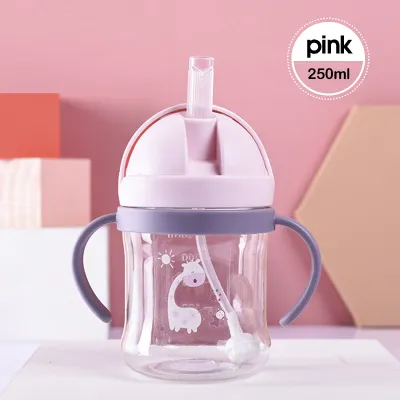
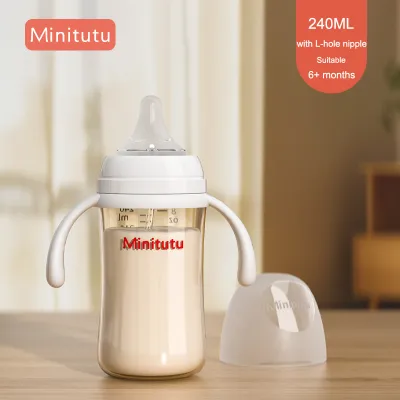
Prices are valid at publication and may change. Please refer to the product page for the latest price.
Oral motor readiness is another critical factor to observe. If your toddler can swallow purees or soft foods smoothly, shows curiosity when you drink from a straw, or attempts to sip from your cup, they may have the tongue control needed for a straw bottle. Most pediatric guidelines suggest introducing a straw cup around nine to twelve months of age as part of the weaning process, though some children may take longer to master the coordination of sucking, swallowing, and breathing simultaneously.
If your toddler initially rejects the straw bottle, bites down on the straw without sipping, or becomes frustrated, it is best to pause and try again a few weeks later. Forcing the transition can create negative associations with the bottle. You can encourage them during this learning phase by using a straw to drop a tiny amount of water onto their lips, helping them understand that liquid comes out of the tube, or by choosing a highly responsive, soft silicone straw that requires minimal suction to deliver liquid.
Essential Features to Evaluate in a Straw Bottle
Selecting a suitable baby bottle with straw involves evaluating how several key components work together to create a safe, functional, and durable drinking system. The bottle is not just a container; it is an interactive tool that your toddler will drop, shake, and carry throughout the day. To make an informed choice, you must examine the material composition, the specific mechanics of the straw, and the design of the sealing lid to ensure they meet your family’s daily needs.

Material Safety and Durability
When evaluating materials, your first step should always be checking the manufacturer’s packaging and labels for safety certifications. Look for explicit labels indicating that the bottle, lid, and straw are free from Bisphenol A (BPA) and Bisphenol S (BPS). Because these bottles will hold milk, water, or juices, verifying that all components are made from food-grade materials—such as food-grade silicone for the straw and high-quality plastics, stainless steel, or borosilicate glass for the bottle body—is essential for long-term safety.
The choice of material directly impacts the bottle’s durability, weight, and suitability for tropical environments. Lightweight plastics like polypropylene (PP) or copolyester (Tritan) are highly drop-resistant and easy for small hands to carry, though they can sometimes retain odors or become cloudy over time if not washed thoroughly. Stainless steel offers excellent durability and can keep drinks cool during hot afternoons, but it is heavier and prevents you from visually checking how much liquid your child has consumed. Glass is highly hygienic and odor-resistant, but even tempered glass carries a risk of breaking when dropped on hard tiled floors.
Regularly inspect the bottle for visual and tactile signs of degradation. Over time, plastic bottles can develop fine scratches where bacteria can accumulate, while silicone straws may become sticky, discolored, or show small tears from teething bites. If you notice any cracks, deep scratches, persistent odors, or changes in the texture of the silicone, replace those components immediately to maintain a hygienic drinking environment.
Straw Mechanism and Flow Control
The design of the straw itself plays a major role in how easily your toddler can drink and whether they will experience choking or coughing. Standard open straws allow liquid to flow freely with very little suction, which is excellent for older toddlers but can cause spills if the bottle is tipped over. Bite-valve straws require the child to pinch or bite the silicone tip to open the pathway, making them highly spill-resistant but sometimes frustrating for younger babies who have not yet mastered this specific oral coordination.
Weighted straws are particularly beneficial for infants and younger toddlers transitioning from traditional bottles. These straws feature a small, food-grade weight at the bottom of a flexible silicone tube, ensuring the end of the straw remains submerged in the liquid regardless of the angle at which the child holds the bottle. This design allows your toddler to drink comfortably while sitting upright, reclining, or tilting the bottle, minimizing the amount of air they swallow and reducing potential gas or colic.
When choosing a bottle, consider whether the manufacturer offers replaceable straw parts or if the straw is integrated into a single, non-removable lid assembly. Removable and replaceable straws are highly practical, as they allow you to swap out worn or chewed straws without buying an entirely new bottle. Ensure the flow rate of the straw matches your child’s sucking strength; a straw that lets too much liquid through at once can overwhelm a younger toddler, while a straw with too tight a valve can cause fatigue and discourage hydration.
Leak-Proof and Spill-Proof Designs
A reliable leak-proof design is essential for preventing messy spills in your diaper bag, car, or living room. Look for bottles that feature robust sealing mechanisms, such as vacuum seals, sliding covers, or flip-top lids that physically fold the silicone straw down when closed. This folding action pinches the straw shut, preventing liquid from escaping even if the bottle is turned upside down or squeezed during travel.
While completely spill-proof valves are highly effective at keeping your home dry, they often require more suction force from the child. This trade-off is important to consider: a highly restrictive valve might prevent leaks entirely but could make it too difficult for a younger toddler to get a satisfying drink, leading to frustration. Conversely, an easier-flowing straw might drip slightly when shaken vigorously but will encourage your child to drink more water.
To verify the leak resistance of a new bottle before using it outdoors, conduct a simple at-home test. Fill the bottle with water to its recommended limit, close the lid securely, and gently shake it over a sink. Turn the bottle upside down, lay it on its side on a dry towel for a few minutes, and observe if any water seeps through the collar, the air vent, or the straw tip. This quick check ensures you can confidently pack the bottle in your bag without worrying about damp gear.
Cleaning Requirements and Hygiene Maintenance
In warm and humid tropical climates, maintaining strict hygiene for your toddler’s drinking gear is critical. Moisture and milk residues left in small crevices can quickly lead to the growth of mold and bacteria. Before purchasing a baby bottle with straw, carefully review the manufacturer’s cleaning instructions to understand the level of maintenance required. Check whether all parts are labeled as dishwasher-safe or if they require dedicated hand washing to prevent warping or damage.
Straw bottles naturally have more components than standard bottles, meaning there are more hidden areas where residue can hide. Pay close attention to the underside of the lid, the connection point where the straw meets the valve, and the interior of the straw tube itself. To clean these areas effectively, you will need a specialized, ultra-thin straw cleaning brush that can reach all the way through the silicone tube to scrub away stubborn milk film or juice pulp.
Establish a consistent daily cleaning routine to keep the bottle hygienic. Disassemble all parts completely after every use; leaving the straw attached to the lid during washing can trap soapy water or moisture inside the joints. Wash all components in warm, soapy water, rinse them thoroughly, and allow them to air dry completely in a well-ventilated area before reassembling. For deep cleaning and sterilization, always follow the manufacturer’s specific guidelines regarding boiling, steam sterilizing, or UV sterilizing, as excessive heat can degrade certain plastics and silicone valves prematurely.
Ergonomics and Age Appropriateness
The physical design of the bottle should support your toddler’s developing motor skills and encourage independent drinking. Consider the overall shape and weight of the bottle when filled with liquid. For younger toddlers who are just learning to hold their own drinks, bottles with contoured bodies or textured surfaces are much easier to grip. Removable, easy-to-hold handles are also highly beneficial, as they allow small hands to secure a firm grip and can be taken off as your child’s coordination improves.
Capacity is another key factor to align with your child’s age and hydration needs. A bottle that is too large can be heavy and unwieldy for a small child to lift, while a bottle that is too small will require constant refilling throughout the day. For infants and younger toddlers, a capacity of around 150 to 240 milliliters is usually sufficient and manageable. Older, more active toddlers may benefit from larger capacities of 300 milliliters or more to keep them hydrated during outdoor play.
Do not underestimate the impact of visual and tactile appeal on your child’s willingness to use the bottle. Bright colors, friendly patterns, or a clear bottle body that lets them see the liquid moving up the straw can make the transition much more engaging. A clear bottle also serves a practical purpose for parents, allowing you to monitor exactly how much liquid your toddler has consumed at a glance.
Building Your Shortlist: Pre-Purchase Verification
Before finalizing your purchase, take a few practical steps to ensure the bottle you choose is a sustainable, long-term investment for your family. Start by verifying the local availability and cost of replacement parts. Because toddlers often chew on silicone straws, you will likely need to replace the straw assembly several times before your child outgrows the bottle. Check local baby boutiques or trusted online marketplaces to confirm that replacement straws and valves are readily available in ₱ and do not cost almost as much as a brand-new bottle.
Next, cross-reference user reviews on local parenting forums and retail sites, looking specifically for recurring complaints about leaking, mold buildup, or fragile parts. Pay attention to how other parents describe the ease of assembly; a bottle with too many tiny, complex parts can quickly become a chore to wash and reassemble multiple times a day.
Finally, confirm the retailer’s return or exchange policy before checking out. Every toddler has unique oral preferences, and despite your careful research, your child might simply refuse to drink from a specific straw design. Knowing you can return or exchange an unused bottle provides peace of mind and ensures you can find the right hydration tool without unnecessary expense.
Frequently Asked Questions (FAQ)
Can I put hot liquids in a toddler straw bottle?
It is generally not recommended to put hot liquids in a toddler straw bottle. Always check the manufacturer’s temperature guidelines, as high heat can damage the silicone straw, warp plastic components, or compromise the bottle’s seals. Furthermore, pouring warm or hot liquids into a sealed, spill-proof bottle can cause air pressure to build up inside. When the lid is opened or the straw is released, this pressure can force the hot liquid to spray out of the straw, posing a significant burn risk to your child. Always test the temperature of any liquid on the inside of your wrist to ensure it is lukewarm or cool before offering it to your toddler.
How often should I replace the straw and bottle?
You should inspect your toddler’s straw bottle daily for signs of wear and tear. Silicone straws generally require replacement every two to three months, or sooner if you observe bite marks, tears, discoloration, or a sticky texture that does not wash away. The main bottle body can last much longer, but plastic bottles should be retired if they develop deep scratches, cracks, or persistent odors. If you are using a stainless steel or glass bottle, you can continue using the main body indefinitely, provided there are no dents, chips, or structural damage, while simply replacing the silicone straw and lid seals as recommended by the manufacturer.

Community discussion
Share your experience or ask a question. Comments are reviewed before publication.