
Choosing the right storage setup for your baby’s feeding gear is highly important during weaning. A safe and hygienic baby bottles storage box must feature verified food-grade, BPA-free materials, a dust-proof lid with balanced ventilation, an elevated drainage tray to prevent water pooling, and a fully detachable design for easy cleaning. As your baby transitions to weaning, storing a mix of bottles, training cups, and small utensils requires a container that actively resists mold growth—especially in warm, humid climates—while keeping everyday feeding essentials organized and free from household dust.
Maintaining clean feeding gear is a continuous task that directly impacts your baby’s health. During weaning, infants are introduced to new foods, and their immune systems are still developing, making them sensitive to bacteria and mold. A dedicated storage box acts as a physical barrier against environmental contaminants, ensuring that sterilized items remain clean until their next use. By focusing on practical design and material safety, you can establish a reliable kitchen workflow that keeps your baby’s weaning essentials hygienic.
Quick Answer: Essential Features for a Hygienic Storage Box
When selecting a storage box for your baby’s bottles and weaning utensils, prioritizing hygiene and ease of use will save time and protect your child’s health. A high-quality storage container should serve as a clean microenvironment within your kitchen.
Products mentioned in this guide
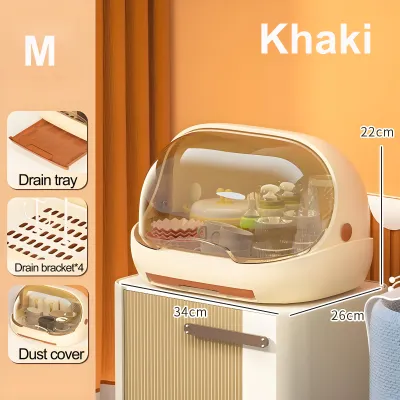
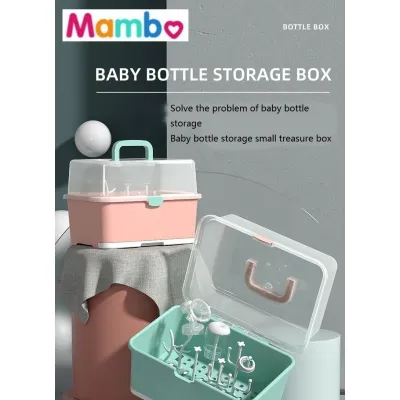
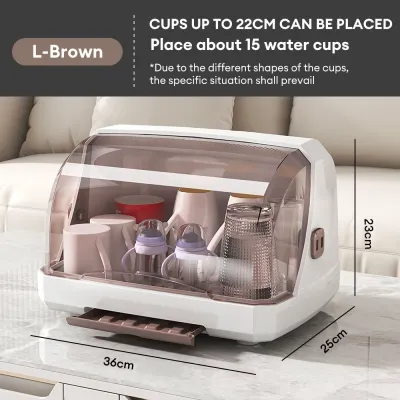
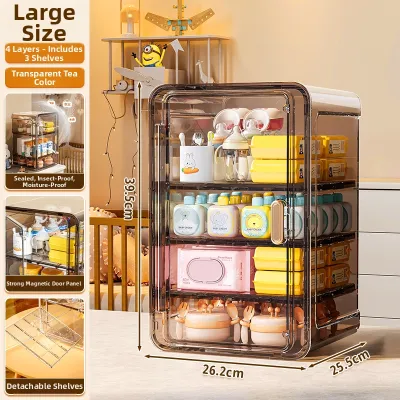
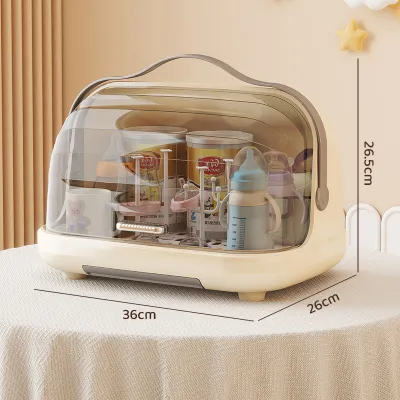
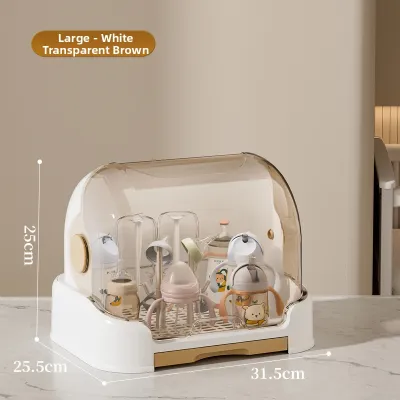
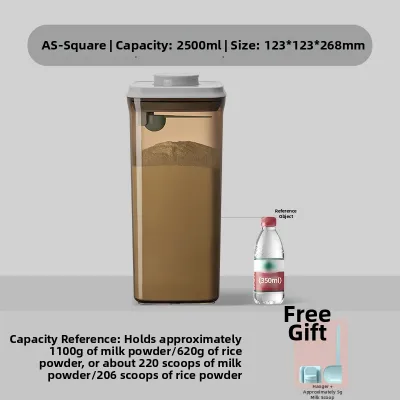
Prices are valid at publication and may change. Please refer to the product page for the latest price.
To ensure you choose a safe and practical model, look for these essential features on the product packaging or manufacturer specifications:
- Verified Food-Grade Materials: Look for clear labels indicating BPA-free, phthalate-free, and food-safe plastics, such as Polypropylene (PP) or PPSU.
- Dust-Proof Lid with Ventilation: A secure cover keeps out household dust and insects, while subtle ventilation slots prevent stagnant, humid air from trapping moisture inside.
- Elevated Drainage Grid: A removable raised tray at the bottom keeps clean items elevated, preventing them from sitting in pooled water.
- Detachable Components: The entire box, including the lid, drainage grid, and water collection tray, should separate easily for thorough washing.
- Sufficient Interior Height: The box must be tall enough to accommodate upright training cups and weaning spoons without them touching the top lid.
Material Safety: What to Check on the Label
The materials used to manufacture a baby bottles storage box must be completely safe for contact with items that go directly into your baby’s mouth. Because these containers hold damp items and may sit near heat sources, verifying the chemical safety of the plastic is your first line of defense.

Always read the manufacturer’s specifications and official labels rather than relying on generic marketing claims. Look for recognized food-safe symbols, such as the international “glass and fork” icon or specific plastic resin identification codes. Polypropylene (PP), marked with a number 5 inside a triangle, is a durable, food-safe plastic commonly used for baby products. Avoid containers that do not clearly state their material composition.
Verify that the product is explicitly certified as BPA-free and phthalate-free. Bisphenol A (BPA) and phthalates are chemical plasticizers that can disrupt endocrine functions, and their absence is critical for any container housing infant feeding gear. Cross-reference the packaging for official testing standards or manufacturer declarations.
Check the stated temperature limits on the product label, especially if you plan to place the storage box near steam sterilizers, UV sterilizers, or warm kitchen appliances. Some plastics can warp or degrade when exposed to high temperatures or UV light. Knowing the heat resistance of the container ensures you do not accidentally damage it during routine kitchen cleaning.
Regularly inspect your existing storage containers for warning signs of material degradation. Over time, exposure to sunlight, heat, and dishwashing can cause plastics to become cloudy, discolored, sticky, or brittle. If you notice any of these changes, or if the box retains a persistent sour odor, replace the container immediately.
Moisture and Dust Control: Preventing Mold and Contamination
In tropical climates like the Philippines, high humidity levels accelerate the growth of mold and bacteria on damp surfaces. A storage box must balance two conflicting needs: sealing out external dust and allowing internal moisture to escape.
Evaluate the design of the lid seal carefully. While a tight-fitting lid is excellent for keeping out ants, flies, and airborne dust, a completely airtight container can trap ambient humidity and residual moisture. Look for storage boxes that feature a secure cover but incorporate small, covered ventilation vents. This design allows air to circulate naturally while preventing dust from settling on the clean items inside.
An elevated drainage grid or removable tray at the base of the box is essential for moisture control. When you place clean, washed bottles or weaning spoons inside, any remaining water droplets should drain downward through the grid. This keeps the feeding essentials elevated and dry, preventing them from sitting in a pool of stagnant water where bacteria can rapidly multiply.
Examine the interior walls of the storage box to ensure they are completely smooth. Complex internal structures, decorative ridges, or textured plastic can trap water droplets and make it difficult for moisture to slide down into the drainage tray. Smooth walls allow the container to dry more quickly and leave fewer places for mold to take root.
Understanding the balance between a protected environment and air circulation is key to preventing contamination. Even with a ventilated box, placing soaking wet items inside will inevitably raise the humidity to unsafe levels. The storage box should be treated as a clean holding area for dry or nearly dry items, rather than a primary drying rack for soaking wet gear.
Layout and Capacity: Accommodating Weaning Essentials
As your baby transitions from exclusive milk feeding to solid foods, the variety of items you need to store will expand significantly. Your storage box must be versatile enough to hold a diverse range of shapes and sizes.
Before purchasing, measure the interior height of the storage box. Weaning essentials often include taller items such as straw cups, training cups with wide handles, and long-handled silicone feeding spoons. These items must stand upright without their tops or mouthpieces touching the underside of the lid, which can transfer dust or condensation back onto clean surfaces.
Look for a box that offers adjustable dividers, removable pegs, or dedicated small compartments. Pegs are incredibly useful for keeping baby bottles and training cups upright, preventing them from tipping over and rolling around. Small, removable baskets or compartments keep tiny weaning accessories—such as bottle collars, pacifiers, and small spoons—organized and easily accessible without cluttering the main storage area.
Avoid overcrowding the storage box. Packing too many bottles, bowls, and cups into a tight space limits air circulation, which slows down the drying process and can trap moisture between touching surfaces. Overcrowding also increases the risk of friction, which can scratch delicate silicone bottle nipples or soft training cup spouts, creating tiny crevices where bacteria can hide.
Finally, measure your available kitchen counter or shelf space to ensure the chosen box fits your layout. A storage box that is too large can crowd your food preparation area, making it difficult to maintain a clean and organized workspace. Choose a size that comfortably holds a single day’s worth of feeding gear while fitting neatly within your kitchen’s designated clean zone.
Cleaning and Maintenance: Keeping the Box Itself Hygienic
A storage box designed to keep baby items clean must be exceptionally easy to clean itself. If the container is difficult to wash, it will quickly accumulate dust, hard water stains, and microscopic milk residue.
Prioritize designs with fully detachable components. The drainage grid, the water collection tray, the main body, and the lid should all separate easily without requiring special tools. Being able to wash each part individually ensures that you can reach every surface, corner, and edge with a standard sponge and mild dishwashing liquid.
Avoid storage boxes with complex hinges, tight corners, or deep crevices. These design features are notorious for trapping moisture and organic residue, making them prime breeding grounds for mold. Simple, lift-off lids or smooth, sliding covers are much easier to keep clean and dry than intricate latching mechanisms.
Establish a consistent routine for washing and thoroughly drying the storage box itself. At least once a week, empty all baby items from the box, disassemble the components, and wash them thoroughly. Allow all parts of the box to air-dry completely in a clean, well-ventilated area before reassembling them and restocking your clean weaning essentials.
Pay close attention to observable signs that the storage box requires deep cleaning or replacement. If you notice a slimy film on the drainage tray, white mineral buildup from hard water, or dark spots in the corners, perform an immediate deep clean. If the plastic becomes deeply scratched, cracked, or permanently discolored, replace the box to ensure your baby’s feeding gear remains truly hygienic.
Do You Need a Dedicated Box? Evaluating Your Current Setup
Before investing ₱300 to over ₱1,000 on a specialized baby bottles storage box, take a moment to evaluate your current kitchen setup and daily workflow. You may find that simple adjustments to your existing routine can meet your hygiene needs, or that a dedicated box is indeed a necessary upgrade.
Identify any red flags in your current storage method. If your clean baby bottles and weaning spoons currently sit on an open dish rack next to the kitchen sink, they are constantly exposed to airborne dust, cooking grease, splattering dishwater, and household insects. If you notice that items take a long time to dry or feel slightly dusty before use, your current setup is not providing adequate protection.
In some cases, a standard, clean, and covered household container can meet your basic hygiene needs. If you have a food-grade plastic container with a loose-fitting lid, you can repurpose it by placing a clean, dry silicone drying mat at the bottom. However, you must commit to washing and drying this setup daily, as it lacks the specialized drainage trays and pegs of a dedicated baby storage box.
Specialized baby storage boxes offer significant convenience by combining a dust cover, an elevated drainage grid, and organizing pegs into a single, compact unit. This integration simplifies your daily routine, making it easier for caregivers to maintain high hygiene standards. Base your decision to upgrade on the observable hygiene risks in your kitchen and your practical daily needs rather than marketing trends.
Frequently Asked Questions (FAQ)
Can I store wet bottles directly in a closed storage box?
No, you should never store wet bottles or weaning utensils directly inside a closed storage box. Trapping moisture inside an enclosed space creates a highly humid environment that promotes the rapid growth of mold, mildew, and bacteria. Always allow your baby’s bottles, cups, and spoons to air-dry completely on an open, clean drying rack in a well-ventilated area before transferring them to the storage box for clean, dust-free storage.
How often should I wash the baby bottle storage box?
You should wash the storage box and empty its drainage tray at least once a week as a baseline routine. In warm, humid environments, or if you notice water accumulating in the bottom tray, increase this frequency to every two to three days. Always use warm water and a mild, baby-safe dishwashing liquid, and ensure every component of the box is completely dry before placing clean feeding items back inside.

Community discussion
Share your experience or ask a question. Comments are reviewed before publication.