
The best milk storage containers for weaning babies are those that combine certified food-safe materials, reliable airtight seals, and clear volume markings to handle both freezing and thawing. As your baby transitions to solid foods, your storage needs shift from simple single-use breastmilk bags to reusable, durable containers that can hold expressed breastmilk, formula, or even early purees. In the tropical climate of the Philippines, where high humidity and warm ambient temperatures accelerate bacterial growth, choosing the right container is crucial for food safety and freshness.
To make an informed decision, you must evaluate how different materials—such as tempered glass, food-grade silicone, and high-quality BPA-free plastics—fit into your daily sterilization, freezing, and feeding routines.
How to Verify Safety Standards on Container Labels
When shopping for reusable milk storage containers, the packaging and the bottom of the container itself hold the most critical safety information. Look for embossed food-grade symbols, such as the international “fork and glass” icon, which indicates the material is officially cleared for food contact. In local department stores or online marketplaces, you should also check for compliance certifications from recognized international bodies like the US Food and Drug Administration (FDA) or European safety standards (EU regulations). These markings confirm that the raw materials used in manufacturing do not leach harmful chemicals into your baby’s milk.
Products mentioned in this guide
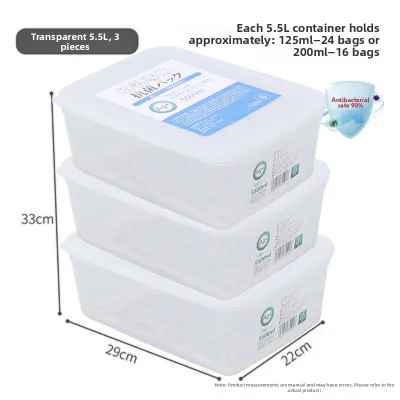
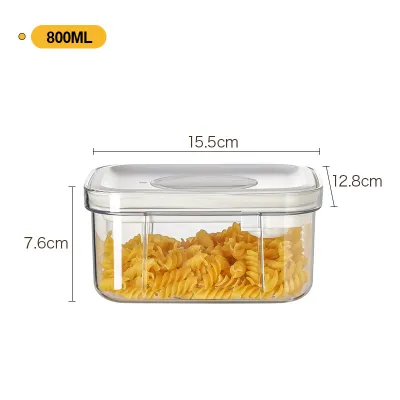
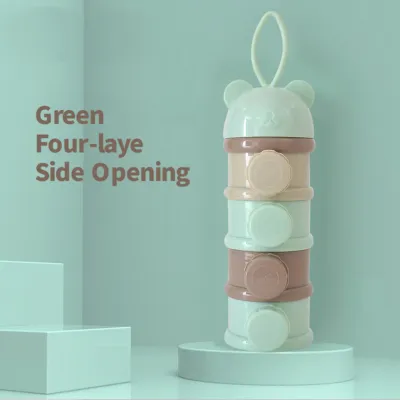
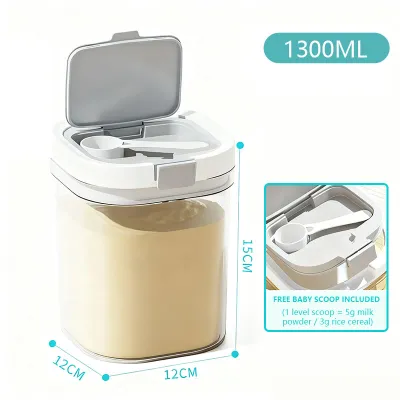
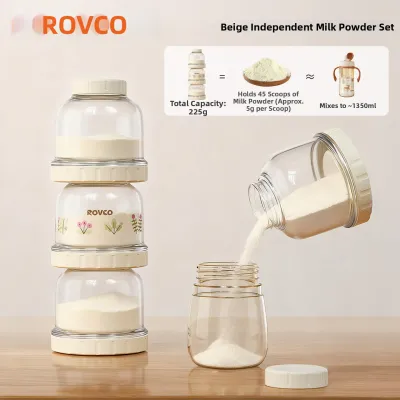
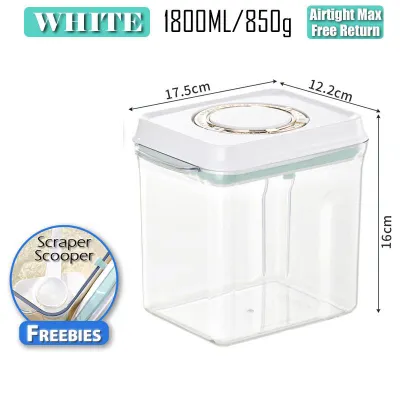
Prices are valid at publication and may change. Please refer to the product page for the latest price.
Understanding chemical-free claims is another vital step in protecting your weaning baby. While most parents are familiar with “BPA-free” labels, modern manufacturing often substitutes Bisphenol A (BPA) with Bisphenol S (BPS), which may carry similar risks. To ensure maximum safety, prioritize containers labeled as both BPA-free and BPS-free, as well as phthalate-free. Phthalates are plasticizers used to make plastics flexible, but they are not chemically bound to the material and can migrate into fatty liquids like breastmilk or formula over time, especially when heated.
Finally, always locate the manufacturer’s printed temperature tolerance range, which is typically molded into the base of the container or detailed in the user manual. This range specifies the exact minimum and maximum temperatures the material can safely withstand without warping, cracking, or releasing chemical compounds. In the Philippines, where steam sterilizers and UV sterilizers are widely used to combat humidity-loving mold and bacteria, verifying that your containers can handle temperatures up to 100°C (or higher for steam) is a non-negotiable safety check.
Comparing Materials: Glass, Silicone, and Safe Plastics
No single material is perfect for every weaning scenario, meaning most parents end up using a combination of glass, silicone, and plastic depending on the daily task. Glass offers unmatched chemical purity but comes with physical weight and breakage risks. Silicone provides incredible flexibility and durability but can absorb odors and oils from milk fats over time. Safe plastics are lightweight and highly portable for travel, yet they require more frequent replacement due to wear and tear. Understanding these material trade-offs allows you to build a storage system that balances safety, convenience, and longevity.

Glass Jars and Bottles
Glass is widely considered the gold standard for hygiene because it is completely non-porous, scratch-resistant, and does not absorb odors or stains. However, when you are managing a busy weaning schedule, the physical weight of glass bottles can become a practical challenge. Dropping a glass container on hard kitchen tiles or concrete floors—common in many Filipino homes—creates an immediate safety hazard of broken shards. If you plan to let your older baby hold their own bottle or cup during the weaning transition, glass may not be the most practical choice for direct feeding.
Thermal shock is another critical factor to manage when using glass storage. Rapid temperature transitions, such as moving a glass jar directly from a cold freezer into a bowl of hot water or a bottle warmer, can cause the material to crack or shatter instantly. To prevent this, always check the manufacturer’s instructions for the maximum allowable temperature differential. Safe handling requires thawing frozen glass containers gradually in the refrigerator or under cool running water before applying any heat.
Additionally, you must verify that any glass container you use is explicitly rated as freezer-safe. Liquid expands as it freezes, and if the glass is not tempered or designed to accommodate this expansion, it will burst under pressure. Look for borosilicate glass, which is highly resistant to thermal shock and structural stress, and always leave at least an inch of empty space at the top of the container to allow the milk to expand safely without pressing against the lid.
Food-Grade Silicone Cups and Pods
Food-grade silicone has gained massive popularity in weaning routines due to its soft, rubbery texture and extreme durability. However, because silicone is naturally flexible, filled silicone cups or multi-compartment pods can bend or collapse when you lift them. This flexibility introduces a high risk of spills, especially when transferring liquid milk from the counter to the freezer. To avoid messy accidents, look for silicone storage systems that include a rigid outer frame or tray to support the flexible cups during transport.
Another characteristic of silicone is its tendency to attract and retain milk fats, which can lead to a cloudy film or a lingering soapy odor after washing. Because silicone is hydrophobic, it bonds easily with the oils present in breastmilk and formula. To maintain these containers, you will need to use a mild, fragrance-free dishwashing liquid and occasionally perform a deep clean using a baking soda paste to neutralize absorbed odors and remove stubborn fat residues.
Despite these maintenance needs, silicone excels when it comes to freezing individual portions of milk or purees. The flexible walls allow you to easily pop out frozen milk blocks or “pods” with a simple push from the bottom, completely eliminating the need to run the container under warm water. This feature is incredibly convenient for portioning out exact amounts of milk to mix into early weaning foods like baby rice or oat cereals.
BPA-Free Plastics (PP and PPSU)
Modern plastic containers are highly versatile, but not all plastics are created equal. When reading labels, you will commonly encounter Polypropylene (PP), Polyphenylsulfone (PPSU), and Tritan. PP is the most common, affordable option; it is lightweight and slightly cloudy in appearance, with a moderate heat resistance that typically tops out around 110°C. PPSU, often recognizable by its natural honey-colored tint, is a medical-grade plastic that offers superior durability, high impact resistance, and a much higher heat tolerance (up to 180°C), making it highly compatible with frequent steam or UV sterilization. Tritan is a crystal-clear plastic that mimics the look of glass without the weight, though it is less common for heavy-duty freezing.
Regardless of the plastic type you choose, you must regularly inspect the interior walls for micro-scratches. Over time, the friction from bottle brushes, abrasive sponges, or even the minerals in tap water can create tiny, invisible grooves in the plastic. These micro-scratches are highly problematic because they can harbor microscopic milk residues and bacteria that survive standard washing. Once a plastic container develops visible scratches or a persistent cloudy appearance, it should be retired from milk storage immediately.
Despite these wear limitations, safe plastics remain the most practical choice for travel and daycare drop-offs in the Philippines. Their lightweight nature makes them easy to pack into insulated diaper bags without adding unnecessary bulk. When using plastic containers on the go, however, you must adhere strictly to heating guidelines: never microwave milk directly in plastic containers, as localized hot spots can degrade the plastic and cause chemical leaching, even in BPA-free materials.
Key Design Features That Prevent Leaks and Preserve Milk
A high-quality milk storage container must perform flawlessly under pressure, which means the sealing mechanism is just as important as the container material. When transporting milk in a humid, tropical climate, any small leak can attract ants and other pests almost instantly. Look for lids equipped with food-grade silicone gaskets or double-zipper seals that create a true airtight barrier. You can test the seal at home by filling the container with water, securing the lid, and holding it upside down over the sink while applying gentle pressure; any moisture escaping indicates a weak seal that will fail during travel or freezing.
Accurate measurement markings are another essential feature during the weaning phase, as you need to track exactly how much milk your baby is consuming alongside solid foods. Embossed or molded-in measurement scales are far superior to printed ink markings, which tend to fade, peel, or rub off after repeated washings and sterilization cycles. Ensure the markings are clear, easy to read in low light (such as during late-night prep), and offer measurements in both milliliters (ml) and ounces (oz) to match different recipe and feeding guidelines.
Finally, consider how the containers will fit into your freezer. Standard home refrigerators in the Philippines often have limited freezer space, making stackability a major design priority. Containers with recessed lids or modular, interlocking shapes allow you to stack multiple units vertically without the risk of them tipping over. Flat, square, or rectangular profiles generally utilize freezer space much more efficiently than round bottles, helping you maximize every square inch of storage.
Building Your Shortlist Based on Your Weaning Routine
To build the perfect container shortlist, you must map your purchases directly to your daily weaning routine. If your primary goal is batch freezing expressed milk to mix into purees or to build a backup supply, your priority should be high-capacity, space-saving containers. For this workflow, modular silicone freezing pods with secure lids or stackable, flat-profile PP plastic containers are ideal. They allow you to freeze milk in small, controlled portions (such as 1-ounce or 2-ounce increments) so you only thaw exactly what your baby needs for a single meal, minimizing expensive milk waste.
For parents who travel frequently or send their babies to daycare, the requirements shift toward lightweight portability and absolute leak prevention. In these situations, PPSU bottles or high-quality PP containers with secure screw-on lids are the safest choice. They can withstand being jostled inside an insulated travel bag filled with ice packs, and their lightweight design won’t weigh down your diaper bag during long commutes in transit.
Lastly, design a workflow that minimizes the number of times milk is transferred between different vessels. Every transfer—from storage container to warmer, and then to feeding cup—increases the risk of bacterial contamination and leaves valuable milk fats stuck to the walls of the containers. Choosing a system where the storage container can connect directly to a compatible silicone nipple, a sippy spout, or a straw lid simplifies the transition immensely. This “store, warm, and feed” single-container workflow saves time, reduces the dishwashing load, and keeps your baby’s milk as hygienic as possible.
Cleaning, Sterilizing, and Knowing When to Replace Containers
Proper hygiene is the foundation of safe milk storage, especially during the weaning phase when your baby’s immune system is still developing. While dishwashers are convenient, many milk storage containers require hand-washing to preserve their seals and structural integrity. If you do use a dishwasher, ensure the containers are placed strictly on the top rack, away from the heating element, to prevent warping. For hand-washing, use a dedicated baby bottle brush with soft nylon bristles or a silicone brush, paired with a mild, fragrance-free dish soap, to avoid scratching the inner surfaces.
Sterilization must be carefully matched to the specific material of your containers to prevent premature degradation. Glass and high-grade silicone can easily tolerate boiling water, steam sterilizers, and UV sterilizers. However, standard PP plastics can warp or degrade if exposed to extreme heat for too long, while certain plastics may discolor or weaken under intense UV light. Always check the manufacturer’s guidelines to confirm which sterilization method is approved for your specific container model, and never exceed the recommended sterilization times.
Finally, establish a weekly routine to inspect your storage containers for signs of wear. Run your fingers along the inner rims to check for rough edges, and hold plastic and silicone containers up to the light to inspect for cloudiness, deep scratches, or warping that prevents a tight lid seal. If a container shows any of these signs, or if a silicone gasket has become stretched and loose, replace it immediately. Investing in timely replacements ensures that your baby’s stored milk remains completely safe, fresh, and free from contamination.
Frequently Asked Questions (FAQ)
How do I verify if a container is truly freezer-safe?
To confirm if a container is safe for freezing, look for the official freezer-safe symbol—usually represented by a snowflake icon—embossed on the bottom of the container or clearly printed on the packaging. Do not assume a container can handle freezing temperatures simply because it is made of thick glass or sturdy plastic. Containers not rated for freezing can become extremely brittle and crack, or fail to accommodate the natural expansion of freezing liquids. Always leave at least a 2-centimeter (about 1 inch) headspace at the top of the container to allow the milk to expand safely without pushing the lid open or cracking the walls.
What are the signs that a milk container needs replacing?
You should replace a milk storage container immediately if you notice persistent cloudiness, discoloration, or a sour odor that remains even after thorough washing and sterilization. For plastic containers, look closely for fine, web-like micro-scratches on the interior walls, as these are prime breeding grounds for bacteria. For silicone containers, check if the material has become sticky, lost its shape, or if the sealing gaskets have stretched out, causing leaks. Any glass container with even a minor chip, hairline crack, or deep scratch must be discarded immediately to prevent glass particles from contaminating the milk.
Community discussion
Share your experience or ask a question. Comments are reviewed before publication.