
Selecting the right sterilizer for your baby bottles is one of the most important decisions you will make when setting up your feeding station. Because modern households often use a mix of glass, plastic, and silicone bottles, finding a single appliance that safely and effectively sanitizes all three materials can be challenging. Each material reacts differently to heat, moisture, and light, meaning a sterilization method that works perfectly for one bottle type might damage or degrade another.
To make an informed choice, you must understand how different sterilization technologies interact with these materials. The goal is to find a system that eliminates harmful pathogens without compromising the structural integrity of your bottles. By focusing on material compatibility, physical design features, and rigorous verification steps, you can establish a safe, efficient, and long-lasting sanitizing routine.
Understanding Sterilization Methods and Material Compatibility
Every bottle material has unique physical properties that dictate how it responds to different sanitizing environments. Before choosing a sterilizer, you must understand how steam, ultraviolet (UV) light, and microwave energy affect glass, plastic, and silicone.
Products mentioned in this guide
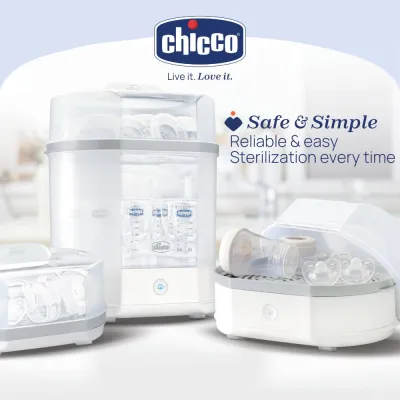
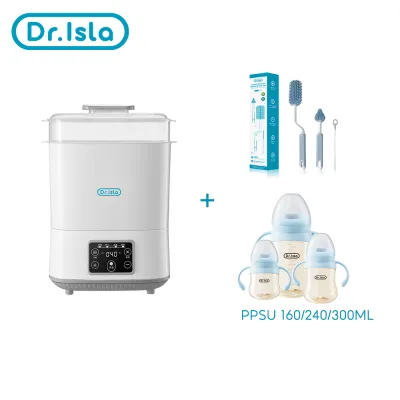
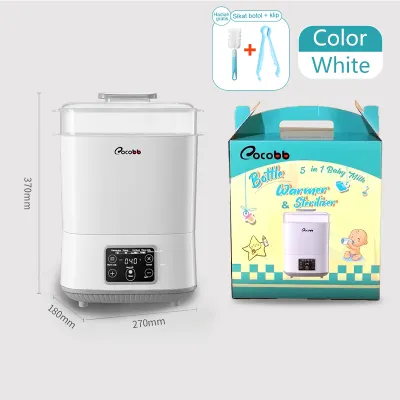
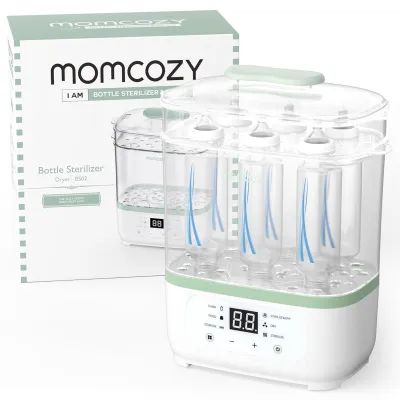
Prices are valid at publication and may change. Please refer to the product page for the latest price.
Steam and Boiling
Steam sterilization relies on high-temperature water vapor to eliminate microorganisms. This method is highly effective and widely compatible, but you must verify the specific heat limits of your bottle components.
- Glass Bottles: Glass is exceptionally resilient to high temperatures and does not leach chemicals when heated. However, it is highly susceptible to thermal shock. Sudden temperature swings—such as moving a hot glass bottle directly into cold water—can cause it to crack or shatter.
- Plastic Bottles: Common plastics like Polypropylene (PP) are lightweight and affordable but have relatively low heat tolerance, often capping out around 110°C. Exceeding this limit can cause warping, especially around the collar threading where a tight seal is required. High-performance plastics like Polyphenylsulfone (PPSU) are much tougher, often withstanding temperatures up to 180°C without degrading. Always look for explicit BPA-free and BPS-free labels on all plastic components.
- Silicone Bottles and Nipples: Food-grade silicone is highly heat-resistant and easily tolerates steam sterilization. However, low-quality silicone or silicone blended with fillers may degrade faster, becoming sticky or discolored over time.
UV (Ultraviolet) Light
UV sterilizers use UV-C light to disrupt the DNA of bacteria and viruses. While this method avoids the high heat of steam, it introduces other material compatibility considerations.
- Material Degradation: Prolonged exposure to UV-C light can break down the chemical bonds in certain polymers. Over time, this photodegradation can cause PP plastics and silicone to become brittle, yellow, or lose their elasticity.
- Manufacturer Approval: Because of this degradation risk, many bottle manufacturers explicitly state in their user manuals whether their products are safe for UV sterilization. You must verify this approval beforehand; using a UV sterilizer on non-approved plastic or silicone can void warranties and shorten the lifespan of your bottles.
Microwave Units
Microwave sterilizers use microwave energy to rapidly heat water and generate steam inside a closed plastic case. While fast and convenient, they require strict safety checks.
- Microwave-Safe Verification: You must ensure that every single bottle part placed inside the unit is rated as microwave-safe.
- Hidden Metal Parts: Some specialized anti-colic bottles feature valves with small metal springs, and some transition bottles include weighted straws containing metal cores. Placing these parts in a microwave sterilizer can cause sparking, melting, and permanent damage to both the bottle and your microwave.
The Absolute Rule of Manufacturer Instructions
Never rely solely on general material assumptions. A bottle that looks like standard silicone might contain plastic structural rings with lower heat thresholds, or a plastic bottle might have a specialized coating that cannot tolerate UV light. Always defer to the official user manuals of both your specific bottle brand and your sterilizer model to confirm compatibility.
Key Features to Look for in a Multi-Material Sterilizer
If your household uses a combination of glass, plastic, and silicone feeding items, your sterilizer needs specific physical and functional features to accommodate this diverse mix safely.

Capacity and Rack Adjustability
Glass bottles are heavy and rigid, whereas plastic bottles are lightweight, and silicone bottles are soft and pliable. If these items are crowded together, they can easily tip over or block the flow of steam or light.
- Sturdy, Dedicated Slots: Look for a sterilizer with robust, molded slots or deep prongs that can securely hold heavy glass bottles upright. This prevents them from tipping over and crushing delicate silicone nipples or scratching plastic collars.
- Adjustable or Modular Racks: A modular design allows you to configure the interior space. You can create a dedicated upper tray for lightweight silicone nipples, valves, and pacifiers, keeping them safely separated from the heavier bottles below.
Integrated Drying Functions
In warm, humid tropical climates, moisture control is a constant battle. Leaving sterilized bottles wet inside a closed, dark chamber creates an ideal breeding ground for mold and bacterial spores.
- Preventing Mold in Crevices: Silicone valves, anti-colic vents, and the fine threading on plastic bottle collars are notorious for trapping water droplets. A sterilizer with an integrated hot-air drying cycle ensures that all moisture is completely evaporated.
- HEPA Filtration: Ensure the drying function utilizes a HEPA filter to clean the incoming air. This prevents airborne dust, pet dander, and mold spores from being blown directly onto your freshly sanitized bottles.
Cycle Customization
Because different materials have different vulnerabilities, a one-size-fits-all cycle is rarely ideal for a mixed bottle collection.
- Adjustable Settings: Look for a unit that offers independent control over sterilizing and drying times. For example, you may want to run a short steam cycle to protect delicate plastics from prolonged heat, followed by an extended drying cycle to ensure complex silicone parts are completely dry.
- Low-Temperature Modes: If you choose a UV sterilizer, look for models that offer a low-temperature drying option. This protects heat-sensitive plastics while still utilizing the sanitizing power of UV-C light.
How to Build and Verify Your Product Shortlist
When shopping for a sterilizer, it is easy to get overwhelmed by marketing claims of absolute safety and universal compatibility. To find a reliable unit, you must follow a systematic verification process.
Step 1: Cross-Reference User Manuals
Before making a purchase, do not rely on the bullet points on the retail box. Go online and download the digital user manuals for both your current baby bottles and the sterilizer models you are considering.
- Check Temperature Limits: Verify the maximum operating temperature of the sterilizer's steam cycle and compare it to the maximum heat tolerance listed in your bottle's care instructions.
- Verify UV Compatibility: If you are looking at a UV sterilizer, check if your bottle manufacturer explicitly warns against UV exposure, or if they provide specific guidelines for UV sanitizing.
Step 2: Evaluate Retail Listings and Buyer Feedback
When browsing online marketplaces, look past the promotional photos and focus on practical, real-world performance indicators.
- Search for Material Issues: Use the search function within customer reviews to look for terms like "melted," "warped," "smell," "cracked," or "rust." This will give you an honest look at how the unit performs with different bottle materials over months of daily use.
- Check Warranty and Return Policies: Ensure the manufacturer offers a clear warranty and a straightforward return policy. A reputable brand should stand behind their product's electrical safety and material durability.
Step 3: Identify Red Flags
Avoid units that exhibit any of the following warning signs:
- Missing Safety Certifications: The appliance should carry recognized electrical safety marks. Avoid unbranded, ultra-cheap units that lack documented safety testing.
- Vague Compatibility Claims: Be skeptical of sterilizers that claim to be "perfect for all bottles" without providing specific temperature thresholds, material limitations, or loading instructions.
- Undocumented Temperature Thresholds: If the manufacturer cannot or will not state the exact temperature reached during the sterilization or drying cycles, do not risk placing your bottles inside it.
Maintenance and Safety Checks for Daily Use
Even the best sterilizer requires regular maintenance to remain safe and effective, and your bottles must be inspected continuously to ensure they are not degrading.
Visual Inspection of Bottles and Nipples
Repeated exposure to heat, steam, or UV light will eventually wear down even the highest-quality materials. Perform a quick visual check during every wash and assembly routine.
- Plastics: Look for cloudiness, micro-cracks, warping along the rim, or a sticky texture. If a plastic bottle loses its transparency or feels tacky, it is degrading and must be discarded.
- Silicone: Check for discoloration, yellowing, loss of elasticity, or micro-tears. Stretch the nipple gently; if it does not snap back quickly or if you see tiny tears around the feeding hole, replace it immediately to prevent choking hazards.
- Glass: Inspect glass bottles for hairline cracks, chips around the rim, or deep scratches. Even a minor chip can weaken the glass, leading to a sudden break during heating or assembly.
Descaling and Cleaning the Sterilizer
Mineral buildup is the primary cause of steam sterilizer failure and uneven heating.
- The Threat of Limescale: In areas with hard water, minerals like calcium and magnesium will quickly form a white or brown crust on the heating plate. This scale acts as an insulator, preventing the plate from reaching the correct sterilization temperature and causing uneven steam distribution.
- How to Descale: Follow your manufacturer's instructions strictly. Typically, this involves pouring a mixture of food-grade citric acid or white vinegar and water onto the heating plate, running a short cycle or letting it soak, and then rinsing and wiping the plate clean. Never use harsh chemical cleaners or abrasive scrubbing pads, which can damage the protective coating of the heating element.
- UV Maintenance: For UV units, regularly wipe down the reflective inner walls with a soft, damp microfiber cloth to remove dust and fingerprints, which can block UV light. Replace the UV bulbs or LEDs strictly according to the manufacturer's recommended schedule, as their sanitizing power diminishes long before they burn out completely.
Clear Stopping Conditions
To protect your home and your baby, you must know when to stop using your equipment immediately. Halt use of your sterilizer if you notice:
- An unusual burning smell or smoke during operation.
- Scorching, rust, or deep pitting on the heating plate that cannot be cleaned.
- Flickering lights, unresponsive buttons, or erratic cycle times.
- Water leaking from the bottom of the unit.
If you observe any of these issues, unplug the appliance and contact the manufacturer or a qualified professional for assistance.
Frequently Asked Questions (FAQ)
Can I sterilize silicone pacifiers and teethers in the same unit as bottles?
Yes, you can generally sterilize silicone pacifiers and teethers alongside your bottles, provided they are made of 100% food-grade silicone and are rated for the sterilization method you are using. Always check the manufacturer’s guidelines for each specific pacifier or teether first.
When loading the sterilizer, place these smaller items on the upper accessory rack. Ensure they are not crowded together or overlapping, as this can trap moisture or block the path of steam or UV light. Never place teethers filled with water or gel into a steam or microwave sterilizer, as the high heat can cause them to expand, leak, or burst.
Does a bottle sterilizer eliminate the need to wash bottles first?
No, a sterilizer is not a washing machine. Sterilization only kills bacteria and viruses; it does not remove physical residue. You must thoroughly wash all bottles, nipples, and collars with warm, soapy water and a dedicated bottle brush before placing them in the sterilizer.
If you skip the washing step, milk fats and proteins will remain on the surfaces. These residues form a stubborn film that shields bacteria from steam or UV light, rendering the sterilization cycle ineffective. Furthermore, leftover milk residue will bake onto the bottles during a steam cycle, causing permanent cloudiness, unpleasant odors, and burnt deposits on your sterilizer’s heating plate.

Community discussion
Share your experience or ask a question. Comments are reviewed before publication.