
Choosing the right bottle sterilizer for baby feeding gear is one of the most critical decisions new parents face. With an array of glass, plastic, and silicone bottles filling kitchen counters, finding a sterilization method that ensures absolute hygiene without damaging these sensitive materials can feel overwhelming. The ideal choice depends entirely on the physical and chemical properties of the bottles you use. While electric steam sterilizers offer a highly universal approach for heat-resistant materials, UV-C sterilizers provide a waterless, heat-free alternative that preserves the lifespan of premium glass and silicone, though they demand precise positioning. Meanwhile, microwave steam sterilizers offer unmatched speed for busy households but require strict adherence to microwave-safe ratings to prevent catastrophic warping.
In the tropical climate of the Philippines, where high ambient humidity accelerates the growth of mold and bacteria, selecting a sterilization system is not just about killing pathogens; it is also about maintaining a dry, sterile environment post-cycle. Understanding how different sterilizer technologies interact with glass, polypropylene, PPSU, and food-grade silicone is key to protecting your baby’s health while maximizing the lifespan of your feeding investments.
Quick Compatibility Guide: Matching Your Bottle Sterilizer for Baby Bottles
To help you quickly navigate the compatibility of different sterilization methods with common bottle materials, we have compiled a comprehensive reference matrix. While this guide outlines general material behaviors, always remember that individual product designs can vary. The safety of any sterilization cycle ultimately depends on the specific manufacturer’s heat and UV tolerance guidelines.
Products mentioned in this guide
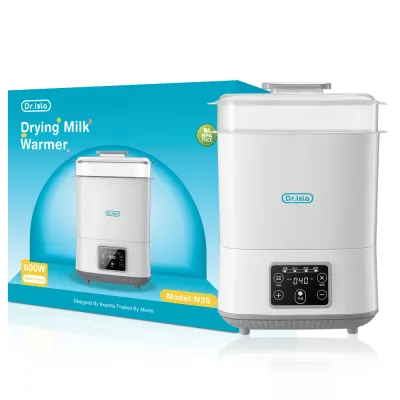
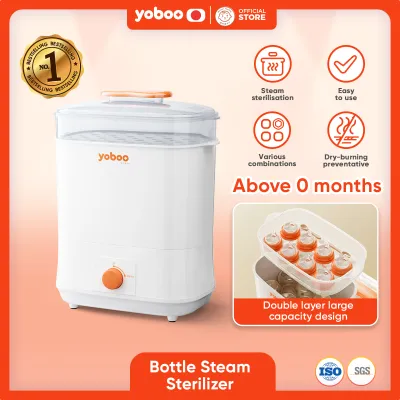
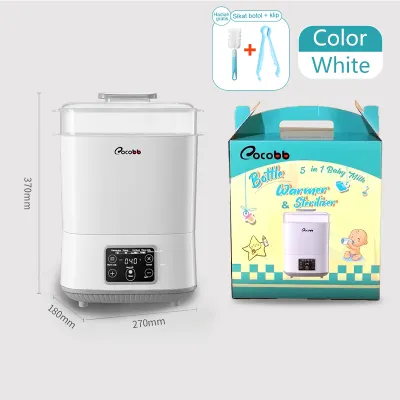
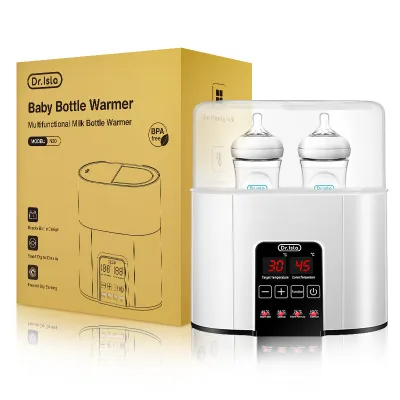
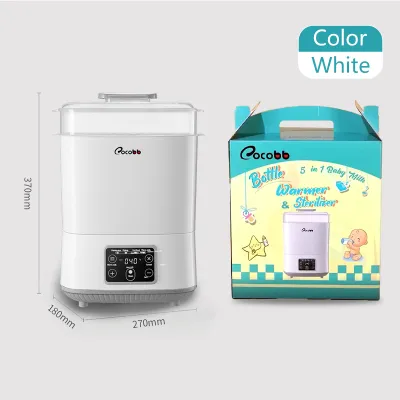
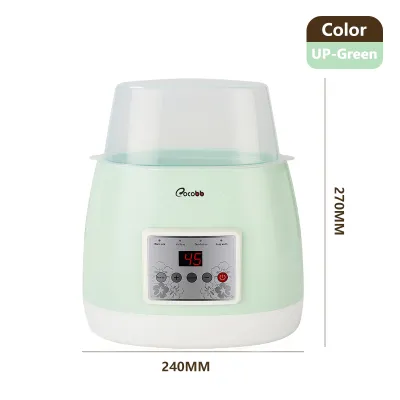
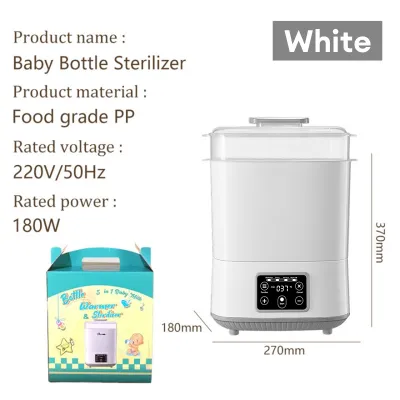
Prices are valid at publication and may change. Please refer to the product page for the latest price.
| Sterilizer Type | Glass Compatibility | Plastic Compatibility | Silicone Compatibility | Key Limitations & Considerations |
|---|---|---|---|---|
| Electric Steam | Excellent<br>Highly compatible; virtually no wear, but vulnerable to thermal shock from sudden temperature drops. | Good<br>Safe for BPA-free PP and PPSU; must be kept away from the heating element to prevent warping. | Excellent<br>Highly heat-resistant; porous silicone may absorb soapy odors or develop a cloudy look over time. | Requires regular descaling due to mineral buildup from tap water; risk of steam burns during unloading. |
| UV Sterilizer | Excellent<br>Completely safe; glass does not degrade under UV-C light. | Fair to Good<br>Can cause standard plastics (like PP) to yellow or become brittle over months of daily exposure. | Excellent<br>Medical-grade silicone exhibits high resistance; minimal degradation under UV-C rays. | Shadowing effect means light only sterilizes surfaces in its direct line of sight; requires precise item placement. |
| Microwave Steam | Good<br>Fast and efficient; glass must be labeled microwave-safe to prevent thermal cracking. | Fair<br>Must be explicitly rated microwave-safe; high risk of melting if microwave wattage is too high. | Good<br>Handles rapid heating well; ensure components are fully submerged or wet as instructed. | Limited capacity; requires manual wattage adjustments; high risk of localized hot spots if turntable stops. |
While this matrix serves as an excellent starting point, parents must treat it as a general framework. Before placing any feeding gear into a sterilizer, verify the specific temperature limits and sterilization approvals printed on your bottle’s packaging.
Steam Sterilizers: Heat Safety for Glass, Plastic, and Silicone
Electric steam sterilizers have long been the gold standard in pediatric hygiene. Operating on the principle of thermal disinfection, these devices heat water to its boiling point (100°C), creating a dense cloud of saturated steam that envelopes the bottles. This high-temperature environment effectively denatures the proteins of bacteria, viruses, and mold spores within minutes. However, the continuous exposure to moisture and high heat affects glass, plastic, and silicone in distinct ways.

Glass: Thermal Shock and Handling
Glass baby bottles—typically constructed from durable borosilicate glass—are highly favored for their chemical inertness and resistance to scratching. While borosilicate glass is engineered to withstand substantial temperature fluctuations, it is not entirely immune to thermal shock. Thermal shock occurs when a rapid, extreme temperature differential causes uneven expansion or contraction within the glass structure, leading to sudden fracturing or shattering.
To prevent this hazard, never transfer cold glass bottles directly from the refrigerator or freezer into a preheated steam sterilizer. Similarly, after the sterilization cycle finishes, resist the temptation to immediately rinse the hot glass bottles under cool tap water. Allow the bottles to cool down naturally inside the sterilizer chamber before handling them. Before every cycle, perform a visual inspection: check for micro-cracks, hairline fractures, or small chips around the rim and base. Even minor structural imperfections can fail catastrophically when subjected to the intense heat and pressure of expanding steam.
Plastic: Warping and Chemical Safety
Plastic baby bottles are lightweight, impact-resistant, and highly practical, but they present unique challenges under high-temperature steam. Most modern plastic bottles are made from polypropylene (PP) or polyphenylsulfone (PPSU). While these materials are designed for durability, parents must verify that all plastic components are certified as BPA-free and BPS-free to ensure no harmful endocrine-disrupting chemicals leach into the milk during heating.
Polypropylene (PP) bottles generally have a maximum heat tolerance of around 110°C to 120°C. Because electric steam sterilizers operate right at the boiling point of water, PP bottles are operating close to their thermal limits. To protect them, always place plastic bottles, collars, and caps on the upper accessory rack of the sterilizer, keeping them as far away from the bottom heating element as possible. Direct proximity to the heating plate can cause localized overheating, resulting in warped necks, distorted collars that leak milk, or premature structural weakening. PPSU bottles, which tolerate temperatures up to 180°C, offer a much wider safety margin but still require careful placement to prevent physical contact with hot metal surfaces.
Silicone: Heat Tolerance and Odor
Food-grade and medical-grade silicone are widely utilized for bottle nipples, anti-colic valves, and flexible bottle bodies. Silicone is an elastomer characterized by exceptional thermal stability, routinely enduring temperatures up to 200°C or higher without melting, warping, or losing its elasticity. This makes silicone highly compatible with the intense heat of electric steam sterilizers.
However, silicone’s physical structure is naturally porous. Over weeks of daily steaming, these microscopic pores can absorb organic compounds from residual milk fats, fragrance molecules from dishwashing soaps, or mineral impurities from your water supply. This absorption often manifests as a stubborn, sour odor or a cloudy, matte film on the surface of the nipple. To prevent this, always wash silicone components meticulously with a mild, fragrance-free dish soap and rinse them thoroughly with clean water prior to sterilization. While a cloudy appearance is generally cosmetic, you must regularly stretch the nipples to test their elasticity; if you notice any stickiness, thinning, or tiny tears, discard the nipple immediately to prevent a choking hazard.
UV Sterilizers: Material Degradation and Drying Benefits
UV-C sterilizers represent a modern, waterless alternative to traditional steam. These devices utilize ultraviolet light at a specific germicidal wavelength (typically 253.7 nanometers) to penetrate the cellular walls of microorganisms, disrupting their DNA and RNA so they can no longer replicate. Because UV sterilizers do not rely on boiling water, they operate at much lower temperatures (usually around 45°C to 55°C), which offers unique advantages and distinct material considerations.
Material Impact of UV-C Light
The primary benefit of a low-temperature UV cycle is the complete elimination of thermal shock risks for glass and thermal warping for plastics. However, UV-C radiation is highly energetic and can cause photo-oxidative degradation in certain polymers over time. Standard polypropylene (PP) plastics are particularly vulnerable to UV degradation. With daily exposure, the UV light breaks down the polymer chains, causing PP bottle bodies and collars to turn yellow, develop a brittle texture, or emit a faint, plastic-like odor.
In contrast, borosilicate glass and high-grade medical silicone are highly stable under UV-C radiation. They do not undergo photo-oxidation, meaning their structural integrity and appearance remain virtually unchanged even after years of UV sterilization. If you plan to use a UV sterilizer as your primary sanitation method, investing in glass or high-quality silicone bottles will significantly extend the lifespan of your feeding gear.
Managing the Shadowing Effect
Unlike steam, which is a gas that naturally expands to fill every microscopic crevice of a sterilizer chamber, UV light travels in straight lines. This physical property introduces the risk of “shadowing.” If a surface is blocked from direct or reflected UV-C light, it will not be sterilized. For example, if a bottle is placed right-side up, the UV light may not reach the deep interior bottom of the bottle.
To guarantee effective sanitation, parents must load UV sterilizers with meticulous care. Always place bottles completely upside down on the wire racks. Ensure that nipples, collars, and caps are fully disassembled and spaced out so they do not overlap or nest inside one another. High-quality UV sterilizers utilize highly reflective stainless steel interiors—often with a diamond-patterned texture—to bounce the light waves into hard-to-reach angles, but proper manual loading remains the single most critical factor in preventing unsterilized shadow zones.
The Drying Advantage in Humid Climates
For parents living in the Philippines, managing humidity is a constant battle. In tropical environments, leaving freshly steamed, wet baby bottles to air-dry on an open kitchen counter is a major hygiene risk. The lingering moisture combined with warm ambient temperatures creates an ideal breeding ground for airborne bacteria, mold, and mildew.
This is where UV sterilizers offer a massive practical advantage. Most modern UV units feature integrated drying cycles powered by low-temperature PTC ceramic heaters and ventilation fans. These systems dry the bottles completely within the sealed, sterile chamber before the UV light cycle begins. By removing all moisture in a controlled, filtered environment, UV sterilizers eliminate the need for external drying racks, keeping your baby’s bottles pristine and ready for immediate use without exposure to domestic contaminants.
Microwave Sterilizers: Convenience and Heating Consistency
Microwave steam sterilizers—available as rigid plastic chambers or heavy-duty reusable silicone bags—are highly popular among parents seeking a fast, budget-friendly, and space-saving solution. These systems work by using microwave radiation to rapidly heat a small reservoir of water at the bottom of the container, generating high-pressure steam in a fraction of the time required by standalone electric units.
Heating Consistency and Turntable Mechanics
The speed of microwave sterilization comes with a trade-off: uneven heating. Microwaves cook and heat via dielectric heating, which can create localized “hot spots” where the electromagnetic waves concentrate. To ensure even steam distribution, microwave sterilizers rely entirely on the physical rotation of the microwave’s turntable.
If your microwave is too small to allow the sterilizer chamber to rotate freely, or if the turntable mechanism stalls, the steam will not distribute evenly. This can cause extreme, localized heat buildup. Such intense heat can quickly warp thin plastic collars, melt silicone nipples, or cause uneven thermal expansion in glass bottles, leading to sudden cracking. Always verify that your microwave’s interior dimensions can comfortably accommodate the sterilizer unit with at least an inch of clearance on all sides to guarantee uninterrupted rotation.
Material Safety and Wattage Adjustments
Because microwave sterilization operates at high speeds and high temperatures, verifying material safety is paramount. Glass and high-grade silicone are naturally microwave-safe, but plastic components require rigorous verification. Parents must inspect every plastic part—including bottle bodies, collars, caps, and anti-colic inserts—for the official microwave-safe symbol or explicit manufacturer approval. Unrated plastics can degrade rapidly or release volatile organic compounds when exposed to intense microwave energy.
Furthermore, you must adjust the sterilization time based on your microwave’s specific wattage. A cycle that takes 2 minutes in an 1100-watt microwave might require 4 to 6 minutes in a 750-watt microwave. Operating a sterilizer on an incorrect time-to-wattage ratio can result in under-sterilization (if the water does not boil long enough) or severe structural damage to your bottles (if the water completely evaporates, causing dry-heating and melting). Always consult your microwave’s user manual to identify its exact wattage output before running your first cycle.
How to Verify Compatibility Using Manufacturer Labels
With the wide variety of baby bottles on the market, parents should never rely on guesswork or assume compatibility based on brand popularity. Safely sterilizing your baby’s feeding equipment requires a proactive approach to reading and interpreting manufacturer labels and safety symbols.
Decoding Standard Safety Symbols
Before purchasing or sterilizing any feeding item, inspect the packaging and the base of the product for international safety and material symbols.
- Recycling Codes: Look for the triangular recycling symbol with a number inside. A "5" indicates Polypropylene (PP), which is heat-resistant but susceptible to UV degradation. "PES" or "PPSU" indicates high-performance sulfone polymers that tolerate extreme heat and chemical exposure.
- Microwave-Safe Icon: Typically represented by a small square containing three wavy horizontal lines. If this symbol is absent, do not place the item in a microwave sterilizer.
- Temperature Limits: Many manufacturers stamp explicit temperature limits directly onto the product (e.g., "Max 120°C" or "Max 240°F"). Ensure your sterilizer's operating temperature does not exceed this rating.
Checking Nipples, Collars, and Accessories Individually
A common oversight is assuming that an entire bottle assembly shares the same material properties. Baby bottles are modular systems composed of different materials, each with its own thermal and chemical tolerances.
- The Bottle Body: May be made of borosilicate glass (highly heat and UV resistant) or plastic (heat-sensitive).
- The Collar and Cap: Usually made of rigid polypropylene, which has a lower melting point than glass or silicone.
- The Nipple: Made of flexible silicone, which is highly heat-resistant but can absorb odors and degrade under intense UV exposure over time.
- Internal Valves: Anti-colic valves or venting tubes are often made of specialized, ultra-soft elastomers. Some of these components cannot tolerate steam or microwave sterilization at all and must be cleaned exclusively using warm, soapy water.
Always disassemble every bottle completely before sterilization. Check each component individually against your sterilizer’s manual to ensure no incompatible parts are subjected to unsafe conditions.
When to Stop and Replace
No matter how carefully you maintain your baby’s bottles, daily sterilization will eventually take a toll on the materials. You must establish a routine of regular inspection and immediately discontinue use of any item showing signs of physical breakdown.
- For Plastics: Replace immediately if you notice persistent cloudiness, yellowing, deep scratches, warping that prevents a tight seal, or a sticky, tacky texture.
- For Glass: Discard immediately if you detect any micro-cracks, chips around the rim, or deep internal scratches, as these compromise the structural integrity of the bottle.
- For Silicone: Replace immediately if the nipple becomes sticky, stretched, discolored, or if it develops a persistent, sour odor that does not disappear after thorough washing.
- Professional Consultation: If you are unsure whether a bottle is still safe to use, or if your baby exhibits signs of feeding discomfort or skin irritation, stop using the item and consult a qualified healthcare professional or pediatrician.
Choosing the Best Bottle Sterilizer for Baby Feeding Gear: A Decision Framework
To help you finalize your purchase decision, we have structured a practical framework based on your primary bottle materials, lifestyle, and household conditions.
Choose Electric Steam if:
- Your bottle collection consists primarily of glass or high-grade PPSU plastic bottles.
- You have a large volume of bottles to sterilize daily (e.g., exclusive pumping or formula feeding).
- You have dedicated kitchen counter space and do not mind performing routine descaling maintenance to remove mineral buildup.
Choose UV if:
- You primarily use premium glass or medical-grade silicone bottles and want to maximize their lifespan.
- You live in a highly humid area of the Philippines and want the hygiene security of an integrated, sterile drying cycle.
- You prefer a waterless, low-maintenance appliance that does not require descaling or water refills.
Choose Microwave if:
- You have a compact kitchen with limited counter space or need a highly portable option for travel.
- Your bottle collection is small, and every single component is explicitly certified as microwave-safe.
- You are looking for a highly budget-friendly entry point to sterilization.
Verify First if:
- You are using older, second-hand, or unbranded bottles where the exact material specifications, plastic types, and heat tolerances are unknown. In these scenarios, avoid high-heat steam or microwave sterilization entirely to prevent accidental chemical leaching or melting.
Frequently Asked Questions (FAQ)
Can I mix glass and plastic bottles in the same sterilizer cycle?
Yes, you can safely mix glass and plastic bottles within the same steam or UV sterilizer cycle, provided both materials are explicitly rated as compatible with that specific sterilization method. When using an electric steam sterilizer, always place plastic components on the upper racks to keep them away from the intense heat generated near the bottom heating plate. Ensure the overall operating temperature of the cycle does not exceed the maximum temperature limit of your most heat-sensitive plastic item.
Does UV sterilization leave harmful residues on silicone nipples?
No, UV-C sterilization is a physical process that uses light waves to destroy pathogens; it does not introduce chemicals, ozone, or harmful residues onto silicone nipples or bottle surfaces. However, because UV light cannot penetrate physical blockages, you must thoroughly wash and rinse all milk fats, soap films, and organic residues off the nipples before placing them in the chamber. Any remaining film will shield bacteria from the UV-C light, leaving those areas unsterilized.
How often should I replace plastic bottles if I use a steam sterilizer daily?
Under daily steam sterilization, standard polypropylene (PP) plastic bottles should be replaced every 4 to 6 months due to gradual thermal wear. High-performance plastics like PPSU can withstand daily steaming longer, typically lasting 8 to 12 months. Regardless of the timeline, you must replace any plastic bottle immediately if you observe signs of material degradation, such as persistent cloudiness, yellowing, deep scratches, warping, or a sticky texture.

Community discussion
Share your experience or ask a question. Comments are reviewed before publication.