
Choosing the right Avent drinking cup depends on matching the cup’s design—such as soft spouts, straws, or 360-degree rims—to your baby’s specific physical development and weaning stage. As infants transition from bottle feeding or breastfeeding to solid foods, their oral motor skills undergo a massive shift. Selecting a cup that aligns with their current stage ensures a smoother transition, supports healthy jaw development, and prevents unnecessary frustration for both parent and child.
Understanding Your Baby's Weaning Stages and Hydration Needs
Weaning is a gradual process that spans several months, typically beginning around six months of age when a baby starts showing readiness for solid foods. Pediatric developmental milestones generally categorize this journey into early, active, and late weaning stages. During the early stage, around six months, babies are introduced to single-ingredient purees or soft finger foods while still receiving the majority of their nutrition from breast milk or formula. By nine months, the active weaning stage begins, characterized by increased curiosity, improved finger coordination, and a wider variety of textured foods. Finally, late weaning occurs around twelve months and beyond, as toddlers transition to family meals and rely primarily on solid foods for their nutritional needs.
As your baby progresses through these stages, their physical drinking mechanism undergoes a significant transformation. Newborns rely on an involuntary sucking reflex, where the tongue moves in a forward-and-backward motion to pump liquid from a nipple. To drink from a cup, however, they must develop the ability to sip, which requires pulling the tongue back, sealing the lips around a rim or spout, and using the jaw to control the flow of liquid. This transition is not instantaneous; it requires practice, muscle coordination, and the right tools to prevent choking and promote proper oral development.
Products mentioned in this guide
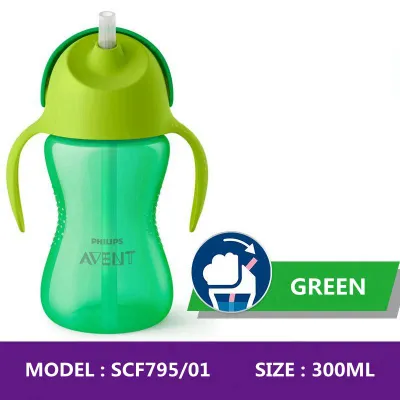
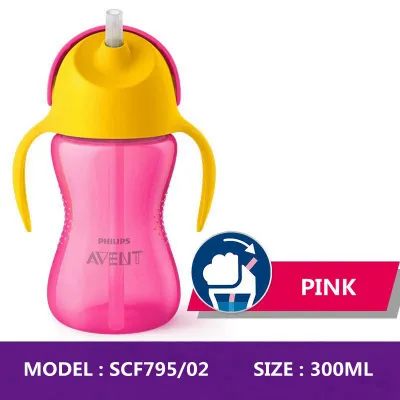
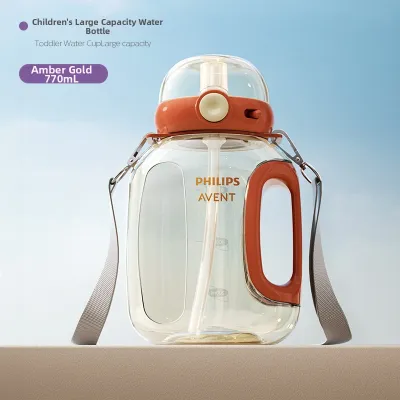
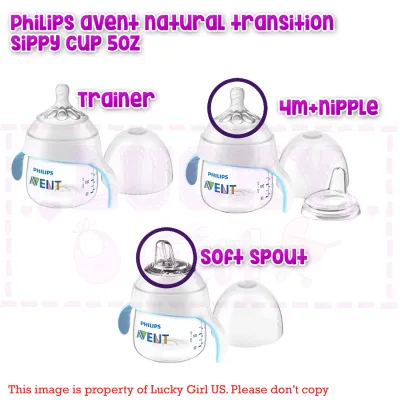
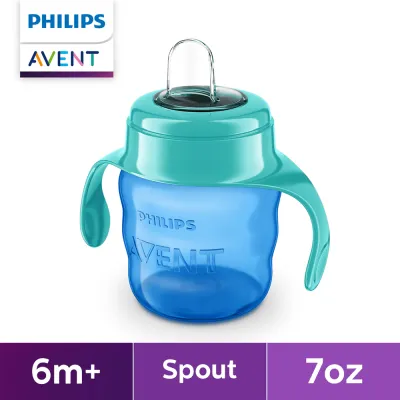
Prices are valid at publication and may change. Please refer to the product page for the latest price.
Introducing small amounts of water alongside solid foods is a crucial step in building lifelong hydration habits. In warm, tropical climates like the Philippines, where high humidity and elevated temperatures are common, ensuring your baby stays adequately hydrated is especially important. However, water introduced during early weaning should only complement milk feeds, not replace them. Offering a few sips of water from a suitable cup during mealtime helps rinse away food particles, aids digestion, and familiarizes your baby with the concept of drinking for hydration rather than comfort.
Key Features to Look for in an Avent Drinking Cup
When evaluating the diverse range of Avent drinking cups, understanding the design elements of different drinking mechanisms is essential for supporting your baby’s oral muscle development. Spout cups are often the first step after bottles, featuring a raised, flat nozzle that encourages a transition from sucking to sipping. Straw cups require a different muscle group, forcing the baby to wrap their lips tightly around the straw and use active suction, which strengthens the cheeks, lips, and tongue. Meanwhile, 360-degree rim cups allow drinking from any side of the edge, closely mimicking the mechanics of an open cup while preventing major spills, which helps develop mature lip control and jaw stability.

Handle designs play a pivotal role in fostering independent motor skills and grip strength. Early transition cups often feature wide, ergonomic handles that are easy for tiny, uncoordinated hands to grasp. These handles are frequently textured or rubberized to prevent slipping, allowing babies to lift the cup to their mouths using their developing hand-eye coordination. As your child grows and their grip strengthens, you can look for cups with slimmer handles or contoured bodies that fit comfortably in a single hand, preparing them for standard cups.
The choice between spill-proof and free-flow valves depends largely on your baby’s developmental stage and the environment. Spill-proof cups utilize silicone valves that only release liquid when the baby applies active suction, making them ideal for active toddlers and travel. Free-flow cups, on the other hand, allow liquid to flow without resistance, teaching babies to manage the natural weight and flow of water, though they require close parental supervision to avoid messy spills.
Material safety and ease of maintenance are critical considerations for any baby product. Always inspect the product packaging for clear material safety indicators, such as BPA-free declarations, which ensure no harmful chemicals leach into your baby’s drinks. Additionally, look for dishwasher-safe symbols and simple, modular designs that allow you to disassemble the cup completely. In humid climates, cups with complex, non-removable parts can easily trap moisture, leading to mold and bacterial growth, making easy-to-clean designs a top priority.
Matching Cup Types to Weaning Milestones
Selecting the right cup is not a one-size-fits-all decision; it requires matching the cup’s specific features to your baby’s current physical capabilities. The general progression moves from soft-spouted trainer cups that bridge the gap between bottle and cup, to straw cups that build oral strength, and finally to 360-degree or open cups that prepare toddlers for adult drinking vessels.
While general age guidelines are helpful, every baby develops at their own pace. It is vital to check the manufacturer’s recommended age range, weight limits, and developmental indicators printed on the specific product packaging before introducing a new cup. Never assume a cup is suitable for your baby based solely on its product name or visual appearance, as safety features and flow rates are carefully calibrated for specific developmental stages.
Early Weaning (Around 6 Months): Transition and Spout Cups
At the start of the weaning journey, around six months, your baby is accustomed to the soft, flexible feel of a bottle nipple or breast. To ease this initial transition, look for trainer cups equipped with soft silicone spouts. These spouts are designed to mimic the familiar texture of a nipple, providing comfort while introducing the concept of a raised spout that requires a slightly different mouth position to extract liquid.
During this early stage, your baby’s grasping reflex is still developing, making ergonomic handles a necessity. Opt for cups with wide, easy-to-hold handles that are securely attached to the cup body, allowing your baby to practice lifting and tilting the cup with minimal frustration. These handles should be lightweight and positioned to help your baby guide the spout directly to their mouth.
Before purchasing or using an early transition cup, always verify the manufacturer’s minimum age recommendation on the product label. Ensure the cup is rated for babies aged six months or older, as these models feature slower flow rates and softer materials tailored to the delicate gums of a young infant. Introducing a cup designed for older toddlers too early can lead to choking or a refusal to use the cup altogether.
Active Weaning (Around 9 Months): Straw and Handle Cups
As your baby reaches around nine months, they enter the active weaning phase, marked by rapid motor skill development and increased curiosity. This is an excellent time to introduce straw cups, which encourage proper tongue placement and active lip sealing. Drinking from a straw helps retract the tongue and strengthens the oral muscles necessary for speech development, making it a highly beneficial milestone in their drinking journey.
Active babies are constantly on the move, whether crawling, pulling themselves up, or taking their first tentative steps. To accommodate this active lifestyle, look for straw cups equipped with reliable spill-proof valves. These valves prevent liquid from leaking when the cup is dropped, tossed, or held upside down, allowing your baby to carry their cup around the house or during outdoor strolls without creating a mess.
However, straw mechanisms can be notoriously difficult to clean, especially in warm, humid environments where mold can develop rapidly in tight spaces. When choosing a straw cup, ensure the entire straw assembly, including the internal valve and weight, can be easily disassembled into individual components. Look for models that include a specialized straw cleaning brush and are compatible with standard sterilizing methods to ensure thorough daily hygiene.
Late Weaning and Toddlerhood (12 Months+): 360-Degree and Open Cups
By twelve months and beyond, your toddler is ready to transition toward mature drinking patterns. 360-degree rim cups are an exceptional tool for this stage, as they allow your child to drink from any edge of the cup, just like an adult glass. The lip-activated valve opens only when pressure is applied to the rim, allowing liquid to flow smoothly while preventing major spills when the cup is tilted or knocked over.
While 360-degree cups are excellent for daily independence, you should also begin introducing small, open cups during supervised mealtimes. Practicing with a small, lightweight open cup helps your toddler master the precise hand-eye coordination and control required to tilt a cup without spilling. Start with very small amounts of water—just a tablespoon or two—to minimize the mess during these learning sessions.
Toddlers are notorious for testing gravity, meaning their cups will frequently be dropped, thrown, or knocked off high chairs. It is crucial to select cups made from durable, bite-resistant materials that can withstand high impacts without cracking or chipping. Inspect the cup regularly for any signs of damage, especially around the rim where teething toddlers may bite down, to ensure no small plastic fragments break off and pose a safety hazard.
Practical Buying Checklist and Safety Checks
To ensure you are purchasing a safe, high-quality, and authentic product for your baby, it is essential to follow a strict verification process. Always purchase your Avent drinking cups exclusively from official brand stores, authorized distributors, or reputable local retailers. Counterfeit baby products are a significant risk on unauthorized online marketplaces, and they may contain hazardous materials or fail to meet basic safety standards.
Before making a purchase, carefully inspect the product packaging for essential safety certifications and declarations. Verify that the packaging clearly states the cup is BPA-free and lists any relevant food-grade material certifications. Pay close attention to the age-grade warnings and developmental indicators, ensuring the cup’s design matches your baby’s current physical capabilities rather than their chronological age alone.
Assess the cleaning requirements of the cup before bringing it home. Look for models with minimal, easily accessible parts that do not require specialized tools to clean, other than a standard bottle brush or straw brush. Ensure that all small components, such as silicone valves or straw tips, are securely fitted and cannot be easily pulled off by a child, as loose small parts can quickly become a dangerous choking hazard.
Finally, compare current prices in ₱ across authorized e-commerce platforms to ensure you are getting a fair deal while avoiding counterfeit risks. Authentic Avent drinking cups in the Philippines typically range from ₱400 to ₱900, depending on the specific model, capacity, and included accessories. If you encounter a listing with a price that seems too good to be true, it is highly likely to be a counterfeit product that lacks warranty validity and safety guarantees.
Transitioning from Bottle to Cup: Tips for Success
Transitioning from a bottle or breast to a cup is a major milestone that requires patience, consistency, and a low-stress approach. Start by offering small amounts of water in the new cup during solid meals, rather than during their usual milk feeding times. This helps your baby associate the cup with eating solid foods and prevents them from feeling frustrated that their familiar milk source is being replaced.
Babies learn primarily by observing their caregivers, so modeling the drinking action is an incredibly effective teaching tool. Take a sip from your own cup while your baby is watching, making exaggerated, positive expressions to show them how easy and enjoyable it is. When your baby interacts with their new cup—even if they just hold it, chew on the spout, or play with the handles—offer warm, positive reinforcement to build their confidence.
It is important to recognize that every baby’s transition timeline is unique, and setbacks are a normal part of the process. If your baby shows signs of intense frustration, cries, or completely refuses the cup, do not force the issue. Forcing a cup can create negative associations that make future transitions even more difficult; instead, gently pause the process, put the cup away, and try again in a few days or weeks when they may be more receptive.
Frequently Asked Questions (FAQ)
How often should I replace my baby's Avent drinking cup?
You should inspect your baby’s drinking cup daily for visual cues of wear and tear, such as discoloration, cloudiness, deep scratches, or cracks where bacteria can accumulate. Silicone components, including spouts, straws, and valves, are subject to heavy wear from biting and washing, and they should be replaced immediately if you notice any tears or degradation. As a general rule, follow the manufacturer’s specific guidelines, which often recommend replacing high-wear silicone parts every three months to ensure optimal hygiene and safety.
Can I put Avent drinking cups in the sterilizer?
Before placing any cup components in a sterilizer, you must consult the specific product manual to verify the exact temperature limits and sterilization compatibility. While most hard plastic bodies and silicone spouts are designed to withstand standard steam or boiling water sterilization, some components, such as printed designs or specialized valves, may deform under high heat. Always disassemble all parts completely before sterilizing to ensure steam can reach every surface, and allow them to air-dry fully in a clean, dry area to prevent mold growth.

Community discussion
Share your experience or ask a question. Comments are reviewed before publication.