
Quick Answer: Which Baby Safety Barrier Fits Your Situation?
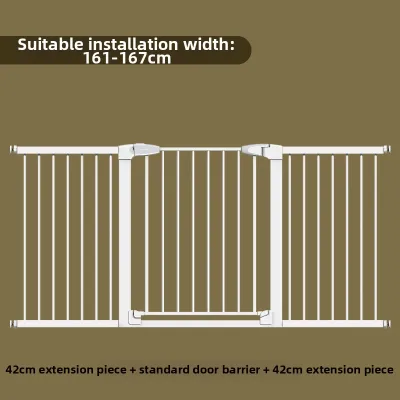
When baby-proofing your home, choosing between a pressure-mounted and a hardware-mounted baby safety barrier depends on where you plan to install it and your living arrangements. If you need to secure the top of a staircase or any high-traffic area where a fall could cause serious injury, a hardware-mounted barrier is the necessary choice. These barriers physically screw into your wall or banister, providing the maximum resistance against a child pushing, pulling, or leaning their full weight against the gate.
Conversely, if you are blocking off a flat doorway between rooms, securing the bottom of a staircase, or living in a rental property where drilling into walls is strictly prohibited, a pressure-mounted barrier offers a highly convenient, damage-free alternative. These gates rely on tension to stay in place, making them easy to install and move. However, before making your final purchase, you must always verify the specific manufacturer’s location warnings, as some models are strictly rated only for specific areas of the home.
Understanding the Core Mechanical Differences
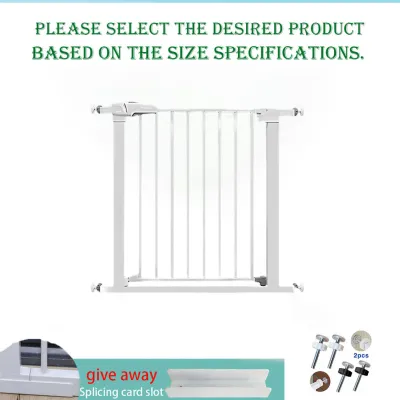
To make an informed decision, it is essential to understand how these two types of baby safety barriers function mechanically. A pressure-mounted barrier operates on the principle of horizontal tension. It features adjustable tension rods or bolts on its outer corners, tipped with rubber pads. When you turn the adjustment knobs, the rods extend outward, pressing the rubber pads tightly against the door frame or walls. This action creates high friction, which holds the barrier in place without any permanent fasteners. Because there are no screws, the structural integrity of your wall remains completely intact, though the constant outward force requires a solid, unyielding surface to remain secure.
Products mentioned in this guide
Prices are valid at publication and may change. Please refer to the product page for the latest price.

A hardware-mounted barrier, on the other hand, relies on physical mechanical fasteners to anchor itself to your home’s structure. This installation method involves drilling holes into your walls, door frames, or wooden banisters to secure mounting brackets or cups using screws and, when necessary, wall anchors. The barrier then hinges directly onto these anchored brackets. This physical connection means the gate does not rely on friction or outward pressure to stay upright. Even under significant impact or constant daily use, a properly installed hardware barrier will not slide, slip, or dislodge, making it the most structurally stable option available.
This mechanical difference highlights a fundamental trade-off between structural permanence and wall preservation. Pressure-mounted gates prioritize convenience and temporary placement, leaving your walls free of holes but remaining vulnerable to shifting if subjected to sudden force. Hardware-mounted gates prioritize absolute stability and load-bearing capacity, ensuring the barrier remains locked in place at the cost of permanent wall modifications that require tools, time, and eventual repair.
Assessing Your Wall Type and Structural Integrity
Before purchasing any baby safety barrier, you must carefully evaluate the construction materials of the walls where you plan to install it. In many homes in the Philippines, interior walls can vary significantly, ranging from solid concrete or masonry to hollow drywall, fiber cement boards, or wooden banisters. Each of these materials interacts differently with the forces exerted by safety gates, and choosing the wrong mounting style for your wall type can lead to structural failure or costly damage.
If you are mounting a hardware barrier onto solid concrete or masonry walls, which are common in many local homes, you will need a masonry drill bit and plastic wall anchors to ensure the screws grip securely. For drywall or plasterboard partitions, you must locate the wooden or metal studs behind the wall using a stud finder, as screwing directly into unsupported drywall will cause the screws to pull out under pressure. If a stud is not available at your desired mounting point, you must use heavy-duty toggle bolts or specialized drywall anchors designed to distribute the weight safely.
For pressure-mounted barriers, the structural integrity of the wall is equally critical. Because these gates exert continuous outward pressure, installing them against soft drywall without a stud behind it can cause the wall to bow, crack, or dent over time. Furthermore, pressure mounts require perfectly flat, parallel, and non-slip surfaces to maintain their grip. If your walls feature uneven decorative stone, textured wallpaper, or glossy tiles that reduce friction, a pressure gate may easily slide out of position. Wooden banisters and stair railings also present a challenge; pressure pads can slip off rounded posts, requiring specialized adapter straps or Y-spindles to create a flat, secure contact point.
Navigating Rental Agreements and Wall Modifications
For families renting apartments, townhouses, or condominiums, the decision to drill into walls is often governed by strict lease agreements. Many landlords include specific clauses that prohibit tenants from making permanent alterations to the property, which includes drilling holes into door frames, wooden banisters, or concrete walls. Violating these terms can lead to disputes or the forfeiture of your security deposit when it comes time to move out.
If you decide that a hardware-mounted barrier is absolutely necessary for your child’s safety—such as at the top of a staircase—it is highly recommended to discuss this with your landlord beforehand. Many landlords are understanding when it comes to child safety and may grant permission if you agree to restore the walls to their original condition upon moving out. This restoration process involves removing the wall anchors, filling the holes with high-quality spackling compound, sanding the surface smooth, and applying a matching coat of paint. Keep in mind that matching paint textures and colors can be challenging, especially in older rentals where the wall paint has faded over time.
For renters who want to avoid the hassle and expense of wall repairs, pressure-mounted barriers serve as an excellent, damage-free alternative. Because they do not require drilling, you can easily install them in doorways or hallways and remove them when your lease ends without leaving a trace. This allows you to protect your child while fully preserving your security deposit and maintaining a positive relationship with your landlord.
Choosing the Right Barrier for Stairs vs Flat Doorways
The physical layout of your home is the most critical factor in determining which safety barrier to use, particularly when it comes to staircases. Falls down stairs represent a significant household hazard for infants and toddlers who are learning to crawl or walk. Therefore, safety standards dictate strict rules regarding where each type of barrier can be safely deployed.
At the top of a staircase, you must always install a hardware-mounted barrier. A pressure-mounted gate is highly dangerous in this location for two primary reasons. First, if a child pushes or leans heavily against a pressure gate, the friction grip can fail, causing the entire gate to dislodge and fall forward, potentially leading to a severe tumble down the stairs. Second, pressure-mounted gates feature a solid metal bottom frame or base bar that remains on the floor even when the gate door is open. This base bar creates a permanent trip hazard at the very edge of the stairs, which can easily cause a caregiver or a child to trip and fall. Hardware-mounted gates, by contrast, swing completely open without any bottom bar, leaving the walkway entirely clear.
For the bottom of the stairs and flat hallways or doorways between rooms, pressure-mounted barriers are typically safe and highly effective. In these low-risk zones, a minor slip of the gate will not result in a fall down a flight of stairs. However, when installing a pressure gate at the bottom of the stairs, ensure it is positioned on the lowest step or on the flat floor just before the stairs, and always configure the gate door to swing away from the staircase rather than toward it.
Comparing Installation Effort and Daily Convenience
The installation process and daily usability of these two barrier types differ significantly, impacting your household’s daily routine. Installing a hardware-mounted barrier requires a moderate level of DIY skill and a set of basic tools, including a power drill, measuring tape, level, screwdriver, and pencil. You must carefully measure the width of the opening, mark the screw holes, ensure the brackets are perfectly aligned on both sides, and drill into the wall. This process can take anywhere from thirty minutes to an hour, and any measurement error can result in a misaligned gate that does not latch properly.
In contrast, installing a pressure-mounted barrier is straightforward and requires no specialized tools. Most models come with hand-tightened tension knobs that you simply turn until the built-in pressure indicator shows that the gate is secure. This process typically takes less than fifteen minutes. Furthermore, pressure gates offer excellent portability. If you travel to visit relatives or move to a temporary residence, you can quickly loosen the tension rods, pack the gate into your vehicle, and reinstall it at your destination in minutes. Hardware gates are permanent fixtures that cannot be easily relocated without leaving empty screw holes behind.
For daily operation, both types of barriers offer various convenience features, such as one-handed latch mechanisms and auto-close hinges. Because caregivers often have their hands full with a baby, diaper bags, or household items, being able to open and close the gate with one hand is a major advantage. Many modern gates of both mounting styles feature a dual-action latch that requires you to slide a button and lift the handle simultaneously, preventing clever toddlers from opening it while remaining manageable for adults.
Comparison Matrix: Pressure vs Hardware Barriers
To help you visualize the key differences and make the best choice for your home, the following table summarizes the core trade-offs of each mounting method.
| Feature | Pressure-Mounted Barriers | Hardware-Mounted Barriers |
|---|---|---|
| Ideal Locations | Flat doorways, hallways, bottom of stairs | Top of stairs, high-traffic main passages |
| Wall Damage Risk | Low (potential minor scuffs or drywall dents) | High (requires drilling permanent screw holes) |
| Installation Effort | Low (no tools required, quick hand-tightening) | Moderate to High (requires drill, level, and precise alignment) |
| Rental Suitability | Excellent (damage-free, easily removable) | Poor (requires landlord permission and wall repair) |
| Base Bar Trip Hazard | Yes (has a permanent bottom frame bar) | No (swings completely open with a clear threshold) |
| Portability | High (easy to uninstall and relocate) | Low (semi-permanent installation) |
Ongoing Safety Checks and Maintenance Rules
Regardless of which baby safety barrier you choose, its effectiveness depends entirely on regular maintenance and safety checks. Over time, daily use, door slamming, and environmental factors can compromise the stability of any gate, making routine inspections essential to ensure your child remains protected.
For pressure-mounted barriers, you should check the tension weekly. In tropical climates like the Philippines, high humidity and temperature fluctuations can cause wooden door frames to expand and contract, which can gradually loosen the pressure pads. Additionally, the rubber pads on the tension bolts can compress over time, reducing their friction grip. To test the stability, gently shake the gate; if it shifts or slides along the wall, you must immediately re-tighten the tension knobs. Always clean the wall surface and the rubber pads occasionally to remove dust and oils that can reduce friction.
For hardware-mounted barriers, inspect the mounting screws and wall anchors once a month. The repeated impact of the gate swinging shut and being latched can cause screws to back out of drywall or wood, especially if the gate is slammed frequently. If you notice any wobbling or if the brackets feel loose, tighten the screws immediately. If a wall anchor has become loose or has damaged the surrounding drywall, you must remove the gate, repair the wall, and reinstall the bracket using a fresh anchor in a slightly different, structurally sound position.
Finally, perform a general check on the locking mechanism of both gate types. Verify that the safety latch engages automatically and locks securely when the gate swings shut. If the gate frame has bent, or if the latch no longer aligns properly due to house settling or wear, stop using the barrier immediately and consult the manufacturer’s instructions for adjustment or replacement parts.
Frequently Asked Questions (FAQ)
Can I use a pressure-mounted barrier at the top of the stairs with adhesive wall cups?
No, you should never use a pressure-mounted barrier at the top of a staircase, even if you use adhesive wall cups or wall-saver pads. While adhesive cups can help prevent the rubber pads from slipping or scuffing your paint, they do not provide the structural, mechanical connection required to withstand a child’s full weight or a sudden impact. The adhesive backing can degrade over time due to humidity, heat, and dust, leading to sudden failure. Furthermore, pressure-mounted gates always feature a solid bottom metal frame bar that remains on the floor when the gate is open. This bar presents a severe trip hazard at the top of the stairs, which can cause a catastrophic fall for both caregivers and children. For the top of any staircase, a hardware-mounted gate is the only safe option.
How do I repair drywall after removing a hardware-mounted barrier?
Repairing drywall after removing a hardware-mounted barrier is a straightforward process that can be completed in a few steps. First, carefully unscrew the mounting brackets and pull out any plastic wall anchors using a pair of needle-nose pliers. Clean any loose plaster or dust from the holes. Next, use a putty knife to apply a small amount of lightweight spackling compound or joint compound into the holes, pressing it in firmly and scraping the surface flush with the wall. Allow the compound to dry completely according to the manufacturer’s instructions. Once dry, gently sand the area with fine-grit sandpaper until it is perfectly smooth and level with the surrounding wall. Finally, wipe away any sanding dust and apply a matching coat of primer and paint using a small brush or roller to blend the patch seamlessly into your wall.
Community discussion
Share your experience or ask a question. Comments are reviewed before publication.