
During pregnancy, your body undergoes rapid physical changes to accommodate your growing baby. As your belly expands, your center of gravity shifts forward, placing significant strain on your lower back, pelvis, and abdominal muscles. A maternity binder, such as a Dr. Isla binder, is designed to distribute this weight more evenly, offering much-needed relief and stability during daily activities. However, the benefits of any maternity support garment depend entirely on how it is worn. Correct positioning and tension are essential to ensure you receive adequate support without restricting blood circulation, causing skin irritation, or placing undue pressure on your developing baby. While general guidelines can help you navigate the daily use of a support belt, you must always prioritize the specific instructions provided by your garment’s manufacturer and consult your healthcare provider to ensure it is safe for your unique pregnancy stage.
Preparing for a Comfortable and Secure Fit
Before wrapping the binder around your midsection, taking a few preparatory steps can make a substantial difference in your comfort. Timing is an important factor. Many expectant mothers find it most beneficial to put on the binder first thing in the morning, before daily physical activity begins and before natural swelling in your legs and pelvic region typically increases. If you experience significant pelvic pressure, you may even want to apply the binder while lying flat on your back, allowing your uterus to settle naturally toward your spine before securing the support.
Given the warm and humid tropical climate in the Philippines, wearing a maternity binder directly against your skin can quickly lead to discomfort, excessive sweating, and heat rashes. To prevent friction and chafing, always wear the binder over a thin, breathable, and seamless layer of clothing, such as a soft cotton camisole or a lightweight maternity undershirt. This protective barrier absorbs moisture and prevents the edges of the binder from digging into your skin.
Products mentioned in this guide
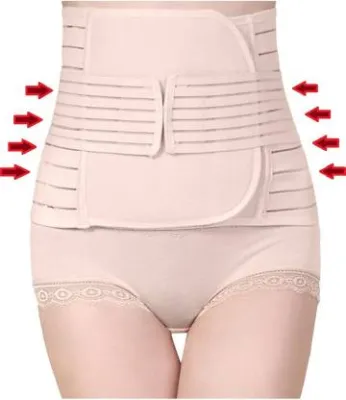

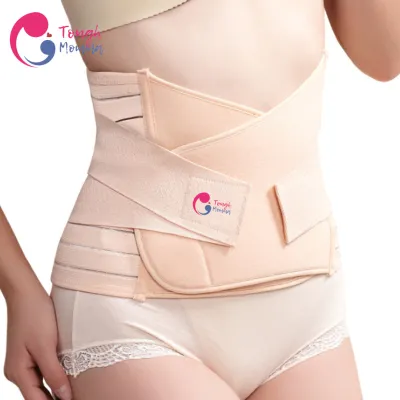
![JF.PH [Fast Delivery] Postpartum Binder Recovery Girdle Waist/Pelvis Belt Body Shaper Postnatal Belly Wrap](https://img.lazcdn.com/g/p/4c7f7742678557bf3d48b369652ab062.jpg_400x400q80.jpg_.webp)
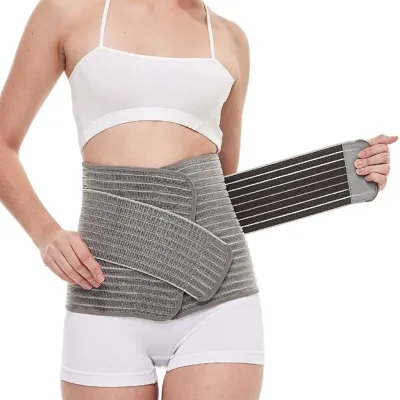
Prices are valid at publication and may change. Please refer to the product page for the latest price.
Additionally, make it a habit to inspect the condition of your garment before every use. Check the hook-and-loop fasteners for any accumulated lint or loss of grip, and examine the seams and elastic panels for signs of fraying or structural wear. A compromised binder will not distribute pressure evenly, which can lead to localized discomfort or inadequate support.
Step-by-Step Guide to Putting On Your Binder
Putting on your maternity binder correctly requires a systematic approach to ensure the weight of your abdomen is lifted rather than compressed. Start by standing in a relaxed, upright posture, or lie down if that is your preferred method. Locate the wide back panel of the binder, which is designed to provide lumbar support. Position this panel flat against your lower back, ensuring it aligns with the natural curve of your spine and sits low enough to cover your sacrum. The lower edge of the back panel should rest just above your tailbone to establish a stable foundation.

Once the back panel is centered, gently bring the side panels forward around your hips. Avoid pulling these bands tightly during this initial stage; hold them with just enough tension to keep the back panel in place. The primary goal of a maternity binder is to cradle the lower portion of your belly, acting as an external set of ligaments that lifts the bump upward and inward toward your body.
Next, secure the primary fasteners of your Dr. Isla binder. Depending on the specific model you own, this may involve a single wide band or a multi-piece system. Always fasten the lower band first, securing it low on your pelvis, well below your belly bump. This positioning is vital: the binder must support the weight from underneath. If you secure the band across the middle or top of your uterus, you risk compressing the baby and restricting blood flow.
Finally, take a moment to look in a mirror to verify the placement. The front of the binder should form a supportive cradle that sits snugly against your pubic bone and lower abdomen. It should not ride up over the peak of your belly. If the band appears tilted upward in the front or is pressing directly into your stomach, unfasten it and reposition the back panel slightly lower before refastening.
Adjusting Tension and Verifying Proper Positioning
Once the binder is secured, you must fine-tune the tension to ensure it is safe and effective. A common mistake is wrapping the binder too tightly in an attempt to get more support, which can restrict deep breathing and impede circulation to your lower extremities. To verify a safe fit, apply the “two-finger” rule. Slide two fingers flat between the binder and your skin (or undergarment) at the front, sides, and back. If you cannot easily slide your fingers underneath, or if you feel a throbbing sensation, the binder is too tight and must be loosened immediately. You should be able to take deep, comfortable breaths without feeling restricted around your ribs or abdomen.
If your maternity binder features secondary tension straps, use them now to customize your support. These smaller, outer straps are designed to let you adjust the level of lateral and lumbar stabilization. Pull these straps forward symmetrically and secure them to the main band. Symmetrical adjustment is key; uneven tension can pull your pelvis out of alignment, potentially worsening lower back or sacroiliac joint pain.
After adjusting the straps, test the fit by transitioning through different movements. Stand up, walk around the room, and sit down on a chair. Observe how the garment behaves. It should remain relatively flat against your body without bunching, folding over, or riding up into your ribcage.
Be vigilant for immediate signs of a poor fit. If you experience any digging at the hips, if the binder slips down as you walk, or if you feel any localized numbness, tingling, or coldness in your legs, these are clear indicators that the binder is either positioned incorrectly or fastened too tightly. Take the time to readjust the bands until these sensations disappear.
Safety Limits and Warning Signs to Remove the Binder
While a maternity binder is an excellent tool for managing physical discomfort, it is not designed for continuous, round-the-clock wear. Relying on a support belt for too many hours a day can cause your core and back muscles to become dependent on the external support, potentially weakening them over time. As a general guideline, limit your wear time to a few hours at a time, focusing on periods of high physical activity, prolonged standing, or walking. Do not wear the binder for more than three to four consecutive hours unless your obstetrician or physical therapist has explicitly instructed you to do so. Never wear a maternity binder while sleeping, as your body needs to move freely, and you cannot monitor your physical responses or baby’s movements while asleep.
You must remain highly sensitive to your body’s signals and remove the binder immediately if you experience any warning signs. These include shortness of breath, dizziness, lightheadedness, a rapid heart rate, or tingling and numbness in your pelvic area or legs. Most importantly, pay close attention to your baby’s movements. If you notice any sudden decrease or change in fetal activity while wearing or after wearing the binder, remove it at once and contact your healthcare provider or midwife.
In hot and humid environments, skin health requires extra vigilance. When you remove the binder, inspect your skin for signs of redness, heat rashes, excessive sweating, or chafing. If you notice skin irritation, keep the area clean and dry, and refrain from using the binder until your skin has fully healed.
Always remember that a maternity binder is a supportive aid, not a medical treatment. If you experience persistent, severe pelvic girdle pain, sharp back pain, or any symptoms that do not improve with rest, stop using the product and consult your doctor or physical therapist for a comprehensive evaluation.
Cleaning and Maintaining the Garment's Elasticity
To preserve the structural integrity, hygiene, and elasticity of your maternity binder throughout your pregnancy, proper maintenance is essential. Because the binder is worn close to the body and absorbs sweat—especially during warm days—regular cleaning is necessary to prevent bacterial growth and skin irritation. Always begin by checking the manufacturer’s care label for specific washing instructions, as some models may have unique material compositions.
When washing the binder, hand washing in cool or lukewarm water is highly recommended to protect the delicate elastic fibers. If you must use a washing machine, place the binder inside a mesh laundry bag and select a gentle or delicate cycle with cool water. Use a mild, hypoallergenic detergent. Avoid fabric softeners, bleach, or harsh chemical stain removers, as these substances can break down the elastane and spandex fibers, causing the binder to lose its supportive stretch and reducing the effectiveness of the Velcro closures.
Drying the binder correctly is just as important as washing it. Never place a maternity binder in a tumble dryer, and do not expose it to direct heat sources like radiators or intense, direct midday sunlight. High heat degrades elastic materials rapidly, causing them to warp or lose their recovery properties. Instead, lay the binder flat on a clean, dry towel in a shaded, well-ventilated indoor or outdoor area to air dry.
Before washing and storing the garment, always fasten all hook-and-loop closures securely. This simple step prevents the rough hooks from snagging the soft elastic panels of the binder itself or damaging other clothing items in the wash. Store the clean, dry binder flat or loosely rolled in a cool, dry drawer away from direct sunlight.
Frequently Asked Questions (FAQ)
Can I wear a maternity binder while sitting or driving?
Yes, you can wear a maternity binder while sitting or driving, but you will likely need to make adjustments. When you transition from a standing to a seated position, your abdominal shape changes, and your thighs push upward against the lower edge of the binder. This can cause a belt that felt perfectly comfortable while standing to dig into your groin, hips, or ribs, potentially restricting blood flow. To maintain comfort, loosen the primary fasteners slightly before sitting down for extended periods, or adjust the secondary straps to relieve localized pressure. Additionally, when driving, ensure that the binder does not interfere with the proper placement of your vehicle’s seatbelt. The lap belt must still sit low across your hips, below your belly bump, while the shoulder belt crosses the center of your chest, ensuring your safety is never compromised.
Should I wear the binder during exercise or physical activity?
A maternity binder can be highly beneficial during light, low-impact physical activities, such as walking, prenatal yoga, or light household chores. During these movements, the binder helps stabilize your pelvis and supports your lower back, reducing the impact of repetitive motion on your joints. However, you should generally avoid wearing the binder during high-intensity workouts, heavy lifting, or exercises that require deep core engagement and abdominal bracing, unless a specialized prenatal physical therapist has advised otherwise. Restricting your abdominal wall during intense exercise can limit your lung capacity and alter your natural core activation patterns. Furthermore, physical exertion increases body temperature and sweating; monitor your skin closely for signs of overheating or chafing, and remove the binder if you begin to feel uncomfortably warm or fatigued.

Community discussion
Share your experience or ask a question. Comments are reviewed before publication.