
To keep outings with your little one stress-free, using a dedicated baby bag organizer is the ultimate way to ensure you never have to dig frantically for a diaper or wipe while holding a crying infant. Step out of the house with a baby, and you quickly realize that time operates differently. A sudden diaper blowout or a hungry cry in the middle of a crowded shopping mall demands immediate, calm action. Without a reliable system, a diaper bag quickly becomes a chaotic abyss where pacifiers vanish and wipes are buried under layers of spare clothes.
An organized bag does more than just save time; it significantly reduces the mental load of parenting on the go. When every diaper, bottle, and wipe has a designated home, you can focus on enjoying your outing rather than stress-searching for a lost burp cloth. By establishing a zoned packing method, you can confidently handle any minor emergency with minimal disruption to your day.
Why a Zoned Baby Bag Organizer Saves Time on the Go
A baby bag organizer is a removable, multi-pocket insert designed to bring structure to the interior of almost any bag. Usually crafted from lightweight felt, durable nylon, or water-resistant canvas, these inserts feature compartments of varying sizes specifically tailored for baby gear. Instead of letting items pool at the bottom of a deep backpack or tote, the organizer holds everything upright and visible.
Products mentioned in this guide
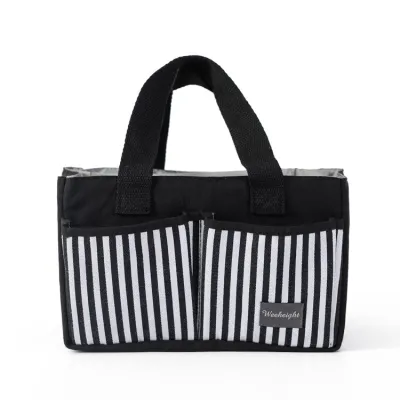
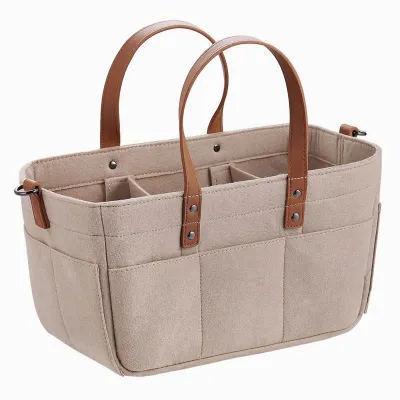
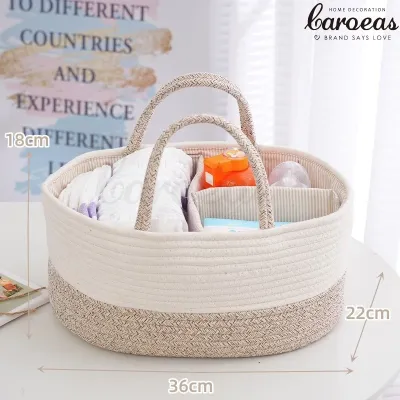
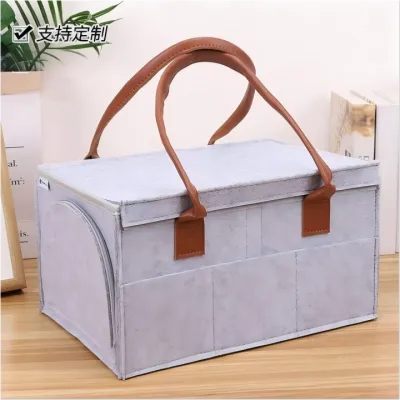
Prices are valid at publication and may change. Please refer to the product page for the latest price.
The contrast between loose packing and a zoned system becomes starkly clear during high-stress moments. Digging through an unstructured bag while balancing a squirming infant on a public changing table is a recipe for frustration. A zoned insert eliminates this friction by keeping high-priority items at your fingertips. You no longer have to empty half the bag’s contents onto a bench just to find a single clean pacifier.
Another major advantage of a removable organizer is its sheer versatility. Parents often need to switch between different bags depending on the destination, whether it is a rugged backpack for a day trip, a sleek tote for a quick lunch, or a compact caddy for a stroller walk. With a removable insert, you can simply lift the entire organized unit out of one bag and drop it into another. This saves you from having to repack individual items every time you change your plans, ensuring you never accidentally leave critical supplies behind.
In tropical climates like the Philippines, where high humidity and sudden rain showers are common, keeping your gear organized also protects it. An organizer keeps dry items safely separated from damp clothes or condensation-prone water bottles, preventing moisture from ruining clean diapers or formula dispensers. Organizer inserts generally range from affordable options around ₱300 to premium, highly structured models costing ₱1,500 or more on local e-commerce platforms, making them an accessible upgrade for any parent.
Step-by-Step Guide to Packing Your Diaper Bag by Zone
An efficient packing system relies on dividing your bag into functional zones based on how often you need each item and how quickly you must access it. By grouping items logically, you create muscle memory, allowing you to reach into your bag and pull out exactly what you need without even looking.

Zone 1: The Diapering Station for Fast Changes
The diapering zone must be designed for rapid, one-handed deployment. Group your diapers, a travel-sized pack of baby wipes, a portable changing mat, and a tube of diaper rash cream together in a single, dedicated section of your organizer. Keeping these items clustered ensures that when it is time for a change, you can grab the entire diapering kit in one swift motion.
Position your baby wipes in the most accessible spot possible, such as an exterior side pocket or the very top of your main compartment. Wipes are the most frequently used item in any parent’s arsenal, needed for wiping sticky hands, cleaning messy faces, and sanitizing public high chairs long before you ever unroll a changing mat. Having them immediately reachable saves you from unzipping the entire bag for a minor cleanup.
When packing diaper creams, ointments, or liquid sanitizers, always verify that the caps are tightly sealed. The intense heat and humidity of the tropical climate can cause certain oil-based creams to thin out and leak more easily. Avoid leaving your diaper bag inside a hot parked car, as extreme temperatures can degrade the ingredients in sunscreens, creams, and sanitizers. Always check the manufacturer’s storage instructions on your baby products to preserve their effectiveness and safety.
Zone 2: The Feeding Hub for Bottles and Snacks
Keeping feeding supplies clean, safe, and at the right temperature requires a dedicated, isolated zone. Utilize the insulated bottle pockets built into your diaper bag or place a separate thermal pouch inside your baby bag organizer. These insulated compartments help maintain the temperature of breast milk, warm water, or prepared formula while preventing condensation from dampening nearby items.
To prevent messy spills, always store dry formula dispensers separately from pre-mixed bottles or water flasks. A tight-sealing, multi-tier formula dispenser allows you to measure portions accurately beforehand, minimizing the risk of powder spilling into the main compartment. Ensure all bottle caps are screwed on straight and tight before placing them upright in their designated slots.
Keep bibs, burp cloths, and feeding spoons in a dry, clean section of the organizer that is physically separated from your diapering supplies. This separation is crucial for maintaining proper hygiene and preventing cross-contamination. Before using any bottles, nipples, or utensils, inspect them for cracks or wear, and follow the manufacturer’s sanitization guidelines to keep your baby safe.
Zone 3: The Comfort and Emergency Kit
The final zone is reserved for items you do not need constantly, but must have on hand for comfort and emergencies. This includes a change of clothes, comforting toys, pacifiers, and a basic first-aid kit. Keeping these items tucked away in their own quiet corner prevents them from cluttering the high-traffic diapering and feeding zones.
To save space and prevent wrinkles, roll your baby’s spare outfits tightly instead of folding them. You can secure these rolls with elastic bands or place them inside a small compression cube. Always pack a complete outfit change, including socks and a light sweater, as air-conditioned shopping malls can feel surprisingly chilly compared to the outdoor tropical heat.
Keep pacifiers, teethers, and small toys clean and hygienic by storing them in small, clear, zippered pouches. This keeps them free from lint and dust while making them instantly visible when your baby needs soothing. Always inspect pacifiers and teethers for tears, punctures, or signs of aging before giving them to your baby, adhering strictly to the manufacturer’s safety warnings.
For emergency situations, pack a compact first-aid kit containing baby-safe adhesive bandages, sterile gauze, and any essential medications. Always consult your pediatrician before administering any over-the-counter medications or remedies while on the go, and keep all health supplies securely zipped away out of your child’s reach.
Quick-Access Hacks to Grab Essentials in Seconds
Once your zones are established, you can fine-tune your setup with practical hacks designed to make on-the-go parenting even smoother.
The ultimate test of any diaper bag setup is the One-Hand Test. While holding your baby in one arm, try to retrieve a diaper, open a pack of wipes, or grab a pacifier with your free hand. If you have to struggle with complex clasps, deep pockets, or tight zippers, your layout needs adjustment. Keep the most critical items in pockets with simple magnetic closures or smooth, single-track zippers that can be operated with one hand.
Utilize external attachments like stroller clips, carabiners, or built-in D-rings to manage bulky items. Hanging a lightweight changing pad, a sun hat, or a wet bag from the outside of your bag frees up valuable interior space. However, always check your stroller manufacturer’s guidelines regarding weight limits. Hanging heavy bags from stroller handlebars can cause the stroller to tip backward, posing a serious safety hazard to your baby.
Finally, do not forget to designate a specific area for your own essentials. Use external magnetic pockets, side mesh compartments, or a dedicated parent console on your stroller to store your phone, keys, wallet, and hand sanitizer. Keeping your personal items separate from your baby’s gear prevents you from contaminating clean baby items when reaching for your keys or phone, and ensures you can sanitize your hands instantly before feeding or changing your little one.
How to Reset and Maintain Your Packing System
An organized diaper bag is not a one-time project; it requires regular maintenance to remain functional and hygienic. Establishing a quick routine after each outing ensures you are never caught unprepared the next time you need to leave the house.
Spend five minutes restocking and wiping down your bag as soon as you return home. Replace any diapers, wipes, or formula portions used during the trip, and throw any dirty clothes or bibs straight into the laundry. Wipe down the interior of your organizer with a damp cloth or a baby-safe disinfectant to remove crumbs, dust, or sticky residues. This simple habit guarantees that your bag is always packed and ready for your next spontaneous trip.
As your baby grows, their needs will change, and your packing system must adapt accordingly. A newborn requires numerous diapers, frequent milk feeds, and multiple outfit changes. A toddler, on the other hand, will need fewer diapers but more solid snacks, water bottles, and interactive toys. Periodically review the contents of your organizer to remove items your baby has outgrown, such as smaller-sized diapers or newborn pacifiers, and adjust your zones to accommodate their current developmental stage.
Lastly, perform a deep cleaning of your bag and organizer at least once a month. Empty every pocket to check for expired creams, stray crumbs, or damp clothes that may have slipped to the bottom. In humid environments, trapped moisture can quickly lead to mold or mildew growth on fabrics. Ensuring your bag is thoroughly dry before repacking it protects your baby’s health and extends the lifespan of your gear.
Frequently Asked Questions (FAQ)
How many diapers should I pack in my baby bag organizer for a day trip?
As a general rule of thumb, pack one diaper for every two hours you plan to be out, plus two additional diapers for unexpected emergencies or delays. If you plan to be out for six hours, packing five to six diapers is usually sufficient. However, you should adjust this estimate based on your baby’s age and habits. Newborns typically require more frequent changes than older infants. Additionally, factor in potential travel delays or long transit times, which are common when navigating busy city roads, to ensure you never run short.
Can I use a regular tote bag instead of a dedicated diaper bag with an organizer?
Yes, you can easily convert any standard fashion tote, backpack, or utility bag into a highly functional diaper bag by inserting a structured baby bag organizer. This approach offers great versatility, allowing you to maintain your personal style while keeping baby essentials perfectly sorted. When choosing a regular tote to pair with an organizer, verify that it has sturdy, comfortable shoulder straps to distribute weight evenly. Look for a bag with a wipeable, water-resistant interior lining to handle accidental spills, and ensure it features a secure top closure, such as a sturdy zipper, to prevent items from falling out when the bag is placed on a car seat or stroller basket.
Community discussion
Share your experience or ask a question. Comments are reviewed before publication.