
To properly use a 5 in 1 bottle cleaning brush set, you must utilize each specialized tool systematically: the main brush for the bottle body, the mini brush for the nipple, the wire detail brush for vents or straws, the hygienic tweezers to handle clean parts, and the drying rack to drain excess water. This multi-tool approach ensures that every surface is physically cleared of milk residue before you initiate the sterilization process. Skipping or rushing this manual scrubbing phase compromises the entire sanitizing cycle, as heat or steam cannot penetrate hardened milk proteins.
In the tropical climate of the Philippines, where high humidity and warm ambient temperatures accelerate bacterial growth and mold formation, mastering this cleaning routine is a vital daily practice. Properly preparing your baby’s feeding equipment protects their developing immune system and ensures that your sterilizer can do its job effectively.
Why Physical Cleaning Must Happen Before Sterilization
Many parents assume that placing a bottle directly into a high-temperature steam or ultraviolet (UV) sterilizer is enough to keep their infant safe. However, there is a critical difference between cleaning and sterilizing. Cleaning is the physical removal of organic matter, dirt, and milk residue from the surfaces of the bottle. Sterilizing, on the other hand, is the process of killing remaining microorganisms, such as bacteria, viruses, and mold spores, on a surface that has already been thoroughly washed.
Products mentioned in this guide
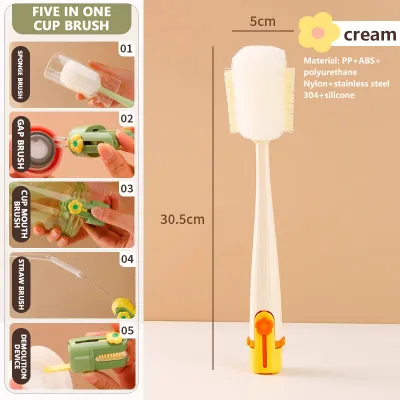

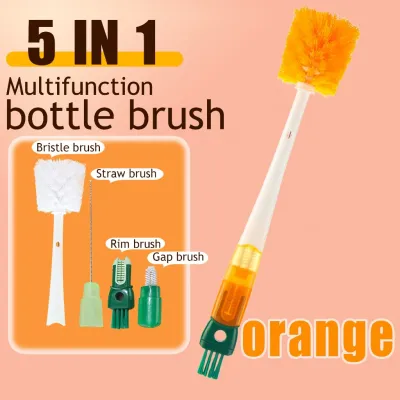
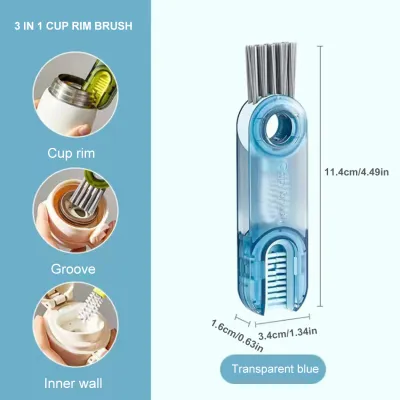
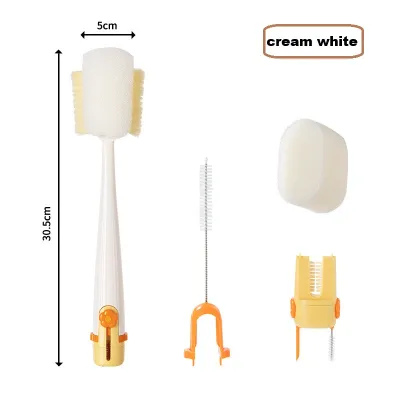
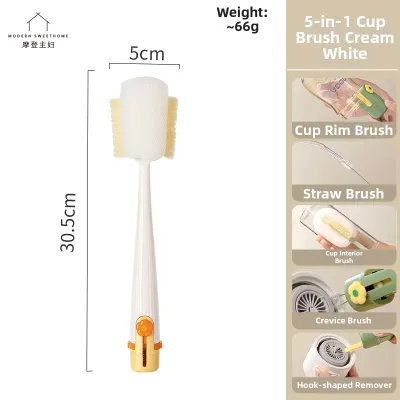
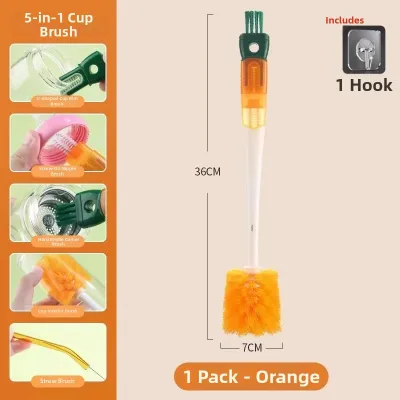
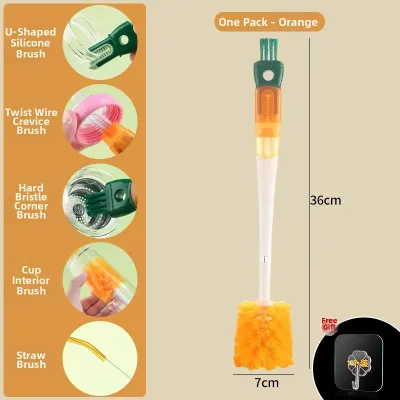
Prices are valid at publication and may change. Please refer to the product page for the latest price.
When milk sits in a bottle, the fats, proteins, and sugars quickly adhere to the plastic or glass walls. If these residues are not physically scrubbed away, they form a microscopic layer known as a biofilm. This sticky film acts as a protective shield for bacteria. If you place a bottle with biofilm into a sterilizer, the heat or UV light may only sanitize the very top layer of the film, leaving the trapped bacteria alive and multiplying underneath. Once fresh milk is poured back into the bottle, these pathogens mix directly into your baby’s feed.
Electric steam sterilizers, microwave sanitizing bags, and UV sterilizing cabinets do not have the ability to wash or scrub. They are designed solely to sanitize clean, non-porous surfaces. Using a dedicated brush set to remove every trace of milk fat is the mandatory first step that makes subsequent sterilization successful.
Identifying the Tools in Your 5 in 1 Bottle Cleaning Brush Set
When purchasing a 5 in 1 bottle cleaning brush set, you are equipping your kitchen with a complete, specialized hygiene kit. While designs vary slightly by brand, a standard set contains five distinct components, each engineered for a specific part of the bottle assembly:

- Main Bottle Brush: This is the largest tool in the set, featuring a long handle and a head made of soft silicone bristles or high-density sponge. It is designed to sweep the expansive inner walls and the bottom of the bottle container.
- Nipple Brush: A smaller, contoured brush shaped specifically to fit the exact interior curve of silicone bottle nipples without stretching or piercing them.
- Straw or Vent Detail Brush: A very thin, flexible wire brush with fine, short bristles, ideal for navigating narrow anti-colic tubes, straws, and tiny valve openings.
- Tweezers or Tongs: Hygienic plastic tongs used to retrieve hot or sterile components from sterilizers or boiling water, keeping your hands from re-contaminating the clean parts.
- Drying Rack or Storage Stand: A dedicated, ventilated platform designed to hold the washed bottle parts upside down to drain, while also keeping your brushes organized and upright.
Before using your set for the first time, check the manufacturer’s packaging or manual to verify if there are specific material instructions, such as temperature limits for the plastic handles. Always inspect all brushes for wear, tear, or loose bristles before each cleaning session. Frayed nylon bristles or tearing sponge heads can become choking hazards or get trapped inside the feeding nipple, so any damaged tools must be discarded immediately.
Step-by-Step Guide to Washing Every Bottle Part
Effective bottle cleaning begins with proper preparation. Before you pick up any brush, fully disassemble the bottle. Do not leave the silicone nipple inside the collar ring, and make sure to remove any anti-colic valves, straws, or silicone rims. Leaving parts assembled creates hidden pockets where milk can pool, sour, and breed bacteria.
In warm, tropical regions, milk residue can dry into a hard, stubborn crust within minutes of a feed. To prevent this, rinse all disassembled parts under warm, running water immediately after your baby finishes feeding. If you cannot wash the bottles right away, keeping them submerged in clean water prevents the milk proteins from hardening against the plastic.
Prepare a clean, dedicated wash basin rather than washing baby items directly in the kitchen sink, which often harbors food residue and household bacteria. Fill the basin with warm water and add a baby-safe, fragrance-free liquid dish soap. Avoid standard household dishwashing liquids, as they often contain heavy synthetic perfumes and strong degreasing agents that can leave a chemical residue on silicone parts.
Cleaning the Bottle Body with the Main Brush
Submerge the bottle body completely in your prepared soapy water. Insert the main bottle brush into the container, ensuring the bristles or sponge head make firm contact with the inner walls.
Rather than simply sliding the brush up and down, use a continuous twisting, rotational motion as you move the brush. This ensures that the bristles sweep away the stubborn milk fat that clings to the sides. Pay close attention to the bottom corners of the bottle, where milk sediments naturally settle and accumulate, as well as the threaded neck where the collar screws on.
Once you have scrubbed the entire interior, pull the brush out and rinse the bottle body thoroughly under clean, running water. Inspect the bottle against a bright light to ensure there are no cloudy patches or soapy bubbles left behind.
Cleaning the Nipple and Collar with the Nipple Brush
Silicone nipples are highly delicate and prone to tearing if handled roughly. Take the small, contoured nipple brush and insert it gently into the underside of the nipple. Do not force the brush through the feeding hole at the tip, as this can easily enlarge the opening, alter the milk flow rate, or split the silicone.
Rotate the nipple brush gently to clear away the fatty film from the inner walls. Next, use the brush to clean the threads of the collar ring. The threaded grooves are notorious for trapping dried milk, which can go unnoticed during a quick wash.
Never stretch, pull, or scrub the silicone aggressively. Damaged nipples can harbor bacteria in microscopic tears and may collapse during feeding. If you notice any signs of wear, thinning, or tearing, discard the nipple immediately and consult your pediatrician or a lactation consultant if your baby experiences persistent feeding difficulties.
Clearing Straws, Vents, and Small Parts with the Detail Brush
Many modern baby bottles feature intricate anti-colic venting systems, long straws, or tiny valves designed to reduce air ingestion. These narrow components cannot be reached by standard brushes and require the thin wire detail brush.
Gently push the detail brush completely through the straw or vent tube. Rotate the wire handle as you pull the brush back out to scrub the inner passage. Repeat this action several times to ensure all milk residue is dislodged.
After scrubbing, flush the tubes with clean, running water to wash away any loosened debris or soap bubbles. Check the anti-colic vents carefully; if they remain blocked by dried milk or soap residue, they will not function properly, which can cause the nipple to collapse or increase your baby’s colic symptoms.
Using Tweezers and the Drying Rack for Hygienic Prep
Once all components are thoroughly scrubbed and rinsed, maintaining hygiene is critical to prevent re-contaminating the clean parts before they enter the sterilizer. Your hands, even if recently washed, carry natural oils and skin bacteria that can quickly transfer to damp silicone.
Use the included tweezers or tongs to handle the clean, wet parts. Grip the collar rings, nipples, and valves with the tweezers rather than your fingers. This is especially useful when transferring wet parts from your washing basin to the drying station.
Place all washed components upside down on the included drying rack or stand. Positioning the bottles and nipples face-down allows water to drain naturally rather than pooling inside the containers. In the highly humid Philippine climate, standing water is a primary catalyst for mold and bacterial growth.
Allow the parts to drain and air-dry briefly in a clean, well-ventilated area before loading them into your sterilizer. While items do not need to be completely dry before steam sterilization, removing excess standing water prevents mineral scale buildup inside your electric sterilizer. If you are using a UV sterilizer, removing water droplets is essential, as water spots can block UV light and reduce sanitizing efficiency.
How to Verify Your Bottles Are Truly Clean
Before loading your feeding equipment into the sterilizer, perform a quick sensory check to ensure the physical cleaning phase was successful. Remember, the sterilizer will only sanitize the surface it can reach; it will not clean off dirt.
- Visual Check: Hold each bottle and nipple up to a bright light. The plastic or glass should look crystal clear, with no cloudy film, white spots, or dried milk rings. Straws and vents must be completely transparent when you look through them.
- Tactile Check: Run a clean finger (or use the tweezers to feel) along the inner surfaces. They should feel squeaky clean. If a surface feels slippery, greasy, or slimy, there is still milk fat or soap residue present, and the part must be washed again.
- Olfactory Check: Sniff the bottle and nipple. There should be absolutely no sour milk smell or heavy artificial soap fragrance. A clean bottle should have a completely neutral scent.
Once the parts pass these checks, consult your specific sterilizer’s manufacturer instructions for the correct loading patterns, water levels, and cycle times to complete the sanitizing process safely.
Caring for and Replacing Your Brush Set
To keep your baby’s bottles clean, your 5 in 1 bottle cleaning brush set must also be kept in pristine condition. After completing your daily washing routine, rinse every brush thoroughly under warm, running water to remove all soap suds and organic particles trapped in the bristles or sponge.
Shake off excess water and store the brushes upright in a dry, well-ventilated area. In humid tropical environments, storing wet brushes in a closed cupboard, under the sink, or flat on a damp countertop will quickly lead to mold, mildew, and bacterial colonization. Keeping them upright on their dedicated stand allows them to air-dry rapidly.
Because these brushes are subjected to daily wear, they have a limited lifespan. Inspect them regularly for signs that indicate it is time to replace the set:
- Frayed, bent, or shedding bristles
- Torn, crumbling, or discolored sponge heads
- Visible black mold spots that cannot be washed away
- A loss of scrubbing stiffness in the bristles
As a general rule, replace your bottle brushes every 30 to 60 days, or immediately if you notice any physical damage or mold growth, to ensure your cleaning routine remains safe and hygienic.
Frequently Asked Questions (FAQ)
Can I use a 5-in-1 brush set on both glass and plastic bottles?
Yes, but you must match the brush material to the bottle type. Soft silicone and sponge brush heads are highly versatile and safe for both glass and plastic bottles because they do not scratch the surfaces. However, if your set contains stiff nylon bristles, use caution on plastic bottles. Over time, stiff bristles can create microscopic scratches on the inner walls of plastic bottles. These tiny scratches can harbor milk fats, proteins, and bacteria, making them much harder to clean and sanitize. Always check both your brush packaging and your bottle manufacturer’s guidelines to ensure material compatibility.
Do I need to sterilize the bottle brushes themselves?
Bottle brushes do not require daily sterilization like feeding bottles, but they must be kept clean and dry. Attempting to sterilize them in steam or UV sterilizers can melt plastic handles or degrade sponge materials unless the manufacturer’s care instructions explicitly state they are sterilizer-safe. Instead, wash them with warm, soapy water, rinse thoroughly, and air-dry. If allowed by the manufacturer, you can occasionally sanitize them by dipping the bristle heads in boiling water for a few seconds, but always verify this first to avoid damaging your cleaning tools.
Community discussion
Share your experience or ask a question. Comments are reviewed before publication.