
Transitioning to washable diapers is a rewarding choice for many families, offering long-term savings and a reduced environmental footprint. While the initial learning curve may seem steep, mastering the basics of diaper types, fitting techniques, and laundry routines makes the process straightforward. This guide breaks down everything you need to know to confidently start your cloth diapering journey.
By choosing reusable options, you can significantly reduce waste while keeping your baby comfortable. Modern cloth diapers are designed with advanced fabrics that are gentle on sensitive skin and highly adjustable to grow with your child. Whether you want to go fully cloth or simply use them while at home, taking the first step is easier than you think.
Essential Supplies You Need to Start Cloth Diapering
Before making the switch, gathering the right tools will make your daily routine seamless. You do not need to buy everything at once, but having a complete starter set prevents mid-day emergencies.
Products mentioned in this guide
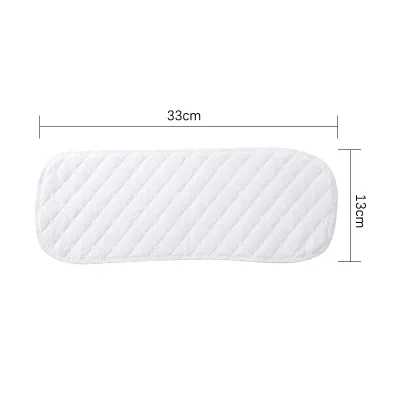
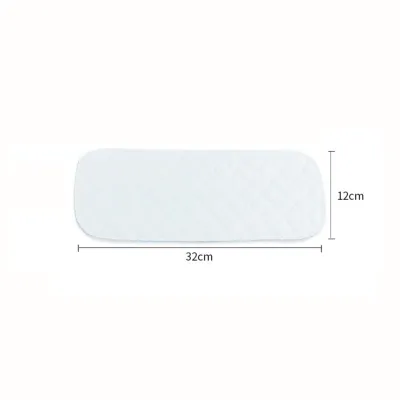
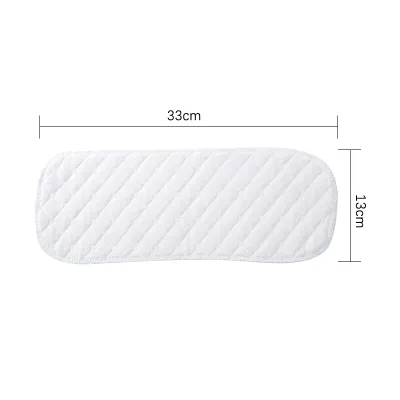
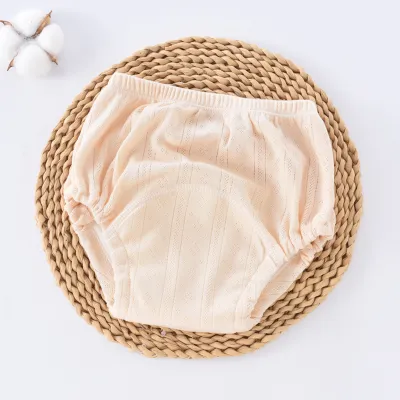
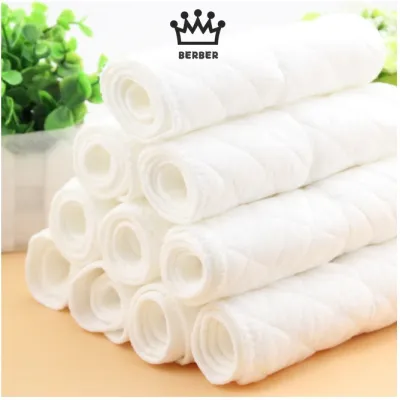
Prices are valid at publication and may change. Please refer to the product page for the latest price.
First, you will need the diapers themselves. Depending on the system you choose, this includes diaper shells, pocket covers, or all-in-one units. Along with the outer shells, you need absorbent inserts, prefolds, or flats made of materials like microfiber, bamboo, or cotton.
To make cleanup easier, consider reusable or disposable liners. These sit on top of the diaper to catch solid waste, allowing you to lift and discard it quickly.
For storage, invest in waterproof wet bags or a dedicated diaper pail with a zippered liner. These keep soiled diapers contained and control odors before wash day. A medium-sized wet bag is also essential for outings, allowing you to store wet diapers securely in your diaper bag.
Finally, choose a diaper-safe laundry detergent. Look for formulas free from fabric softeners, optical brighteners, and heavy fragrances, as these additives can coat the fabric fibers and reduce absorbency over time.
Choosing the Right Type of Washable Diaper for Your Routine
Selecting the right diaper system depends on your lifestyle, budget, and drying conditions. In tropical climates with high humidity, drying time is a major factor to consider when building your collection.

Prefolds and flats with waterproof covers are highly cost-effective and dry exceptionally fast, making them ideal for humid weather or rainy seasons. Prefolds are rectangular cotton fabrics sewn with extra layers in the middle, while flats are large, single-layer sheets. Both require folding techniques and fasteners before putting on a waterproof cover, which can have a slight learning curve for beginners but offers excellent customization.
Pocket diapers are highly popular because they offer customizable absorbency and a stay-dry feel. They feature a waterproof outer layer and a soft inner lining that forms a pocket. You stuff the absorbent inserts inside this pocket. While they require assembly after every wash, they dry relatively quickly because the inserts and covers dry separately.
All-in-One (AIO) diapers provide the ultimate convenience, closely mimicking the design of disposable diapers. The absorbent layers are sewn directly to the waterproof shell, meaning no stuffing or folding is required. However, because all layers are attached, they take significantly longer to dry, which can be challenging during wet, humid months when line drying is slower.
Fitted diapers are made entirely of absorbent material and require a separate waterproof cover. They offer excellent coverage and high absorbency, making them a favorite for heavy wetters or long naps. Because they lack a built-in waterproof layer, they are highly breathable but require a two-step putting-on process.
How to Put on a Washable Diaper for a Secure Fit
Achieving a proper fit is the most effective way to prevent leaks and ensure your baby remains comfortable throughout the day. Unlike disposable diapers, washable diapers require a slightly different positioning technique to work effectively.
Start by prepping the insert or folding the prefold. For boys or tummy sleepers, fold the insert to place more absorbency toward the front. For girls, distribute the absorbency evenly in the center. Place the prepped insert flat inside the pocket or cover, ensuring there are no bunches or folds that could cause discomfort.
Next, adjust the rise snaps on the front of the diaper. These snaps control the length of the diaper to match your baby’s current height. Snap them into place before putting the diaper on your baby. The diaper should sit low on the waist, similar to a pair of pants, rather than high up on the stomach.
Lay your baby on the diaper and pull the front up. Fasten the waist snaps or hook-and-loop closures securely. You should be able to slide two fingers easily between the diaper and your baby’s tummy, ensuring it is snug but not restricting their breathing.
Finally, check the leg gussets. Run your finger along the elastic around the thighs to make sure the fabric is tucked into the underwear line. No gaps should be visible, and the elastic should rest gently against the skin without digging in or leaving deep red marks.
Building a Reliable Washing Routine for Cloth Diapers
A consistent laundry workflow keeps diapers hygienic, prevents stubborn odors, and preserves the integrity of the waterproof materials. Because these fabrics hold moisture and waste, they require a two-step washing process to get completely clean.
First, remove solid waste. For breastfed babies, the waste is water-soluble and can go straight into the washing machine. Once the baby starts solid foods, plop the waste into the toilet or use a diaper sprayer to rinse the diaper before storing it in your wet bag.
When wash day arrives, run a short pre-wash cycle with cold or warm water and a small amount of detergent. This cycle flushes out the bulk of the organic waste and prepares the fabric fibers for a deeper clean. Avoid hot water in this step, as it can bake in stains and odors.
Follow this with a heavy-duty main wash cycle. Use the recommended amount of diaper-safe detergent for a heavily soiled load. Ensure there is enough water and agitation to rub the diapers against each other, which helps scrub the fibers clean.
For drying, refer to the manufacturer’s guidelines. Hanging diapers on a clothesline under the sun is highly effective, as natural sunlight acts as a natural sanitizer and helps fade stubborn stains. However, protect the waterproof laminate covers from direct, intense midday heat to prevent the material from cracking.
Never use fabric softeners, dryer sheets, or petroleum-based diaper creams without a liner. These products leave a greasy residue that coats the fibers, causing the fabric to repel liquid instead of absorbing it.
Troubleshooting Leaks, Odors, and Rashes
Even with a solid routine, you may occasionally encounter minor issues. Knowing how to diagnose these problems quickly keeps your cloth diapering journey on track and ensures your baby stays comfortable.
If you experience leaks, first evaluate the fit. Gaps around the legs or waist are the most common culprits. If the fit is correct, check if the insert is completely saturated; your baby may need a more absorbent material like bamboo or hemp. Finally, test for repelling by pouring a small amount of water on a clean, dry insert. If the water puddles instead of sinking in, detergent residue or fabric softener may be blocking absorption.
Persistent odors, such as a strong ammonia smell when the baby wets or a musty scent when clean, indicate an incomplete washing routine. This can happen from using too little detergent, hard water mineral buildup, or insufficient rinsing. Adjust your detergent dosage or run an extra rinse cycle to ensure all soap is cleared from the fibers.
Diaper rashes can occur if a baby is sensitive to wetness or if there is detergent buildup in the fabric. Increase the frequency of diaper changes to keep the skin dry. If you suspect detergent residue, perform a “swish test” by placing a clean insert in a bowl of warm water; if the water becomes cloudy or sudsy, rinse your diapers thoroughly until the water runs clear.
If issues persist, or if you notice a stubborn rash that does not clear up with standard care, consult a pediatrician. For deep-seated mineral buildup or yeast issues, you may need to perform a deep strip wash or sanitize the diapers according to manufacturer instructions.
Frequently Asked Questions (FAQ)
How many washable diapers do I need for a full-time stash?
The number of diapers you need depends on your baby’s age and how often you plan to wash them. Newborns typically go through 10 to 12 diapers a day, while older babies use about 6 to 8. If you plan to wash every other day, a stash of 20 to 24 diapers is ideal. This provides enough diapers for two days of use, plus a buffer of 4 to 6 extra diapers to use while the clean batch is drying on the line, which is especially helpful during humid or rainy seasons.
Can washable diapers be used overnight?
Yes, washable diapers can be highly effective for overnight use with a few adjustments. Since babies sleep for longer stretches, you will need to increase the diaper’s absorbency. You can do this by adding a booster or doubler made of highly absorbent natural fibers like hemp or bamboo fleece inside the pocket or cover. Ensure the diaper still fits snugly around the legs after adding the extra layers to prevent compression leaks while your baby sleeps.
How do I manage washable diapers when traveling?
Managing cloth diapers on the go is highly manageable with a little preparation. Pack a medium or large zippered wet bag to store soiled diapers securely without odors escaping. Bring pre-stuffed pocket diapers or all-in-one units for quick, hassle-free changes while away from home. If you are traveling for several days without access to laundry facilities, mixing washable diapers with eco-friendly disposables can offer a practical, stress-free balance.
Community discussion
Share your experience or ask a question. Comments are reviewed before publication.