
Switching to a washable diaper for baby care is a practical, eco-friendly, and cost-effective choice for modern families. In the Philippines, where the tropical climate and high humidity require careful attention to baby skin health and laundry practices, cloth diapering offers a reliable alternative to single-use disposables. By selecting the right diapering system, mastering the fit, and establishing a consistent washing routine, parents can significantly reduce household waste while keeping their babies comfortable.
Starting your cloth diapering journey does not require an all-or-nothing commitment. Many families begin by using washable diapers at home and gradually transition to full-time use as they become more comfortable with the routine. This guide provides the practical steps, troubleshooting tips, and essential safety checks needed to build a successful and stress-free diapering routine.
Choosing the Right Washable Diaper for Baby: Systems and Types
To build a functional setup, it helps to understand the basic anatomy of a modern washable diaper for baby. Every system consists of two primary components: a waterproof outer layer to prevent leaks and an absorbent inner layer to hold moisture. How these two layers are combined determines the diaper type, affecting ease of use, drying speed, and overall cost.
Products mentioned in this guide
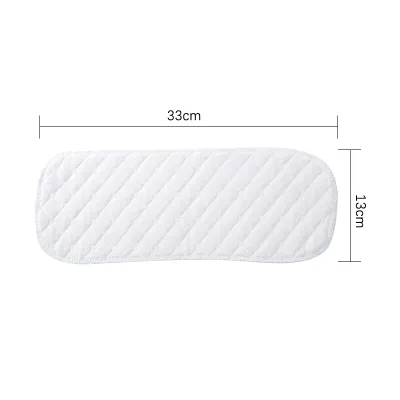
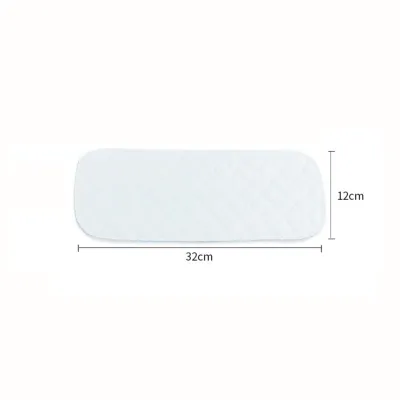

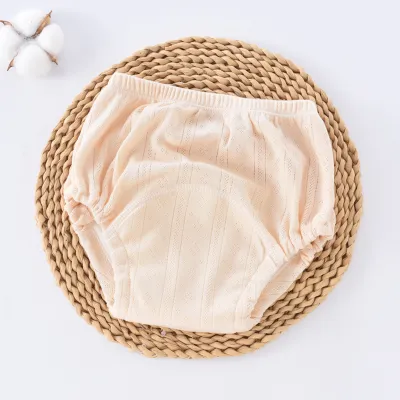
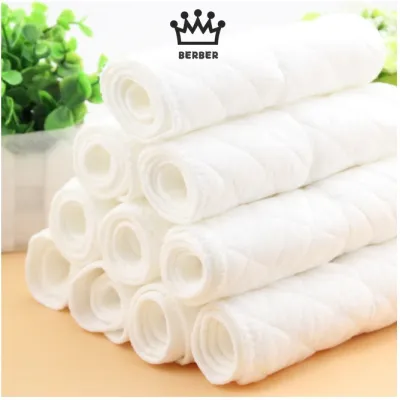

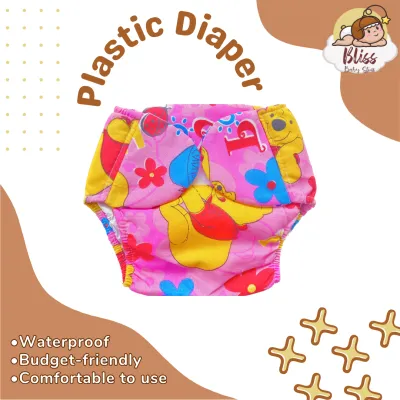
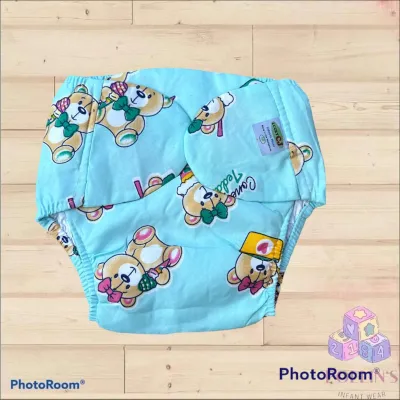
Prices are valid at publication and may change. Please refer to the product page for the latest price.
All-in-One (AIO) Diapers
All-in-One diapers are the closest equivalent to disposable diapers because the waterproof cover and the absorbent core are sewn together as a single unit. This design makes them highly intuitive for grandparents, nannies, or other caregivers. However, because all layers are permanently attached, AIOs generally take the longest time to dry, which can be a challenge during the humid rainy season in the Philippines.
Pocket Diapers
Pocket diapers feature a waterproof outer cover with a stay-dry inner lining that creates a pocket. You slide absorbent inserts into this pocket before putting the diaper on your baby. This system allows you to customize absorbency by adding thicker or multiple inserts. Because the inserts are removed for laundering, pocket diapers dry much faster than AIOs, making them highly practical for tropical climates.
Fitted Diapers with Covers
Fitted diapers are made entirely of absorbent material and do not have a waterproof outer layer. They require a separate waterproof cover over the top to prevent leaks. Because the entire diaper absorbs liquid, this system offers excellent containment and is highly recommended for overnight use or for heavy-wetting babies.
Prefolds and Flats with Covers
Prefolds and flats are the traditional, budget-friendly options. Flats are single layers of woven fabric (often cotton) that you fold around the baby, while prefolds are rectangular layers pre-layered in the center. Both require a waterproof cover and fasteners. While they have a steeper learning curve, they are highly economical, durable, and dry incredibly fast on an outdoor clothesline.
Many parents find that mixing systems is the most practical approach. You might choose pocket diapers for daytime use when convenience is key, and switch to fitted diapers with double-gusseted covers for overnight protection. This flexibility allows you to tailor your diaper stash to your daily schedule and laundry capacity.
Building Your Starter Stash: Essential Supplies and Quantities
Before making your first purchase, determine how many diapers you need based on your laundry frequency. A baby typically requires 8 to 12 diaper changes per day, with newborns needing more frequent changes. To wash diapers every two days comfortably, aim for a starter stash of 20 to 30 diapers. If you plan to wash daily, a smaller stash of 12 to 15 diapers may suffice.

In addition to the diapers themselves, several accessories make daily management much easier:
- Waterproof Wet Bags: These zippered bags are lined with polyurethane laminate (PUL) to contain wetness and odors. Keep a large one at your home changing station and a smaller, portable version in your diaper bag for outings.
- Diaper Sprayer or Liners: A diaper sprayer attached to your toilet toilet-line helps rinse solid waste directly into the bowl. Alternatively, biodegradable paper liners can be placed inside the diaper to catch solids, allowing for quick disposal.
- Dedicated Diaper Pail: A ventilated bin or a hanging wet bag keeps soiled diapers contained and allows airflow, which helps minimize ammonia buildup before wash day.
When using washable diapers, pay close attention to the diaper rash creams you apply. Standard petroleum-based or zinc oxide barrier creams can leave a greasy residue on fabric fibers. Over time, this buildup causes the fabric to repel moisture rather than absorb it, leading to leaks. Always choose cloth-safe creams free of petroleum and mineral oil, or use a disposable liner to protect the diaper fabric when a heavy barrier cream is necessary.
Step-by-Step Guide: How to Fit and Put On a Washable Diaper
Achieving a proper fit is the most effective way to prevent leaks and ensure your baby remains comfortable. Unlike disposable diapers, which are often fastened tightly around the waist, cloth diapers rely on a precise fit around the legs and groin. Always check the diaper manufacturer’s documentation for specific weight limits and rise-snap guidelines before adjusting the size.
Step 1: Prepare the Diaper
If you are using pocket diapers, stuff the inserts into the pocket beforehand, ensuring they lay completely flat from front to back. For flats or prefolds, fold them neatly and place them securely inside the waterproof cover. Any bunching or twisting of the absorbent material can create gaps and cause uneven absorbency.
Step 2: Position the Diaper Under the Baby
Lay your baby down and slide the prepared diaper underneath them. The back elastic of the diaper should sit at the baby’s natural waistline, just above the hips. Positioning the diaper too low at the back is a common cause of leaks and blowouts when the baby sits up.
Step 3: Fasten and Check the Waist
Bring the front of the diaper up over the baby’s tummy. Fasten the waist snaps or hook-and-loop tabs symmetrically. To ensure the diaper is not too tight, apply the “two-finger rule”: you should be able to slide two fingers easily between the diaper waist and your baby’s stomach without forcing them.
Step 4: Adjust the Leg Gussets
This is the most critical step for leak prevention. Tuck the leg elastics directly into the baby’s groin creases, similar to how underwear fits. Run your finger along the inside of the leg elastics to ensure the outer waterproof fabric is pulled outward and the inner absorbent lining is completely tucked inside. Any exposed absorbent fabric will wick moisture onto your baby’s clothes.
Step 5: Consider Newborn Needs
If you are diapering a newborn baby, avoid placing any friction on the healing umbilical cord stump. Many newborn-sized washable diapers feature a snap-down front design to keep the fabric clear of the navel. Alternatively, you can fold down the front rise of the diaper to keep the area dry and exposed to air.
Establishing a Reliable Washing and Drying Routine
Developing a hygienic laundry routine is essential for maintaining diaper absorbency and protecting your baby’s sensitive skin. In the warm, humid climate of the Philippines, a thorough wash routine prevents the growth of bacteria, mold, and mildew. Always refer to your specific diaper brand’s care instructions for temperature limits and detergent compatibility.
Pre-Wash Preparation
For babies who are exclusively breastfed, urine and waste are completely water-soluble and can go directly into the washing machine. Once your baby begins eating solid foods or formula, you must remove solid waste before washing. Use a diaper sprayer or a liner to deposit solids into the toilet, then store the wet diaper in your dry pail or wet bag.
The Two-Step Wash Routine
Never wash heavily soiled diapers in a single cycle. A proper routine requires two distinct steps to ensure deep cleaning:
- The Pre-Wash: Run a short, cold or warm wash cycle (15 to 30 minutes) with a small amount of detergent. This cycle flushes out urine and surface soil, preventing dirty water from circulating during the main wash.
- The Main Wash: Run a long, heavy-duty cycle with hot or warm water (typically 40°C to 60°C, depending on manufacturer guidelines) and the full recommended amount of detergent for a heavily soiled load. Ensure there is enough water agitation; the diapers should rub against each other to scrub away deep-seated oils and bacteria.
Detergent and Additive Guidelines
Choose a strong, enzyme-based detergent that effectively breaks down organic waste. Avoid fabric softeners, dryer sheets, and liquid detergents containing heavy optical brighteners or fabric conditioners. These additives leave a waterproof coating on the fabric fibers, which quickly ruins absorbency. If you have hard water, verify if a water softener is needed to prevent mineral buildup on the inserts.
Drying Strategies
Whenever possible, take advantage of the tropical climate and hang your diapers to dry outdoors. Direct sunlight is a natural sanitizer and acts as a mild, chemical-free bleaching agent that helps remove stubborn stains. When line-drying, hang pocket covers and AIOs sideways to prevent stretching out the elastics. If you use a clothes dryer, select a low-heat setting to protect the waterproof PUL layer and elastics from heat damage. Ensure all inserts are 100% dry before folding and storing them, as damp fabrics in high-humidity areas can rapidly develop mildew.
Troubleshooting Leaks, Odors, and Skin Irritation
Even with a consistent routine, you may occasionally encounter challenges. Understanding how to diagnose these issues allows you to make quick adjustments without abandoning your cloth diapering system.
Addressing Leaks
If you experience frequent leaks, systematically check the following factors:
- The Fit: Look for gaps around the legs or waist. If the baby has recently grown, you may need to adjust the rise snaps to a larger setting.
- Absorbency Capacity: If the diaper is completely soaked through when it leaks, your baby may have outgrown the capacity of the current insert. Try adding a booster insert made of highly absorbent natural fibers like bamboo or hemp.
- Fabric Repelling: If the diaper leaks but the insert inside is dry, the fabric is repelling liquid. Test this by pouring a small cup of water onto a clean, dry insert. If the water beads up instead of sinking in, you have detergent or oil buildup. You will need to deep-clean or "strip" the diapers using a residue-removing wash, following the manufacturer's instructions.
Eliminating Odors
Washable diapers should have no smell when clean. If you notice a strong, pungent ammonia smell when your baby pees, or a stale “barnyard” odor immediately after washing, your wash routine is incomplete. Ammonia smells indicate trapped bacteria or mineral buildup, while barnyard smells point to insufficient detergent or inadequate water agitation. Adjust your detergent dosage, ensure your washing machine is not overloaded, and run an extra rinse cycle to clear out residues.
Managing Skin Irritation
Healthy baby skin should remain clear and free of persistent redness. Mild redness can occur if a baby is sensitive to wetness; using a stay-dry fleece liner can help keep moisture away from the skin. Redness can also result from detergent sensitivity, which can be resolved by switching to a fragrance-free detergent and adding an extra rinse cycle.
However, diaper rashes can also stem from bacterial or fungal infections, such as yeast. If your baby develops a bright red, persistent, peeling, or bleeding rash, stop using washable diapers immediately. Switch to disposable diapers temporarily, use plain water for cleanups, and consult a pediatrician or qualified healthcare professional for an accurate diagnosis and treatment plan.
Frequently Asked Questions (FAQ)
Can I use washable diapers overnight?
Yes, overnight cloth diapering is highly effective but requires more absorbency than daytime setups. Because babies sleep for 10 to 12 hours, you need to pair a fast-absorbing cotton or microfiber layer with slow-absorbing, high-capacity natural fibers like hemp or bamboo inserts. Combine this absorbent core with a reliable, double-gusseted waterproof cover to ensure a leak-free sleep.
Do cloth diapers help babies potty train earlier?
Many parents observe that babies using washable diapers tend to potty train earlier. Because cloth diapers do not contain the chemical gelling agents found in disposables, babies feel the physical sensation of wetness when they urinate. This sensory feedback helps them connect the urge to go with the result. However, potty training readiness is ultimately a developmental milestone that varies widely for every child.
How do I manage cloth diapers when traveling or out of the house?
Managing cloth diapers on the go is simple with a small amount of preparation. Pack a medium-sized, zippered waterproof wet bag in your travel kit to store soiled diapers and seal in moisture and odors. Bring a compact, wipeable changing pad and pre-moistened cloth wipes. If you are traveling long distances or staying somewhere without laundry access, mixing cloth with eco-friendly disposables is a practical, stress-free compromise.
Community discussion
Share your experience or ask a question. Comments are reviewed before publication.