
Starting your newborn’s journey with cloth diapers from day one is a rewarding, eco-friendly, and budget-conscious choice. While the prospect of managing extra laundry during the postpartum period can feel intimidating, preparing the right system makes the transition seamless. Choosing a high-quality lampin for new born babies ensures that your little one’s delicate skin is wrapped in breathable, chemical-free fabrics right from their very first hours. With a solid understanding of stash sizes, fit adjustments, and tropical washing routines, you can confidently skip disposables entirely.
What to Prepare: Sizing Your Newborn Cloth Diaper Stash
Newborns are notorious for frequent diaper changes. During the first few weeks, a baby typically urinates and passes stool 10 to 12 times a day. To calculate your ideal stash size, you must balance this high frequency with how often you plan to run the washing machine. If you plan to wash diapers every single day, you will need a minimum of 12 to 15 diapers to allow for washing and drying time. If you prefer to wash every other day, a stash of 24 to 30 diapers is highly recommended to ensure you never run out of clean options.
When building this stash, you must decide between newborn-specific cloth diapers and adjustable “one-size-fits-most” (OSFM) options. Newborn diapers are specifically tailored for babies weighing roughly 2 to 5 kilograms, offering a trim fit that easily accommodates tiny legs and healing umbilical cords. In contrast, OSFM diapers are designed to fit babies from around 4 to 15 kilograms. While OSFM diapers save money in the long run, they are often bulky on a newborn and require advanced folding techniques, such as the “newborn hack,” to prevent gaping at the legs. Always check the manufacturer’s stated weight ranges before purchasing to make sure the diaper matches your baby’s birth weight.
Products mentioned in this guide
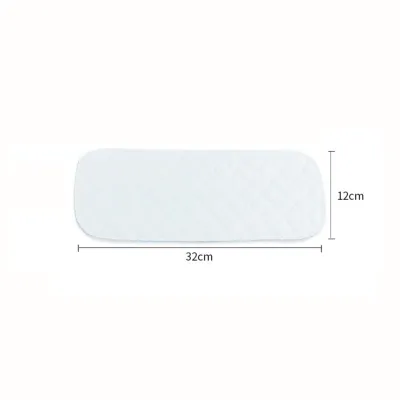
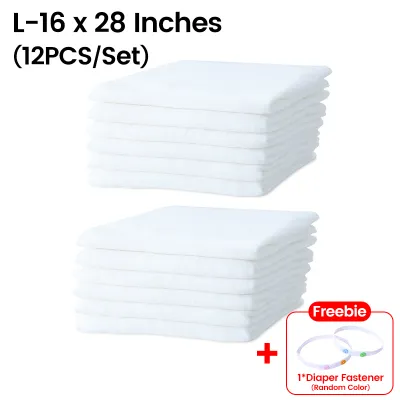
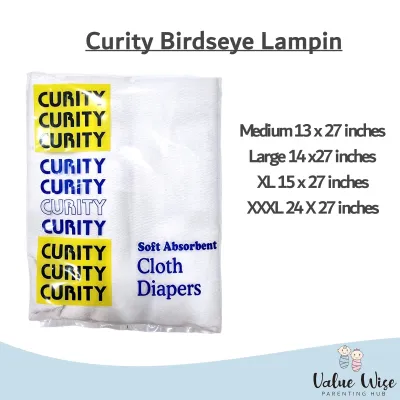



Prices are valid at publication and may change. Please refer to the product page for the latest price.
Beyond the diapers themselves, several essential accessories will make your daily routine manageable. You will need at least two large waterproof wet bags to store soiled diapers, along with a few smaller travel-sized wet bags for diaper changes on the go. A dedicated diaper pail or a ventilated plastic laundry basket is crucial for holding dirty diapers before wash day. Finally, preparing a stack of soft cloth wipes and reusable or flushable diaper liners will simplify cleanups significantly during the first few weeks of parenthood.
How to Adjust the Fit for a Tiny Newborn
Achieving a proper fit on a tiny, fragile newborn is the most effective way to prevent leaks and protect their sensitive skin. The first priority during the initial two weeks is proper umbilical cord care. The healing umbilical cord stump must remain clean, dry, and exposed to the air to prevent infection. If your cloth diaper does not feature a built-in newborn umbilical cutout, you must fold down the front rise of the diaper or snap it down securely to ensure the fabric sits well below the navel. This prevents the waistband from rubbing against or trapping moisture around the healing stump.

Once the diaper is on, you must carefully inspect the leg gussets. The elastic edges of the diaper must sit snugly in the leg creases—similar to how underwear fits an adult—rather than resting on the baby’s outer thighs. Gaps in the leg area are the primary cause of newborn blowouts and leaks. Run your finger along the inside of the leg elastics to ensure the inner lining is tucked in and that the fit is secure. While the elastic should be snug, it should not leave deep, dark red marks on your baby’s skin; light pink indentations that fade quickly are normal, but deep marks indicate the diaper is too tight.
Next, evaluate the waist fit using the classic “two-finger” rule. Fasten the waist snaps or hook-and-loop tabs so that the diaper is secure, then slide two fingers comfortably between the diaper’s waistband and your baby’s tummy. This gap ensures that the diaper remains comfortable when the baby sits up, feeds, breathes, or experiences normal digestion bloating. The diaper should feel snug enough to stay in place without compressing the abdomen.
As your baby grows rapidly, you must stay alert for signs that it is time to adjust the rise snaps or transition to a larger size. If you notice persistent leaks despite a perfect fit, or if the diaper consistently leaves deep, irritated marks on the thighs and waist, your baby is likely outgrowing the current setting. Additionally, if the diaper’s absorbency can no longer handle the volume of your baby’s wetness, resulting in saturated inserts within an hour, it is time to increase the absorbency or size up.
Step-by-Step: Changing and Storing Soiled Diapers
Managing newborn waste is simpler than many first-time parents expect, especially before the introduction of solid foods. During the first few days, your baby will pass meconium, a thick, sticky, greenish-black substance. To protect your cloth diapers from staining, place a biodegradable or flushable liner inside the diaper. This liner catches the sticky meconium, allowing you to lift it out and dispose of it directly in the trash, leaving the underlying fabric clean. Once your baby transitions to breastmilk or formula, the stool becomes water-soluble and can go straight into the washing machine without prior rinsing.
When performing a diaper change, prioritize safe and gentle skin hygiene. Use a soft, damp cloth wipe to clean your baby’s diaper area from front to back, ensuring all skin folds are free of moisture and waste. Before putting on a fresh cloth diaper, let the skin air-dry completely for a minute or two. Fastening a diaper over damp skin traps moisture against the delicate skin barrier, which is a primary cause of diaper rash in newborns.
For storage, the “dry pail” method is the safest and most hygienic approach. Place your soiled diapers directly into a dry, breathable laundry basket lined with a large, washable wet bag. Do not fill a bucket with water to soak the diapers; this traditional soaking method is highly discouraged. Standing water poses a severe drowning hazard for mobile infants, promotes the rapid growth of bacteria and mold, and can quickly degrade the waterproof laminate and elastics of modern diapers.
Establishing a Safe Washing Routine for Your Lampin for New Born
A robust laundry routine is the secret to successful long-term cloth diapering, ensuring that every lampin for new born remains clean, sanitary, and highly absorbent. The foundation of this routine is a strict two-step wash process. First, run a short pre-wash cycle using cold or warm water and a small amount of detergent. This initial cycle flushes away the bulk of the urine and solid waste, preventing dirty water from circulating during the deep clean. Follow this immediately with a long, heavy-duty main wash cycle using hot or warm water, the full recommended dose of detergent, and high agitation to thoroughly sanitize the fibers.
Choosing the right detergent is critical for preserving the functionality of your cloth diapers. Use a strong, enzyme-rich laundry detergent that effectively breaks down biological waste. Avoid fabric softeners, dryer sheets, and petroleum-based diaper creams entirely, as these products coat the fabric fibers with a water-repellent layer, causing liquids to slide off the diaper instead of being absorbed. If you must use diaper rash creams, always pair them with a reusable liner to protect the diaper lining.
Water temperature and machine settings must always align with the manufacturer’s care labels. While warm or hot water is excellent for killing bacteria, excessively high temperatures can melt the waterproof polyurethane laminate (PUL) layer or ruin the elastic stretch. Always check the specific heat limits specified by your diaper brand before setting your washing machine or dryer cycles.
In the tropical climate of the Philippines, outdoor line drying is your greatest asset. Hanging your diapers and inserts under direct sunlight provides natural bleaching that easily removes yellow breastfed poop stains, while the sun’s ultraviolet rays act as a natural sanitizer. However, the country’s high humidity can slow down drying times, especially during the rainy season. Ensure that thick inserts, such as those made of multi-layered bamboo, hemp, or microfiber, are completely dry all the way to the core before folding and storing them, as any trapped moisture will quickly lead to mildew and sour odors.
Troubleshooting Common Leaks and Skin Irritation
Experiencing minor setbacks like leaks or mild skin irritation is a normal part of the learning curve, but these issues are easily resolved with a few adjustments. If you encounter frequent leaks, start by checking for compression leaks. This occurs when tight clothing, snug onesies, or car seat straps press against a saturated diaper, squeezing liquid out like a sponge. Opting for looser clothing or using onesie extenders can resolve this instantly. If the fabric is repelling liquid rather than absorbing it, perform a water test by pouring a small amount of water onto a clean, dry insert; if the water puddles on top, a buildup of detergent or oils is present, requiring a deep clean or “stripping” process.
Diaper rash requires immediate attention but is often easy to manage. Standard friction irritation usually presents as mild redness along the leg elastics or waistband, which can be fixed by loosening the fit or adjusting the diaper’s positioning. However, if a rash persists for more than a few days, worsens, develops bright red bumps, or shows signs of a yeast infection, stop using cloth diapers temporarily. Switch to disposables, discontinue any home remedies, and consult a pediatrician or qualified healthcare professional immediately for a proper diagnosis and safe treatment plan.
A strong, pungent ammonia smell when your baby urinates indicates that waste is not being fully removed during laundry. This buildup occurs when there is insufficient water, inadequate detergent, or too little agitation during the main wash cycle. To resolve this, increase your detergent dosage, ensure your washing machine is loaded correctly to allow proper fabric-on-fabric friction, and verify that your pre-wash cycle is effectively flushing out the bulk of the urine before the main wash begins.
Frequently Asked Questions (FAQ)
Can I use cloth diapers immediately after birth?
Yes, you can absolutely use cloth diapers from your baby’s very first day of life. The key is ensuring that the diaper’s waistband is folded down or snapped away so that it does not cover or rub against the healing umbilical cord stump, keeping the area dry and clean.
How do I handle the sticky first poop (meconium)?
Handling meconium is simple when you use a disposable or flushable diaper liner. Placing this thin liner inside the diaper catches the thick, tar-like stool, allowing you to lift the liner out and discard it in the trash, keeping the cloth diaper underneath clean and stain-free.
Community discussion
Share your experience or ask a question. Comments are reviewed before publication.