
Properly wrapping and positioning your baby in a Yakaph baby wrap involves securing a snug, supportive fabric base around your body, lowering your baby into an ergonomic “M-shaped” seat, and tightening the passes strand-by-strand to lock them in place. This safe positioning keeps the infant’s airway completely clear, supports their natural spinal development, and distributes their weight evenly across your shoulders and hips to prevent strain.
Preparing for a Safe and Comfortable Carry
Before you attempt to put on your baby wrap, your very first step must always be to read the specific manufacturer’s manual provided with your Yakaph baby wrap. Every baby carrier has distinct weight limits, age recommendations, and approved tying methods that are designed to protect your child’s developing body. Never assume that a wrap is suitable for your baby based solely on its product name or general appearance; instead, verify the exact specifications and safety warnings outlined by the manufacturer to ensure your baby falls within the safe weight and developmental range.
Next, perform a thorough physical inspection of the wrap fabric before every single use. Lay the fabric out flat and run your hands along its length to check for any signs of wear, thinning, loose threads, or compromised elasticity. Stretchy wraps rely on the structural integrity of their fibers to hold your baby securely against your chest; if the fabric has lost its recovery stretch or shows signs of tearing, it can sag under your baby’s weight, creating a serious fall hazard or compromising their breathing position.
Products mentioned in this guide

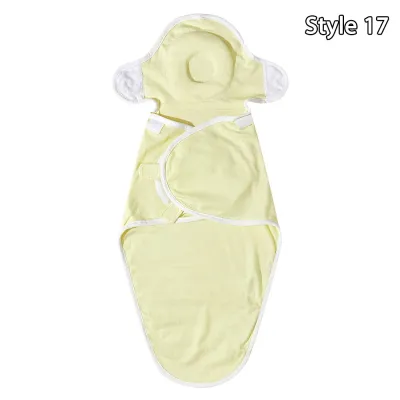

![[Teeker]Newborn Baby Swaddle Wraps Cotton Four Seasons Sleeping Bags Cartoon Anti Startle Anti Kick 360° Wrapped 30x60CM Bed Accessories For Neonate Infant 0-3 Months](https://img.lazcdn.com/g/p/15421bddd6075ef1332eb00e5cf69036.png_400x400q80.png_.webp)
Prices are valid at publication and may change. Please refer to the product page for the latest price.
Dressing your baby appropriately is another essential preparation step, particularly when babywearing in hot and humid tropical climates like the Philippines. The fabric of the wrap itself acts as at least one or two layers of clothing, which can quickly trap body heat and cause your little one to overheat. Opt for lightweight, breathable fabrics such as single-layer cotton or bamboo onesies, and ensure that your own clothing is made of a breathable material to avoid transferring excess body heat to your baby.
For the caregiver, wearing supportive, comfortable clothing without large buttons, zippers, or embellishments is crucial to prevent irritating your baby’s delicate skin. When you are first learning how to tie the wrap, always practice in a safe, stable environment. Stand next to a soft surface like a bed or a sofa, or even practice the initial tying steps while sitting down, so that there is a cushioned barrier beneath your baby as you guide them into the fabric passes.
Step-by-Step Guide to Wrapping Your Baby
Mastering the art of babywearing takes practice, patience, and a methodical approach to securing the fabric. By breaking the process down into distinct stages—tying the base, positioning your baby, and securing the final passes—you can build confidence and ensure a safe, ergonomic carry every time. It is highly recommended to practice these steps first with a doll or a stuffed animal until the movements feel natural and intuitive.

Tying the Base and Creating the Seat
To begin the tying process, locate the center marker of your Yakaph baby wrap, which is typically a small tag or label sewn into the middle of the fabric strip. Gather the width of the wrap and place this center marker flat against your chest or torso, just below your bust line. Keeping the fabric smooth and un-twisted, wrap the two long tails around your back, crossing them over to form an “X” shape across your shoulder blades.
Bring the two tails forward over your shoulders, allowing them to hang down your chest to create two vertical suspender-like straps. Take care to ensure the fabric remains flat and wide across your shoulders to distribute the baby’s weight evenly later on. At this point, gather the vertical passes and tuck them down under the horizontal band that is resting against your torso, pulling them through from the bottom.
Cross these two tails again in front of your body to create an “X” shape at your lower torso, then bring them around to your back. If the wrap is long enough, you can cross them behind your back and bring them forward again to tie a secure, flat double knot at your waist or hip. Pull the fabric taut throughout this process; the base must feel snug and form-fitting against your body, like a tight t-shirt, to prevent the baby from sagging once placed inside.
Positioning the Baby Securely
Once your base is securely tied, you are ready to lift your baby into the carrier using the “ticket collector” hold. Hold your baby securely against your shoulder opposite the fabric pass you plan to use first, supporting their head, neck, and bottom. Gently slide one of your baby’s legs through the inner diagonal pass of the fabric “X” on your chest, ensuring the fabric covers their thigh and bottom completely.
Shift your baby to your other shoulder and repeat the process for the other leg, guiding it through the outer diagonal pass. Once both legs are through, spread the fabric of both passes wide, stretching it from one knee crease all the way to the other knee crease. This knee-to-knee support is vital for creating a deep, ergonomic “M-shape” seat, where your baby’s knees are positioned higher than their bottom, which supports healthy hip joint development and prevents hip dysplasia.
For newborns and younger infants who lack head control, you must pull the fabric of the inner passes up to the nape of their neck to provide adequate spinal and cervical support. For older babies who have achieved strong, independent neck and head control, the fabric can be positioned slightly lower, ending just under their armpits to allow them more freedom of movement while keeping their torso securely supported against your chest.
Tightening and Securing the Final Passes
With your baby positioned in the “X” passes, locate the horizontal panel of the wrap that you previously pulled down around your waist. Pull this panel upward, guiding it over your baby’s feet and legs, and stretch it all the way up over their back to their shoulders. This horizontal pass acts as a safety shield that locks the diagonal passes in place and prevents your baby from leaning backward or shifting out of the seat.
To ensure there is no slack in the carrier, perform a strand-by-strand tightening of the shoulder passes. Gently pull on the inner and outer edges of the fabric resting on your shoulders, moving any excess slack down toward your waist and securing it by re-tying your double knot if necessary. The fabric should feel firm and supportive, holding your baby’s chest and tummy snugly against your torso without compressing their ribs or restricting their breathing.
Double-check all knots to make sure they are completely flat, secure, and tied with a proper square or double knot. Inspect your baby’s face to ensure that no loose fabric, shoulder straps, or horizontal passes are covering their mouth or nose. By keeping the fabric smooth and taut, you eliminate the risk of loose material shifting over your baby’s airway during movement.
Checking the Fit: Essential Safety Rules
Every time you finish wrapping your baby, you must perform a systematic safety check to verify that the carry is secure and that your baby’s airway is fully protected. A widely recognized and reliable framework for this is the TICKS safety guidelines, which have been adapted specifically for wrap carriers to help parents identify and correct potential hazards instantly.
The first letter, T, stands for Tight. Your Yakaph baby wrap must be tied snugly enough to hug your baby close to your body, as any loose fabric will allow your baby to slump down. Slumping can curve their spine excessively and cause their chin to press against their chest, which can severely restrict their breathing.
The second letter, I, reminds you that your baby must be In view at all times. You should be able to see your baby’s face, eyes, and airway simply by glancing down, without having to move any fabric, clothing, or your own body. Never allow the wrap to cover your baby’s face, and ensure their nose and mouth remain completely clear of both the fabric and your chest.
The third letter, C, means Close enough to kiss. Your baby’s head should be positioned high up on your chest, close enough to your chin that you can easily lean forward and kiss the top of their head or forehead without straining your neck. If your baby is riding too low, the wrap is too loose, or the base knot was tied too low on your torso.
The fourth letter, K, emphasizes that you must Keep chin off the chest. Ensure there is always at least a finger’s width of space under your baby’s chin to keep their airway open. If their chin is pressed down against their chest, it can close off their windpipe; if you notice this, immediately adjust their positioning by tilting their head slightly back and upward.
The fifth letter, S, stands for Supported back. Your baby’s back should be supported in its natural, slightly curved “C-shape,” with their tummy and chest resting flat against your body. The wrap should be tight enough to prevent them from slumping or leaning sideways, but not so tight that it flattens their natural spinal curve.
In addition to the TICKS rules, perform a quick breathing check by watching the gentle rise and fall of your baby’s chest and listening to their breath. If your baby shifts out of position, falls asleep, or begins to fuss, stop what you are doing, support your baby with your hands, and re-adjust the wrap to restore the correct ergonomic posture.
Common Wrapping Mistakes and How to Adjust
One of the most common mistakes beginners make is allowing the baby to sag or ride too low on the torso. This usually happens when the base wrap is not pulled tight enough before the baby is placed inside, or if the fabric has stretched out over a long walk. To correct a sagging baby without taking the entire wrap off, support your baby’s weight with one arm, locate the slack in the shoulder passes, pull the excess fabric strand-by-strand toward your back, and re-tie the double knot securely at your waist.
Another frequent error is the “dangling legs” position, where the baby’s legs hang straight down instead of forming an ergonomic seat. This occurs when the diagonal fabric passes are bunched up in the baby’s crotch rather than being spread wide from knee to knee. To fix this, reach inside the wrap, gently lift your baby’s knees upward, and pull the fabric of both diagonal passes outward so that it fully supports the thighs all the way to the back of the knee creases.
Caregiver back, shoulder, or neck pain is a clear sign of uneven weight distribution or twisted fabric. If you experience discomfort, check to see if the fabric passes are bunched up or twisted across your back or shoulders. To resolve this, spread the shoulder straps wide like capes over your shoulders and ensure the “X” on your back is centered between your shoulder blades, which helps distribute the baby’s weight evenly across your entire upper body.
There are certain “stop and adjust” conditions that require immediate action to protect your baby’s safety. If your baby’s face is pressed flat against your chest, if the wrap fabric covers their nose or mouth, or if their chin is resting on their chest, you must stop walking immediately, support your baby, and re-position them. If you cannot achieve a safe, secure fit where the airway is completely clear, take the baby out of the wrap entirely and consult a qualified babywearing professional or the manufacturer’s customer support for guidance.
Frequently Asked Questions (FAQ)
Can I use a baby wrap in hot and humid weather?
Yes, you can use a baby wrap in hot and humid weather, but you must take extra precautions to prevent heat exhaustion. Dress both yourself and your baby in single, lightweight, and highly breathable layers of natural fibers like cotton or bamboo, keeping in mind that the wrap fabric counts as an additional layer of clothing. Plan your babywearing activities during cooler parts of the day, take frequent breaks in shaded or air-conditioned indoor spaces, and regularly monitor your baby for signs of overheating, such as flushed skin, rapid breathing, sweating, or a warm neck.
When should I transition to a different carrier?
You should transition to a different carrier when your baby exceeds the maximum weight limit specified in your Yakaph baby wrap manufacturer’s manual, or when you notice the fabric can no longer support their weight without sagging. Stretchy wraps are ideal for newborns and young infants, but as babies grow heavier, more active, and begin to wriggle, the elasticity of a stretchy wrap may cause them to bounce or sag during movement. When this occurs, it is time to transition to a more supportive option, such as a structured soft-structured carrier (SSC) or a woven wrap, to ensure continued safety and comfort for both of you.
Community discussion
Share your experience or ask a question. Comments are reviewed before publication.