
Properly positioning your child in a baby carrier with hipseat is essential for protecting their developing body and ensuring your own physical comfort. Unlike traditional wraps or soft-structured carriers, a hipseat carrier features a solid, padded shelf that supports the baby’s weight from below. This design redistributes pressure away from your upper back and shoulders, but it requires precise positioning to keep your baby’s spine, hips, and airway perfectly safe.
To achieve the ideal carry, you must secure the waist belt firmly above your hips, place your baby centrally on the seat, and guide their legs into a deep, ergonomic “M” position. This ensures their weight is distributed evenly across their thighs rather than dangling from the pelvis. By mastering these key adjustments, you can enjoy long walks, errands, and daily activities while keeping your little one secure and comfortable.
Preparing to Use Your Baby Carrier with Hipseat: Age, Weight, and Gear Checks
Before attempting to place your baby on the seat, you must verify that they have reached the appropriate developmental milestones. A baby carrier with hipseat is specifically designed for babies who have developed strong head and neck control, which typically occurs around four to six months of age. Placing a younger infant on a hipseat can lead to dangerous slumping, which compromises their airway. Always consult your specific product’s user manual to verify the minimum and maximum weight limits, as these specifications vary widely between brands.
Products mentioned in this guide
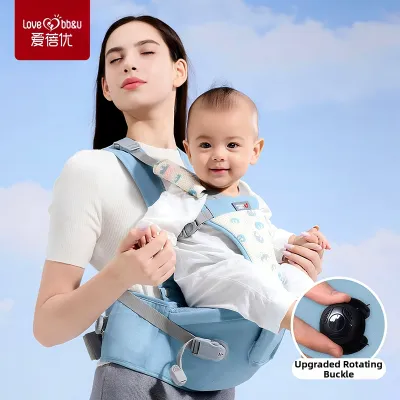
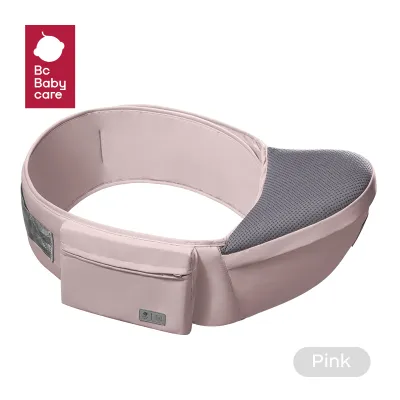
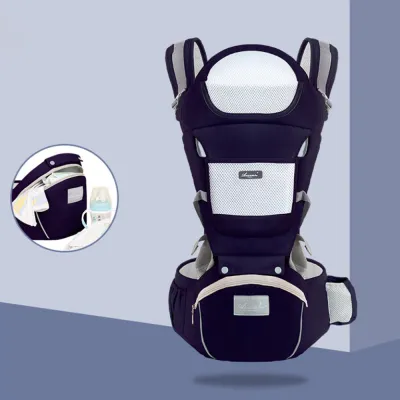

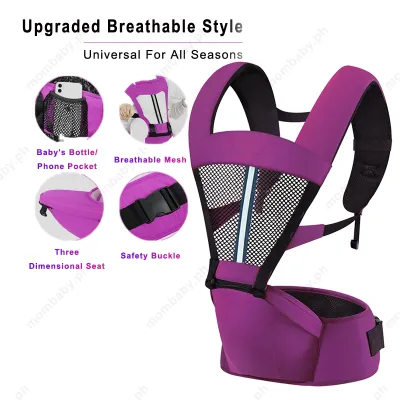
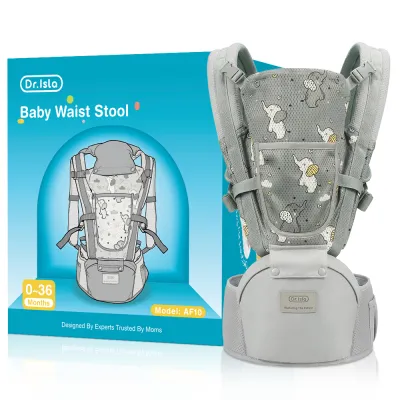

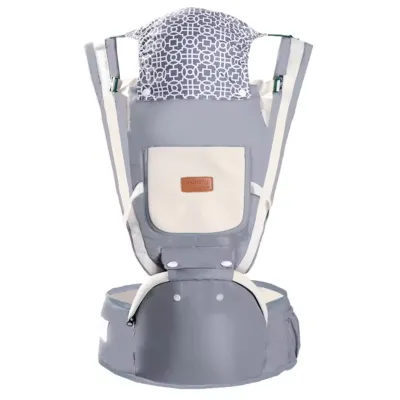
Prices are valid at publication and may change. Please refer to the product page for the latest price.
Performing a thorough equipment inspection before every use is a critical safety habit. Examine the waist belt, shoulder straps, and back panel for any signs of frayed stitching, torn fabric, or loose seams. Test all plastic buckles to ensure they click locked and remain secure under tension. If your carrier utilizes a zippered connection to attach the back panel to the hipseat base, check that the zipper is fully closed and that the safety snap or Velcro flap is completely engaged. Never use a carrier that shows any signs of structural wear.
In the warm, humid climate of the Philippines, dressing your baby appropriately is vital to prevent overheating while babywearing. The close contact between your body and your baby’s body generates significant heat, which can quickly lead to discomfort or heat rash. Dress your little one in a single layer of lightweight, breathable fabric, such as cotton or bamboo. Ensure that the carrier’s ventilation panels, if available, are unzipped to allow maximum airflow during outdoor walks or trips to the local market.
Step-by-Step: Placing Your Baby in the Hipseat
Correctly loading your baby into the carrier requires a systematic approach. Following a consistent sequence ensures that the carrier is stable and that your baby transition safely from your arms to the seat.

Securing the Waist Belt
Position the wide waist belt high on your natural waist, well above your hip bones. This high placement is crucial because the weight of the baby will naturally pull the front of the belt downward. Fasten the Velcro firmly, ensuring a tight, flush fit around your torso, then click the safety buckle and pull the strap until it is highly secure. A loose waist belt will cause the hipseat to sag forward, tilting your baby away from you and placing painful strain on your lower back.
Holding and Placing Your Baby
Lift your baby safely against your chest, keeping one hand securely on their back and the other supporting their bottom. Slowly lower them onto the center of the hipseat platform. Ensure their bottom is resting fully on the padded seat, not sliding off the front edge. Keep at least one arm wrapped securely around your baby’s torso at all times during this step to prevent them from leaning or slipping.
Achieving the "M" Position
Manually guide your baby’s legs so they spread naturally around your waist. Lift their knees upward so they are positioned slightly higher than their bottom, creating a distinct “M” shape when viewed from the front. The wide, padded base of the hipseat must support their thighs from knee crease to knee crease. This position keeps the hip joint in its natural socket, reducing the risk of hip dysplasia and ensuring a comfortable ride.
Maintaining the "C" Curve
Allow your baby’s spine to rest in its natural, gently rounded “C” shape. When babies are young, their spines have a natural curve that should not be forced into a rigid, bolt-upright position. Ensure the back panel of the carrier supports this curve without pulling so tight that it flattens their back, especially if they begin to fall asleep during the carry.
Fastening the Upper Straps
While maintaining a firm hold on your baby with one hand, slide your free arm through one shoulder strap, then switch hands to secure the other strap. Reach behind your neck or upper back to fasten the chest clip, which keeps the shoulder straps from slipping off. Once connected, pull the adjustment webbing on both sides symmetrically to bring your baby close to your chest, ensuring their weight is evenly balanced across both of your shoulders.
Adjusting the Carrier for Caregiver Comfort and Baby Support
Once your baby is in the carrier, taking a moment to fine-tune the straps will make a substantial difference in how heavy your baby feels over long periods.
Shoulder Strap Adjustments
Adjust the tension of the shoulder straps so that your baby’s weight is distributed evenly across your upper back. If your carrier features an H-style back clip, slide the connector up or down so it sits comfortably in the middle of your shoulder blades, preventing the straps from digging into your neck. If your carrier allows for crossed (X-style) straps, ensure they cross flatly against your back to maximize weight distribution.
Chest and Safety Belt Tightening
Tighten the upper straps until your baby is held snugly against your torso, preventing them from slumping or leaning away from you. To verify that the straps are not overtightened, slide two fingers flatly between the carrier’s fabric and your baby’s chest. This check ensures that the carrier is secure enough to prevent shifting while still allowing your baby to breathe deeply and expand their chest comfortably.
Checking the Hipseat Angle
Observe the angle of the hipseat platform while your baby is resting on it. The seat should tilt slightly upward and inward toward your abdomen. If the platform is tilting downward toward the floor, it indicates that either the waist belt is too loose or it is positioned too low on your hips. Undo the shoulder straps while holding your baby safely, raise the waist belt higher, tighten it firmly, and re-secure the straps to correct the angle.
Common Positioning Mistakes and How to Fix Them
Even experienced caregivers can fall into poor carrying habits. Recognizing these common errors will help you maintain a safe and ergonomic setup.
Dangling Legs
If your baby’s legs are hanging straight down in a “V” or “U” shape, their weight is concentrated entirely on their groin, which can strain their developing hip joints. This issue often occurs if the baby is sitting too far forward on the seat or if the seat base is too narrow for their size. To fix this, slide your hand inside the carrier, gently scoop your baby’s pelvis, and tilt it backward to lift their knees into the proper “M” position.
Slouching and the Chin-to-Chest Position
When a baby slumps down inside the carrier, their head can tilt forward, pressing their chin firmly against their chest. This position can restrict their airway and lead to positional asphyxiation. If you notice your baby slouching, immediately pull the back panel higher and tighten the shoulder straps to pull their upper body closer to yours. Always ensure there is a clear, visible gap of at least one finger-width between your baby’s chin and chest.
Facing Outward Too Early
Many parents are eager to turn their baby outward to let them see the world, but doing so too early can cause physical strain. Only use the outward-facing position once your baby has complete, independent head and neck control, and can sit upright unassisted. Limit outward-facing carries to short intervals of 15 to 20 minutes to prevent overstimulation and fatigue. If your baby shows signs of sleepiness, always turn them back inward to support their head and neck properly during rest.
Verifying the Fit: A Quick Safety Checklist
Before you begin walking or managing daily tasks, perform a quick mental scan using a modified version of the classic babywearing safety rules to ensure everything is secure:
- Tight: The carrier straps and waist belt must be snug enough to hold your baby securely against your body, preventing any shifting or sagging.
- In View: You must always be able to see your baby's face clearly by simply looking down. Their face should never be covered by fabric, clothing, or your chest.
- Close Enough to Kiss: Your baby's head should be positioned high enough on your chest that you can easily kiss the top of their head by tipping your chin forward.
- Keep Chin Off Chest: Ensure there is always a visible gap under your baby's chin to keep their airway completely clear and unrestricted.
- Supported Back: Your baby's back should be comfortably supported in its natural "C" curve, with no slumping or leaning to the side.
In addition to these structural checks, monitor your baby’s physical state. Check their skin temperature by feeling the back of their neck; if they are sweating or flushed, move to a cooler environment or remove them from the carrier to rest. Watch for red marks on their inner thighs, which can indicate that the seat edge is digging into their skin. If you notice the waist belt slipping, the straps loosening, or your baby showing signs of discomfort, stop walking immediately, find a safe place to sit, and readjust the carrier.
Frequently Asked Questions (FAQ)
Can I use a hipseat carrier for a newborn?
No, you should not use a standard hipseat carrier for a newborn baby. Newborns do not possess the head, neck, or trunk control required to sit safely on a hipseat platform, and the wide seat base can overextend their fragile hip joints. For the first few months of life, a soft wrap, ring sling, or an infant-specific structured carrier is highly recommended. Always check your specific carrier’s documentation for the minimum age and weight requirements before use.
How long can my baby stay in a hipseat carrier at one time?
While there is no strict universal time limit, it is best to take regular breaks every 30 to 45 minutes to let your baby stretch, move their limbs freely, and cool down. This is especially important in warm, humid climates where heat can build up quickly between your bodies. Pay close attention to your baby’s comfort cues, such as fussiness or restlessness, and remove them from the carrier immediately if they show signs of distress or overheating.
Community discussion
Share your experience or ask a question. Comments are reviewed before publication.