
Keeping your baby close while keeping your hands free is one of the most rewarding aspects of early parenthood. However, when using a carrier for baby newborn safety, proper positioning is not just a matter of comfort—it is a fundamental safety requirement. To properly position a newborn in a baby carrier, you must secure them in an upright, high-carrying position where their head is fully supported, their airway remains clear, their spine maintains a natural C-curve, and their hips are aligned in an ergonomic M-shape.
In the early weeks of life, infants lack the muscle strength to support their own heads or correct their posture if their airway becomes restricted. A poorly adjusted carrier can lead to serious developmental or respiratory risks. By mastering a few key positioning techniques, you can confidently enjoy the benefits of babywearing while ensuring your infant remains safe, secure, and comfortable.
Why Correct Positioning is Critical for Newborns
The physiological makeup of a newborn baby requires specialized care when choosing and using a carrier. Unlike older infants, newborns have highly flexible cartilage instead of fully formed bones, and their neck muscles are not yet strong enough to support their relatively heavy heads. If a newborn is placed in a carrier without proper support, their head can easily tilt forward, pressing their chin against their chest. This position can lead to positional asphyxia, a silent and dangerous condition where the baby’s airway is restricted, making it difficult or impossible for them to breathe.
Products mentioned in this guide





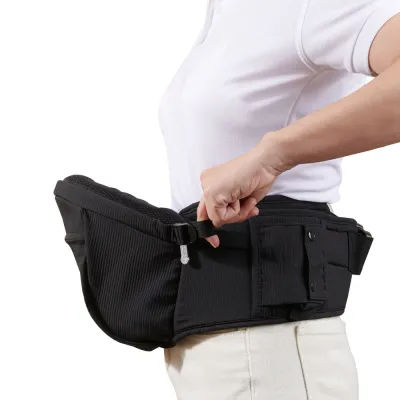
Prices are valid at publication and may change. Please refer to the product page for the latest price.
Another critical developmental consideration is hip health. At birth, the hip joints are still developing and consist largely of soft cartilage. If a newborn’s legs are allowed to dangle straight down, the constant downward pull can stretch the joint, potentially leading to hip dysplasia—a condition where the thigh bone does not fit properly into the hip socket. To prevent this, pediatric orthopedists recommend keeping the baby’s hips and knees in an “M-shape” or “froggy” position, where the knees sit higher than or level with the bottom, and the thighs are fully supported.
Additionally, a newborn’s spine naturally curves like the letter “C” rather than the “S” shape found in adults. Forcing a newborn’s spine into a straight, rigid position can put unnecessary pressure on their developing vertebrae and ribcage. While this guide outlines the essential safety frameworks for healthy babywearing, every infant is unique. Parents must always defer to the specific instructions provided in their carrier’s manufacturer manual and consult their pediatrician regarding any specific developmental or medical concerns.
Preparing Your Carrier for Baby Newborn Use and a Safe Fit
Before you attempt to place your newborn into any baby carrier, you must verify that the gear is completely safe and suitable for their current developmental stage. Always check the manufacturer’s documentation for the exact minimum weight and age requirements. Many standard structured carriers, while highly adjustable, are designed for older infants and require a specific, separate infant insert to safely support a newborn. Never assume a carrier is safe for a newborn simply because of its name or general classification; verify the specific weight limits first.

Next, perform a thorough safety inspection of the carrier itself. Check the fabric for any signs of wear, such as frayed seams, torn straps, or weakened stitching. Examine all plastic buckles, snaps, and zippers to ensure they lock securely into place and do not slip under tension. Once you confirm the carrier is in excellent condition, adjust all the straps to their smallest or snuggest settings. It is much easier to loosen a strap slightly once the baby is inside than it is to tighten a completely loose, floppy carrier while trying to support a fragile newborn.
Dressing your baby appropriately is another essential step, especially in a warm and humid tropical climate like the Philippines. Overheating is a significant risk for newborns, who cannot regulate their body temperature as effectively as adults. Because the carrier fabric and your own body heat act as multiple layers of insulation, dress your baby in lightweight, breathable cotton clothing, such as a simple onesie. Keep a close eye on the ambient temperature, ensure adequate ventilation, and avoid heavy blankets or thick swaddles inside the carrier.
Step-by-Step Guide to Securing Your Newborn
Securing a newborn in a carrier requires patience, a calm environment, and a methodical approach. It is often helpful to practice with a doll or stuffed animal first, or to have another adult nearby to assist you during your first few attempts.
Step 1: Secure the Waist Belt Begin by putting on the carrier’s waist belt. Position it high on your torso, well above your hips—often around your natural waist or just below your ribcage. Fasten the buckle securely and pull the strap tight. The belt must be snug enough that it does not slide down or tilt forward when the baby’s weight is added. A high waist belt ensures the baby sits close to your center of gravity, which protects your lower back and keeps the baby within safe viewing range.
Step 2: Position and Support Your Baby Hold your newborn gently but firmly against your chest, placing their chest against yours. Use one hand to continuously support their head, neck, and upper back. Use your other hand to guide their legs into the carrier’s opening or the designated infant insert. Slowly and carefully lower your baby into the carrier, ensuring you do not let go of their head and neck support until the carrier’s panels are fully adjusted and secured.
Step 3: Seat the Baby Deeply Once the baby is inside, guide their bottom deep into the seat pouch of the carrier. The fabric should cup their bottom and extend from the back of one knee to the back of the other. Ensure there is no bunched fabric underneath their thighs or bottom, as this can cause discomfort or uneven pressure. The baby’s weight should rest fully on their bottom and thighs, not on their feet or crotch.
Step 4: Secure and Tighten the Straps While still supporting your baby with one hand, slip your arms through the shoulder straps one at a time. Fasten the chest or back clip, then pull the adjustment straps evenly. Tighten the straps until the baby is held snugly against your body. The fit should be firm enough that when you lean forward slightly, the baby does not pull away from your chest or slump down.
Protecting the Head, Neck, and Airway
Because newborns cannot support their own heads, the carrier must provide adequate structural support without causing safety hazards. Ensure the carrier’s integrated headrest or neck cushion reaches the base of your baby’s skull or mid-ear level. The support should hold the head upright and stable, but it must never be so tight or high that it pushes the baby’s head forward toward their chest.
To protect your baby’s airway, you must strictly observe the “two-finger rule.” At all times, there must be a visible gap of at least two fingers between your baby’s chin and their chest. This gap ensures their windpipe remains straight and open. Regularly check that the baby’s face is completely clear of fabric, your clothing, or your skin, allowing fresh air to circulate freely around their nose and mouth.
Supporting the Hips and Spine in an M-Shape
To promote healthy joint development, you must actively guide your baby’s lower body into an ergonomic M-shape. As you settle them into the carrier, gently push their knees upward so they sit slightly higher than or level with their bottom. Their thighs should spread comfortably around your torso, creating a wide, stable base.
The carrier fabric must support the baby’s thighs from knee crease to knee crease. If the fabric is too narrow, the legs will dangle straight down, placing excessive pressure on the hip joints. Conversely, if the fabric is too wide, it may force the knees to over-extend, which can also cause joint strain. Ensure the baby’s spine maintains a soft, natural C-curve, with their back rounded gently rather than flattened or arched backward.
The TICKS Checklist: Verifying Your Baby is Safe
The TICKS checklist is an internationally recognized safety standard designed to help parents quickly and reliably verify that their baby is positioned correctly. Every time you put your newborn in a carrier, run through these five essential checks:
- T — Tight: The carrier must be adjusted snugly. Any loose fabric will allow the baby to slump down, which can restrict their airway, strain your back, and increase the risk of accidental slips.
- I — In view at all times: You must always be able to see your baby's face simply by looking down. The fabric of the carrier, your clothing, or any accessories should never cover or shroud their face, nose, or mouth.
- C — Close enough to kiss: Your baby should be positioned high enough on your chest that you can easily kiss the top of their head or forehead by simply tipping your head forward. If they are too low, reposition the waist belt higher.
- K — Keep chin off the chest: Ensure there is always a gap of at least two fingers under your baby's chin. A baby's head should never be forced downward, as this can compress their airway and lead to silent suffocation.
- S — Supported back: The carrier's back panel must support the baby's back in its natural, gently rounded C-curve. Their tummy and chest should rest comfortably against your chest, preventing them from slumping or curling sideways.
Common Positioning Mistakes and When to Stop
Even experienced parents can make mistakes when adjusting a carrier for baby newborn use. One of the most common errors is leaving the shoulder or waist straps too loose, which causes the baby to slide down and slump. Another frequent mistake is allowing the baby’s face to press directly against the parent’s chest or clothing, blocking fresh air. Additionally, using a carrier that is too wide or too narrow without the proper infant insert can force the legs into a dangling or over-extended position, compromising hip health.
There are clear conditions under which you must immediately stop using the carrier and remove your baby. First, monitor your baby closely for signs of overheating, which is especially common in tropical climates. If your baby has flushed skin, is sweating, or is breathing rapidly, remove them from the carrier immediately, move to a cooler or well-ventilated area, and offer a feed. Second, if you cannot adjust the carrier to meet all the TICKS checklist requirements, stop using it until you can verify the fit or try a different style of carrier.
Additionally, if you experience severe back, shoulder, or neck pain, stop carrying and re-evaluate the strap adjustments. If your baby becomes persistently fussy, cries, or continuously slips out of the correct position, remove them and take a break. If you are ever unsure about the safety or fit of your carrier, or if your baby has a pre-existing medical condition, such as hip dysplasia, respiratory issues, or low muscle tone, consult your pediatrician or a certified babywearing educator before continuing use.
Frequently Asked Questions (FAQ)
When can my newborn face outward in a carrier?
A newborn must always face inward, resting their chest and tummy against your body. This position provides the essential head, neck, and airway support that young infants require. You should only transition your baby to a forward-facing position once they have achieved full, independent head and neck control, which typically occurs between 4 and 6 months of age. Additionally, you must verify that your specific carrier is designed to support outward-facing carrying and that your baby meets the exact height and weight specifications detailed in the manufacturer’s instruction manual.
How long can a newborn stay in a carrier at one time?
While there is no rigid time limit, developmental experts generally recommend taking your newborn out of the carrier every 1 to 2 hours. These regular breaks allow you to check your baby’s skin for any red marks or irritation, let them stretch their limbs, change their diaper, and offer a feed. Rather than strictly watching the clock, pay close attention to your baby’s physical cues and your own comfort. If your baby becomes restless, or if you feel physical fatigue, it is time to take a break and let both of you rest.
Community discussion
Share your experience or ask a question. Comments are reviewed before publication.