
Wearing your baby close is one of the most rewarding ways to bond while keeping your hands free to manage daily tasks. Whether you are navigating a bustling local market, walking through a quiet neighborhood, or simply trying to soothe a fussy infant at home, a baby carrier offers unparalleled convenience. However, achieving a fit that is both safe for your little one and comfortable for your body requires more than just buckling a few straps.
To wear a baby carrier correctly, you must ensure the waistband sits high and snug on your torso, the baby’s hips are positioned in an ergonomic “M” shape, and their airway remains completely unobstructed. By mastering these key adjustments, you can prevent physical strain on your back and shoulders while supporting your baby’s healthy physical development.
Preparing Your Baby Carrier and Baby for Safe Use
Before you attempt to put on your baby carrier, take a few moments to inspect the equipment and prepare your baby. This proactive step establishes a baseline of safety and ensures that your babywearing experience is smooth and comfortable from the very start.
Products mentioned in this guide

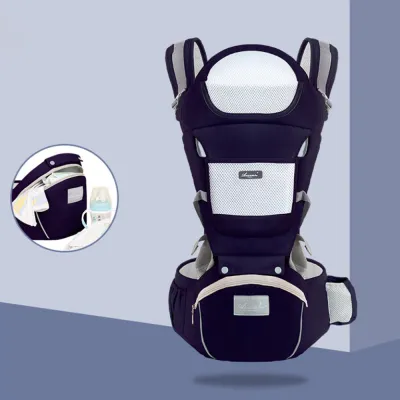
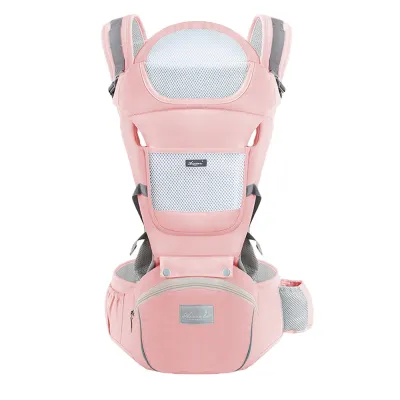
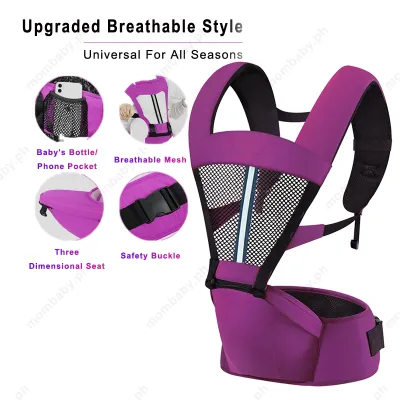


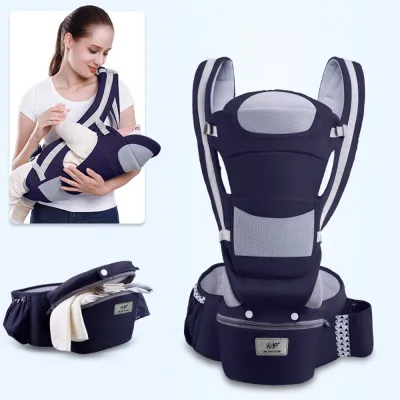

Prices are valid at publication and may change. Please refer to the product page for the latest price.
First, perform a thorough visual and physical inspection of the carrier. Examine all stress points, paying close attention to the stitching where the shoulder straps and waistband meet the main body panel. Check that the plastic buckles are free of cracks, click securely into place, and do not slip when tension is applied. Inspect the adjustable sliders, zippers, and velcro attachments for any signs of wear, fraying, or accumulation of lint that could compromise their grip. If you notice any damage or weakened seams, discontinue use immediately and contact the manufacturer.
Next, verify that your baby’s current weight, height, and developmental stage align with the carrier’s specifications. Every baby carrier model has strict minimum and maximum weight limits, which you can find on the product label or in the user manual. Placing a newborn in a carrier designed for older babies without the proper modifications can lead to slipping or airway obstruction, while exceeding the maximum weight limit can strain the carrier’s structure and your body.
Dressing your baby appropriately is also vital, especially in a tropical and humid climate like the Philippines. The fabric of the carrier acts as an extra layer of insulation, and the close physical contact between you and your baby generates significant shared body heat. Opt for lightweight, breathable fabrics such as single-layer cotton, linen, or bamboo onesies. Avoid dressing your baby in footed sleepers, as the fabric can pull tightly against their toes when they are seated in the carrier, causing discomfort or restricting circulation.
Finally, prepare yourself by wearing comfortable, supportive footwear, such as flat, non-slip shoes, which help you maintain balance while carrying extra weight. Choose clothing made of breathable fabric that allows a full range of motion, and avoid wearing dangling necklaces, large earrings, or shirts with heavy embellishments that could scratch your baby’s delicate skin or present a choking hazard.
Step-by-Step Guide to Putting On a Structured Baby Carrier
Soft-structured carriers (SSCs) are highly popular due to their padded shoulder straps, supportive waistbands, and user-friendly buckle systems. Following a systematic sequence when putting on your carrier ensures that both you and your baby remain secure throughout the process.

Securing the Waistband for Lumbar Support
The foundation of comfortable babywearing lies in how you position and secure the waistband. A properly adjusted waistband transfers the majority of your baby’s weight to your hips and legs, protecting your lower back and shoulders from premature fatigue.
Begin by placing the waistband around your torso. The exact height depends on your baby’s size and the manufacturer’s instructions. For newborns and younger infants, position the waistband higher up on your natural waist, just below your ribcage. This high placement ensures the baby remains close enough to kiss once they are in the carrier. For older, heavier babies, you may position the waistband slightly lower, resting on the top of your hip bones.
Once the waistband is in the correct position, fasten the main buckle. You should hear a distinct click, confirming that the buckle is fully engaged. Pull the adjustment strap to tighten the belt until it feels snug and highly supportive, similar to a firm hug. The waistband should rest flat against your body without folding, twisting, or digging painfully into your skin. Ensure the fabric seat of the carrier is perfectly centered on your front to keep your center of gravity balanced.
Positioning the Baby and Fastening the Straps
With the waistband securely fastened, you are ready to place your baby into the carrier. This step requires careful coordination and a calm, deliberate approach.
Hold your baby securely against your chest in a natural upright position, using one arm to cradle their back and bottom. Your baby’s chest should rest gently against yours, with their legs naturally wrapping around your torso. Use your free hand to reach down, grab the back panel of the carrier, and smooth it up over your baby’s back. As you lift the panel, guide your baby’s legs through the designated openings, ensuring the fabric supports their thighs from knee to knee.
While keeping one hand firmly pressed against your baby’s back to keep them secure, use your other hand to slide one shoulder strap over your shoulder. Swiftly switch your supporting hand to hold the baby through the fabric panel, and slide the second shoulder strap over your other shoulder. Never let go of your baby completely during this transition.
Reach behind your neck or upper back to locate the chest strap, also known as the back clip. Fasten the buckle and slide the strap up or down along its tracks so it sits comfortably in the middle of your shoulder blades. This strap prevents the shoulder straps from sliding off your shoulders. Once the chest strap is secured, pull the forward-facing adjustment straps on your shoulder pads to tighten the overall fit, ensuring your baby is held close to your body. Keep at least one hand securely on your baby until all buckles are fully fastened and adjusted.
Adjusting the Fit for Baby’s Hips, Spine, and Airway
Once your baby is inside the carrier and the main straps are fastened, you must fine-tune the adjustments to ensure proper ergonomic positioning and complete airway safety.
Checking the Hip and Leg Position
Supporting your baby’s developing skeletal structure is critical to preventing long-term joint issues. The ideal position for a baby’s lower body in a carrier is the natural “M” shape, often referred to as the “froggy” position.
In a correct “M” position, your baby’s knees are positioned slightly higher than or level with their bottom, and their thighs are spread wide around your torso. This position allows the head of the femur to sit securely inside the hip socket, reducing the risk of hip dysplasia. Visually inspect your baby from the front and sides; their legs should not dangle straight down, as this places excessive, unnatural pressure on their hip joints and lower spine.
If your baby carrier features an adjustable seat width, utilize the built-in snaps, buttons, or velcro tabs to customize the support. The fabric of the seat panel should extend fully from one knee pit to the other, providing complete thigh support. If the fabric is too narrow, your baby’s legs will dangle. If the fabric is too wide, it will force their knees outward at an uncomfortable angle or bunch up behind their calves, restricting blood flow. Adjust the seat width as your baby grows to maintain this knee-to-knee support.
Fine-Tuning the Straps and Head Support
The upper body of your baby must be supported firmly to prevent slumping, which can lead to physical discomfort and serious breathing hazards.
Tighten the shoulder straps evenly until your baby is held snugly against your chest. There should be no visible slack in the straps, and your baby should not lean away from you when you move or bend forward slightly. A snug fit keeps your baby’s spine in its natural, gently rounded “C” curve, which mimics their position in the womb and protects their developing back muscles.
Next, adjust the height of the chest strap on your back. If the strap is positioned too high, it can press against your neck and cause muscle strain. If it is too low, the shoulder straps may pull outward, causing them to slip off your shoulders and shifting the baby’s weight unevenly. Slide the strap until it rests comfortably in the middle of your shoulder blades, then tighten it until the shoulder straps pull slightly inward.
If your carrier includes a built-in headrest, neck support panel, or a sleeping hood, adjust it to provide gentle stability for your baby’s head. This support is especially important for newborns who lack head control, or for older babies when they fall asleep. Ensure the head support is snug enough to keep their head from flopping backward or sideways, but never tighten it so much that it forces their chin down toward their chest, as this can severely restrict their airway.
Verifying Safety and Comfort Before You Move
Before you begin walking or performing daily tasks, run through a quick, reliable safety checklist. Taking thirty seconds to verify these points ensures your baby is secure and breathing easily.
First, check that your baby is at “kissable height.” You should be able to easily kiss the top of your baby’s head simply by tipping your chin downward. If your baby’s head is too low, their weight will pull forward on your shoulders, causing back pain, and it will be difficult for you to monitor their breathing. To correct this, support your baby’s weight with your hands, loosen the shoulder straps slightly, slide the waistband higher up on your torso, retighten the waistband securely, and then retighten the shoulder straps.
Second, apply the “two-finger” rule to check your baby’s airway. Look down at your baby’s neck and ensure there is a gap of at least two fingers between their chin and their chest. If their chin is pressed tightly against their chest, their airway can easily become kinked or obstructed, which is a critical safety hazard. Keep their head slightly tilted back in a neutral position.
Third, perform a visual check of your baby’s face. Their face must be completely visible to you at all times, never covered by the carrier fabric, your clothing, or a nursing cover. Ensure their nose and mouth are entirely free of any obstructions.
Finally, perform a quick temperature check. In warm, humid environments, overheating can happen quickly. Feel the back of your baby’s neck or their upper back with your hand. If their skin feels excessively hot, sweaty, or damp, or if they exhibit flushed cheeks, rapid breathing, or unusual fussiness, find a cool, shaded, or air-conditioned space immediately. Take your baby out of the carrier to let them cool down, and offer them breastmilk or formula to keep them hydrated.
Common Babywearing Mistakes to Avoid
Even experienced parents can fall into habits that compromise safety or cause physical discomfort. Being aware of these common mistakes helps you avoid them.
One frequent mistake is carrying the baby too low on the torso. This error typically happens when the waistband is fastened around the hips rather than the waist, or when the shoulder straps are left too loose. A low-riding carrier shifts your center of gravity forward, forcing you to lean backward to compensate, which leads to severe lower back and shoulder strain. It also prevents you from keeping a constant visual watch on your baby’s face.
Another error is facing a baby outward prematurely. Babies should never be placed in a forward-facing position until they have developed full, independent head and neck control, which typically occurs around four to six months of age. Facing outward too early can strain their neck muscles and force their spine into an unnatural straight or hollowed position. Additionally, outward facing can lead to overstimulation in busy or noisy environments; if your baby becomes fussy or falls asleep, immediately turn them back to the inward-facing position to protect their airway and neck.
Leaving the carrier too loose is a subtle but dangerous mistake. When the straps are loose, your baby can slump down into a deep “C” shape inside the fabric panel. This slumping can cause their chin to press against their chest, restricting their oxygen intake. A snug, firm fit is essential to keep their body upright and their airway open.
Lastly, avoid overdressing your baby when using a carrier. It is easy to forget that the carrier itself behaves like a layer of heavy clothing. In warm climates, dressing your baby in thick fabrics or multiple layers while inside a carrier can quickly lead to overheating. Stick to minimal, lightweight clothing and monitor their temperature regularly.
Frequently Asked Questions (FAQ)
Do I need an infant insert for my newborn?
Whether you need an infant insert depends entirely on the specific model of your baby carrier and your newborn’s weight and height. Some structured carriers require a specialized insert to support a newborn’s head, neck, and hips safely until they reach a certain weight or age, while other carriers feature adjustable seats that can be customized for newborns without an insert. Always consult your carrier’s instruction manual and check the manufacturer’s minimum weight requirements. Never use an infant insert from a different brand or model, and stop using the insert once your baby reaches the specified weight or developmental milestone.
How do I know if my baby is too hot in the carrier?
You can determine if your baby is getting too warm by checking the back of their neck, chest, or upper back with your hand. If their skin feels hot, sweaty, or damp, they are likely overheating. Other signs include flushed cheeks, rapid breathing, damp hair, or unusual fussiness. If you notice these signs, move to a shaded, cool, or air-conditioned area, remove your baby from the carrier, and allow both of your bodies to cool down. Offer your baby breastmilk or formula to prevent dehydration, and ensure they are dressed in lightweight, breathable clothing.
Can I face my baby outward in the carrier?
You should only face your baby outward if your specific carrier model is designed to support a forward-facing position, and if your baby has met the necessary developmental milestones. Your baby must have full, independent head and neck control, and be able to sit upright unassisted, which typically occurs around five to six months of age. Additionally, check the manufacturer’s manual for the specific weight and height limits for the outward-facing position. If your baby falls asleep while facing outward, immediately switch them back to the inward-facing position to ensure their head is properly supported and their airway remains clear.
Community discussion
Share your experience or ask a question. Comments are reviewed before publication.