
Wearing a baby carrier properly requires a careful balance of ergonomic positioning, structural checks, and close attention to your baby’s developmental stage. For parents using a Zima baby carrier, achieving the correct fit ensures that your baby’s hips and spine are supported while keeping their airway completely clear. Because babies grow rapidly, a carrying position that works well during the first few weeks will need to be adjusted as your child gains head control, weight, and height. In warm, tropical climates like the Philippines, babywearing also requires extra vigilance regarding temperature and airflow to keep both caregiver and infant comfortable. By understanding the core principles of ergonomic positioning and following the manufacturer’s specific guidelines, you can safely enjoy the convenience of hands-free parenting.
Pre-Wear Safety Checks and Preparation
Before you place your baby into the carrier, a thorough inspection of the gear is essential for safety. Examine the fabric of your Zima carrier for any signs of wear, such as frayed seams, torn stitching, or worn-out fabric panels. Check all plastic buckles, adjusters, and zippers to ensure they snap securely into place and do not slip under tension. If you notice any cracked plastic or compromised stitching, suspend use immediately and contact the manufacturer.
Next, verify that your baby meets the specific weight and developmental requirements for the exact Zima model you own. Baby carriers are engineered with precise weight limits, and using a carrier for a baby who is too light or too heavy can compromise both structural safety and ergonomic support. Never assume suitability based on age alone; physical milestones, such as the ability to hold the head up independently, are critical indicators of which carrying positions are safe.
Products mentioned in this guide
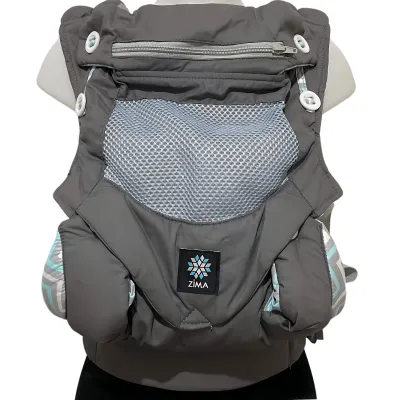

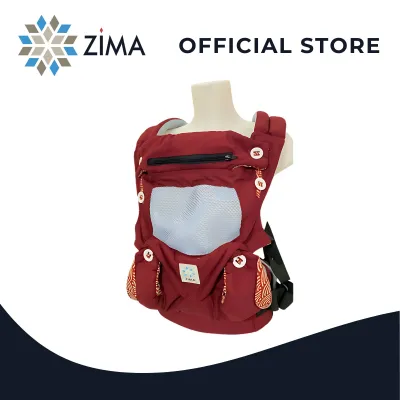





Prices are valid at publication and may change. Please refer to the product page for the latest price.
Dressing your baby appropriately is another vital preparation step, especially in warm and humid environments. Overheating is a significant risk when babywearing, as your body heat transfers directly to your child. Opt for lightweight, breathable fabrics like single-layer cotton or bamboo, and avoid heavy onesies or footed sleepers that can pull tightly on your baby’s toes when they are seated in the carrier. Keep a close eye on your baby’s temperature by feeling the back of their neck or chest; if their skin feels hot or sweaty, take a break from wearing the carrier to let them cool down.
Core Positioning Rules for Hip and Airway Safety
The foundation of safe babywearing rests on two critical pillars: protecting your baby’s developing joints and safeguarding their breathing. When positioned correctly, your baby’s hips should form an “M” shape, also known as the spread-squat position. In this alignment, the baby’s knees are supported and sit slightly higher than their bottom, while their thighs spread around the caregiver’s torso. This position reduces stress on the hip joints, helping to support natural hip development and minimize the risk of hip dysplasia. The carrier’s seat panel must support the baby’s thighs from knee-to-knee; if the seat is too narrow, the legs will dangle straight down, placing undue strain on the hip sockets.

Airway safety is equally paramount and requires constant monitoring. Your baby’s face must always remain visible to you, and their nose and mouth should never be pressed against your chest, the carrier fabric, or your clothing. Ensure there is a space of at least two fingers between your baby’s chin and their chest to prevent their airway from being restricted. A slumped posture can cause the chin to drop, which can block the infant’s delicate airway. The carrier’s back panel should be adjusted to provide firm support along the spine without forcing it into an unnaturally straight position, allowing the back to maintain its natural, gentle curve.
While babywearing is highly beneficial, caregivers must remain alert to signs of discomfort or distress. If you notice your baby struggling to breathe, making unusual noises, slumping excessively, or showing signs of skin irritation, remove them from the carrier immediately. If you have ongoing concerns about your baby’s breathing, posture, or physical comfort while using the carrier, stop using it and consult a pediatrician or a certified babywearing specialist for professional guidance.
Step-by-Step: Putting On and Securing the Zima Carrier
To achieve a secure and comfortable fit, start by fastening the waistband of the carrier around your torso. Position the waistband flat against your body, typically at your natural waist or slightly above the hips, depending on your comfort and the baby’s size. Secure the buckle and pull the strap tight enough so that the waistband does not sag under the baby’s weight. A snug waistband is crucial because it distributes the majority of the baby’s weight to your hips and legs, protecting your lower back from strain.
Once the waistband is secure, hold your baby firmly against your chest in the desired position, ensuring their legs are positioned on either side of the seat panel in the proper “M” shape. While supporting your baby’s back with one hand, slide your other arm through one of the shoulder straps, then switch hands to secure the second shoulder strap. Throughout this process, keep at least one hand securely on your baby at all times until all buckles are fully fastened.
With both shoulder straps in place, reach behind your back to fasten the chest or back connector strap. This connector prevents the shoulder straps from slipping off your shoulders and helps distribute weight evenly across your upper back. Adjust the tension of the shoulder straps by pulling the adjustment webbing forward or backward. The straps should be tight enough to hold your baby close to your body—close enough to kiss the top of their head—without restricting their chest expansion or movement. Double-check that all safety loops are utilized and that no straps are twisted.
Adjusting the Carrier as Your Baby Grows
As your baby transitions from a newborn to an active toddler, their physical proportions and developmental capabilities will change. You must adjust the configuration of your Zima carrier to match these milestones, relying strictly on the manufacturer’s official guidelines for age, weight, and physical readiness. For instance, front-outward carrying should only be attempted once your baby has strong, consistent head and neck control and meets the minimum weight threshold specified in your manual.
To accommodate a growing child, many carriers allow you to adjust the width of the seat and the height of the back panel. For younger infants, the seat should be narrowed so that it does not force their legs too far apart or cut into the back of their knees. As their legs grow longer, widen the seat to maintain the essential knee-to-knee support. Similarly, the back panel should be high enough to support a younger baby’s upper back and neck, but can be lowered or adjusted once the child is older and wants more freedom to move their arms and look around.
Pay close attention to the physical signs that indicate your baby has outgrown their current carrying setup. If the seat panel no longer reaches near the back of their knees, leaving their lower legs dangling unsupported, or if the back panel no longer reaches their mid-back, it is time to adjust the settings or transition to a different carrying position, such as a back carry or a dedicated hip seat configuration. Regularly reviewing the manufacturer’s manual will help you make these transitions safely.
Troubleshooting Fit and Comfort for Caregiver and Baby
If you experience shoulder, neck, or lower back pain while wearing your baby, the cause is often an uneven distribution of weight. To resolve this, try raising the waistband higher on your torso to bring the baby’s center of gravity closer to yours. Ensure the shoulder straps are not twisted and that the back connector strap is positioned in the middle of your shoulder blades, rather than riding up toward your neck. Adjusting the angle of the shoulder straps can also relieve pressure on sensitive pressure points.
For your baby, fussiness or crying inside the carrier can sometimes indicate physical discomfort. Check the leg openings to ensure the fabric is not pinching their thighs or leaving deep red marks. If the back panel is pulled too tight, it may restrict their limb movement or compress their chest; conversely, if it is too loose, they may slump, which compromises their airway. Adjust the tension incrementally until your baby is held securely but comfortably, with room for natural movement.
If you have adjusted the straps and positions but still cannot achieve a comfortable fit for yourself or your baby, do not force it. Stop using the carrier and seek advice from a certified babywearing educator or a local babywearing group. These professionals can provide personalized, hands-on adjustments and help you identify specific fit issues to ensure a safe, comfortable, and ergonomic experience for both you and your child.
Frequently Asked Questions (FAQ)
Can I use the Zima carrier for a newborn without an infant insert?
Whether you need an infant insert depends entirely on the specific model of your Zima carrier and your newborn’s weight. Some carrier models are designed with adjustable seat widths that can safely accommodate newborns directly, while others require a dedicated infant insert to support the baby’s head, neck, and hips properly. Always consult your specific product manual to verify the minimum weight limit and whether an insert is mandatory for safe use.
How do I know if the carrier straps are too tight or too loose?
The carrier straps are adjusted correctly when your baby is held snugly against your torso, preventing them from slumping or shifting when you move. You should be able to slide your hand easily between the carrier fabric and your baby’s back, ensuring their chest can expand fully for normal breathing. If the baby’s head wobbles or their body sags away from you when you bend forward slightly, the straps are too loose; if the fabric presses tightly against their chest or leaves deep marks, they are too tight.

Community discussion
Share your experience or ask a question. Comments are reviewed before publication.