
Correctly positioning your baby in a hip seat carrier is essential for protecting their developing joints and ensuring your own physical comfort. To do this properly, you must secure the waist belt high and snug above your hips, sit your baby fully on the center of the shelf, and guide their legs into an ergonomic “M-position” where their knees rest higher than their hips. Using a baby carrier hip seat correctly prevents unnecessary strain on your lower back while keeping your little one secure during daily activities.
While these carriers offer excellent weight distribution, achieving the perfect fit requires attention to detail. In warm, tropical climates like the Philippines, proper positioning also helps maintain airflow between you and your baby, preventing overheating and skin irritation. By mastering a few simple adjustments, you can turn your carrier into a safe, comfortable tool for everyday parenting.
When Is Your Baby Ready for a Hip Seat Carrier?
Before using a baby carrier hip seat, you must verify that your child has reached the necessary physical milestones. Every baby develops at their own pace, meaning chronological age is only a secondary guideline. You should always check the manufacturer’s specific age, weight, and developmental requirements printed on the product packaging or listed in the user manual.
Products mentioned in this guide
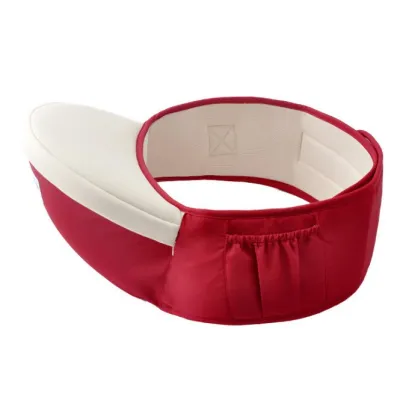
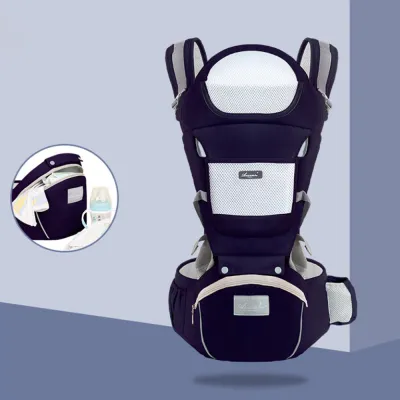


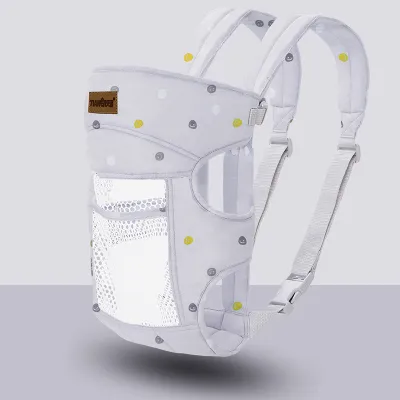

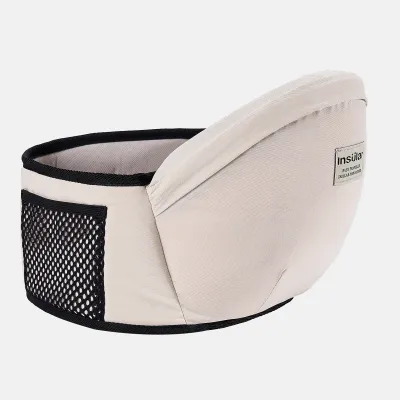
Prices are valid at publication and may change. Please refer to the product page for the latest price.
As a primary rule, a hip seat carrier is not suitable for newborns or young infants who lack torso and neck stability. Placing a newborn on a solid hip seat can lead to spinal slumping and dangerous airway obstruction. Your baby is only ready for this type of carrier once they have achieved full, consistent head and neck control. This milestone typically occurs around six months of age, but you must observe your child’s physical capabilities directly.
In addition to neck control, your baby should be able to sit upright with minimal support before transitioning to a hip seat. This level of physical development ensures their spine can handle the upright posture without placing undue pressure on their lower back. If you have any doubts about your baby’s developmental readiness or physical muscle tone, consult your pediatrician before using the carrier.
Step-by-Step Guide to Positioning Your Baby in a Baby Carrier Hip Seat
Properly setting up your carrier protects your body from strain while creating a safe environment for your baby. Taking your time during the initial setup prevents the need for constant, uncomfortable adjustments later on.

Securing the Waist Belt and Adjusting Parent Posture
To begin, position the wide waist belt high on your torso, wrapping it around your natural waist rather than your lower hips. Fastening the belt too low causes the seat to tilt downward under the baby’s weight, which pulls your pelvis forward and strains your lower back. The belt should sit firmly above your hip bones, creating a level, supportive platform.
Pull the belt snug before securing the primary fasteners. If your carrier uses a combination of hook-and-loop fabric and a buckle, ensure the fabric is completely flat and aligned before snapping the buckle shut. A loose belt will sag, forcing you to lean backward to compensate, which can cause severe muscle fatigue over time.
Once the belt is fastened, stand tall and check your posture. Avoid the temptation to lean to one side or arch your lower back. Adjust the secondary safety straps and side buckles to distribute the tension evenly across your waist and shoulders. Double-check that all safety locks are fully engaged according to the manufacturer’s instructions before lifting your child.
Placing the Baby and Achieving the M-Position
Lift your baby gently and place their bottom squarely in the center of the hip seat. Their weight should be fully supported by the solid base, rather than hanging off the edge. If your carrier includes a removable back panel, hold your baby securely against your chest with one hand while pulling the panel up over their back with the other.
Immediately guide your baby’s legs into the ergonomic “M-position,” which is also referred to as the frog-leg position. To achieve this, gently lift your baby’s knees so they sit higher than their bottom, allowing their thighs to spread naturally around your waist. The seat base must support their thighs from knee crease to knee crease, preventing their legs from dangling straight down.
Observe your baby’s spinal alignment once they are settled. Their back should maintain a soft, natural “C” curve, curving gently outward rather than being forced into a rigid, straight line. This curved posture relieves pressure on the developing spine and allows the baby to rest comfortably against your chest. Ensure the back panel is adjusted snugly enough to maintain this position without compressing their chest.
Verifying Safety, Airway, and Comfort
Once your baby is positioned, you must perform a quick safety check to ensure their airway is completely clear. Your baby’s face must always remain visible, and their chin should never rest directly on their chest, as this posture can restrict breathing. A helpful rule of thumb is to ensure the baby is “close enough to kiss,” meaning you can easily kiss the top of their head simply by tipping your chin down.
Next, inspect the space around your baby’s face to verify that no loose fabric, clothing, or carrier straps are covering their nose or mouth. In humid environments, lightweight, breathable clothing for both parent and baby is essential to prevent heat buildup. Ensure that the fabric of the carrier’s back panel is smooth and does not bunch up near the baby’s face.
Assess how the weight is distributed across your own body. If you feel immediate pressure on your lower back, pelvic bone, or shoulders, the waist belt may be too loose or positioned too low. The carrier’s lower edge should not dig uncomfortably into your hips or ribs, and the seat should not press harshly into your baby’s inner thighs. If you experience discomfort, set your baby down in a safe spot and readjust the belt higher and tighter.
Common Positioning Mistakes and When to Stop
One of the most frequent mistakes parents make is letting the baby’s legs dangle straight down. This vertical dangling places excessive pressure on the hip joints, which can interfere with healthy joint development. Always check that the baby’s thighs are supported and their knees are elevated in the proper M-shape.
Another common error is wearing the waist belt too loose, which causes the hip seat to slope downward. This sloping forces the baby to slide forward, placing strain on their groin and pulling the parent’s spine out of alignment. Additionally, parents should avoid facing their baby outward before the child has demonstrated consistent, independent head and neck control, as outward-facing positions offer less head support and can lead to overstimulation.
When to Stop Using the Carrier Immediately:
- Baby's physical signs: Stop use if your baby shows signs of physical distress, has difficulty breathing, or if you notice deep red marks or bruising on their inner thighs.
- Parent's physical signs: Cease carrying if you experience sharp back pain, shoulder numbness, or severe muscle strain.
- Equipment wear: Discontinue use immediately if you notice frayed seams, cracked plastic buckles, or failing hook-and-loop fasteners on the waist belt.
If your baby has pre-existing hip, spine, or developmental concerns, do not use a hip seat carrier without first consulting a pediatrician or a certified babywearing educator. They can provide personalized advice tailored to your child’s specific physical needs.
Frequently Asked Questions (FAQ)
Can improper positioning in a hip carrier cause hip dysplasia?
Improper positioning that allows a baby’s legs to dangle straight down can place unnatural stress on the hip joints, potentially increasing the risk of hip development issues. To support healthy hip joint alignment, you should always position your baby with their knees higher than their hips in the ergonomic M-position. When purchasing gear, look for recognized hip-healthy certifications on the product packaging, and consult your pediatrician if you have specific concerns about your child’s hip development.
How long can my baby safely stay in the carrier at one time?
There is no single, universal time limit for babywearing, as safety depends on your baby’s age, physical comfort, and your own stamina. However, it is highly recommended to take short breaks every 30 to 45 minutes to check your baby’s skin for irritation, ensure proper blood circulation in their legs, and give your own back and core muscles a rest. Regular breaks also provide an opportunity to check their diaper and ensure they remain hydrated, especially in warm, humid weather.
Community discussion
Share your experience or ask a question. Comments are reviewed before publication.