
Every parent has experienced the sudden wave of panic that hits when a baby starts crying in a crowded public space, and the one item needed to soothe them is buried deep inside a chaotic diaper bag. Digging through a mountain of loose clothes, half-empty wipe packets, and stray toys while trying to calm an infant is exhausting. When you are out and about, every second counts, and a disorganized bag only heightens your stress.
The solution to this common parenting struggle lies in a systematic approach to packing, centered around a high-quality baby organizer. By shifting your mindset from simply packing items where they fit to organizing by functional zones, you can transform your diaper bag into a highly efficient mobile nursery. Using dedicated inserts and modular pouches ensures that every essential has a predictable, easily accessible home, allowing you to respond to your baby’s needs in seconds.
Why Zoning is the Secret to a Stress-Free Diaper Bag
Traditional diaper bags often become bottomless pits because items of all shapes and sizes are tossed in together. When you pack chronologically or simply fill empty spaces, you end up with a disorganized mess that requires complete excavation just to find a single pacifier. Zoning solves this problem by grouping items according to specific tasks—such as diaper changes, feeding, or soothing—rather than their physical size or shape.
Products mentioned in this guide
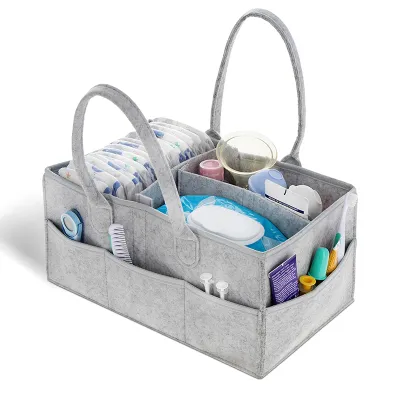
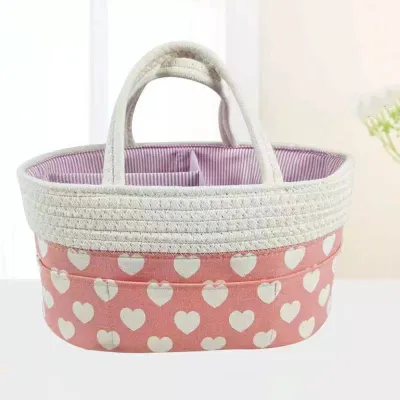
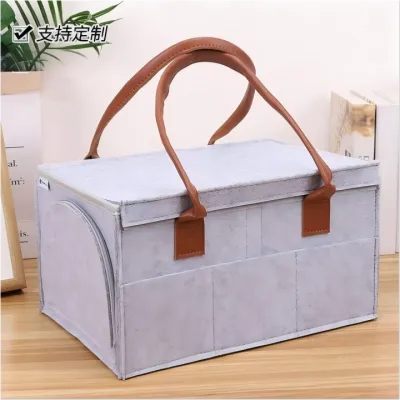
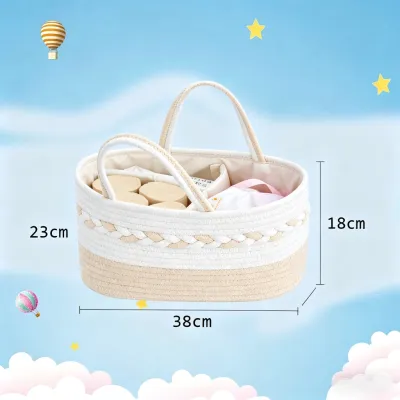
Prices are valid at publication and may change. Please refer to the product page for the latest price.
Implementing a zoning system relies heavily on a dedicated baby organizer. Whether you choose a structured bag-in-bag insert or a collection of color-coded modular pouches, these tools create physical boundaries within your main bag. Instead of loose items shifting during transit, your gear remains locked in its designated zone. This predictability means that even in low-light environments or high-stress situations, your hand knows exactly where to go.
Furthermore, zoning makes it easy for other caregivers, such as grandparents or babysitters, to navigate the bag without constant instructions. When the layout is intuitive and organized by function, anyone can step in to help. This simple organizational shift reduces the cognitive load on parents, turning potentially chaotic outings into smooth, manageable experiences.
Choosing the Right Baby Organizer and Pouches
Selecting the right tools to structure your diaper bag depends heavily on your bag’s shape and your daily lifestyle. A structured felt or nylon bag-in-bag insert is excellent for open totes or slouchy backpacks, as it provides immediate vertical compartments and prevents the bag from collapsing. Nylon inserts are particularly popular because they are lightweight and easy to wipe clean, while felt options offer rigid walls that keep bottles and containers upright.

For parents who prefer a modular setup, clear mesh pouches and lightweight packing cubes are highly effective. Clear mesh allows you to identify the contents of a pouch instantly without opening it, saving valuable time. Additionally, specialized pouches are essential for specific baby needs. You will want to invest in at least one high-quality waterproof wet bag to isolate soiled clothes or damp cloth diapers, as well as insulated bottle holders to maintain safe temperatures for liquid feeds.
Before purchasing any baby organizer, always measure the interior dimensions of your current diaper bag. An insert that is too large will warp the shape of your bag and make zippers difficult to close, while one that is too small will slide around and defeat the purpose of organization. Aim for a snug fit that leaves just enough room on the sides for flat items like a changing mat or a tablet.
Lastly, prioritize materials that are water-resistant, durable, and machine-washable. Baby gear is inevitably subjected to spills, leaks, and outdoor dirt. Checking product labels for easy-to-clean fabrics will save you significant maintenance time in the long run, ensuring your organizational system remains hygienic and fresh.
Step-by-Step Guide: Packing Your Diaper Bag by Task Zones
To build a highly functional diaper bag, you must pack systematically, placing the most critical items in the easiest-to-reach locations. By dividing your bag into four distinct, task-oriented zones, you eliminate the need to search through unrelated gear when addressing an immediate need. Follow this logical layout to organize your baby organizer for maximum efficiency.
Zone 1: The Changing Station
This zone must be the most accessible part of your diaper bag, as diaper changes often require urgent action. Pack a dedicated pouch or top compartment with enough diapers for your outing—a reliable rule of thumb is to pack one diaper for every two hours you expect to be out, plus two extra diapers for unexpected emergencies. Along with the diapers, include a travel-sized pack of wipes, a tube of diaper cream, and a compact, foldable changing pad.
Position this entire changing assembly at the very top of your baby organizer or in an exterior quick-access pocket. When a blowout occurs, you should be able to grab this single pouch and head straight to the restroom without carrying your entire diaper bag. Keeping these items unified prevents you from having to balance a baby on a changing table while rummaging around for a clean wipe.
Zone 2: Feeding and Hydration
Whether you are breastfeeding, formula feeding, or introducing solids, keeping feeding supplies clean and temperature-regulated is vital. In this zone, pack clean bottles, pre-measured formula dispensers, or sealed breast milk storage bags. Include a couple of clean bibs and soft burp cloths to manage spills and spit-ups during and after the feed.
Always utilize the insulated compartments of your diaper bag or place your bottles inside dedicated thermal pouches. This is especially important for maintaining the safety of prepared formula or expressed milk during extended trips. Keep this zone physically separated from the changing station to maintain strict hygiene standards and prevent any accidental cross-contamination.
Zone 3: Clothing and Comfort
Spit-ups, diaper leaks, and sudden weather changes require you to carry spare clothing. Pack at least two complete outfit changes, including onesies, pants, and socks. To maximize space inside your baby organizer, roll each outfit tightly—often called the “ranger roll” method—and secure it inside a dedicated clothing pouch. This keeps the garments compact and prevents them from unraveling into a messy pile.
Within this same comfort zone, allocate a small, clean pocket for soothing items. Store spare pacifiers in sterile cases, along with a pacifier clip to prevent them from falling onto dirty floors. You can also include a small, familiar comfort toy or a lightweight swaddle blanket to help soothe your baby to sleep while away from home.
Zone 4: Parent and Emergency Essentials
It is easy to forget your own needs when packing for a baby, but keeping your personal items organized is just as important. Dedicate a specific section—ideally an external zippered pocket or a distinct, stylish pouch—for your keys, phone, wallet, hand sanitizer, and a water bottle. Keeping your personal items separate ensures you do not accidentally drop your keys while pulling out a baby wipe.
This zone should also house a compact first-aid kit containing infant-safe essentials. Include a digital thermometer, adhesive bandages, baby-safe nail clippers, and a clean nasal aspirator. Having these emergency items in a clearly marked, secure compartment provides peace of mind, ensuring you are prepared for minor mishaps without cluttering your daily baby-care zones.
Adapting Your Diaper Bag for the Philippine Climate
Packing a diaper bag in the Philippines requires special consideration due to the year-round tropical heat, high humidity, and sudden heavy downpours. To keep your baby comfortable in this climate, prioritize lightweight, highly breathable spare clothing. Fabrics made from 100% cotton or bamboo blends are ideal, as they help wick away sweat and prevent heat rashes, which are common in warm conditions.
Your climate-specific gear should always include a compact, wind-resistant umbrella and a clear stroller rain cover to handle sudden afternoon tropical showers. Additionally, protect your baby’s sensitive skin by packing baby-safe sunscreen and a gentle insect repellent to guard against mosquitoes. Always check the age-appropriateness labels on these products; caregivers must consult a pediatrician before applying sunscreen or insect repellent to infants under six months of age.
Furthermore, the intense tropical heat accelerates food spoilage. Prepared formula or expressed breast milk can spoil rapidly if left in warm temperatures. To prevent this, invest in a high-quality insulated bottle holder lined with dense thermal foam, and always include frozen gel ice packs for outings lasting more than an hour. Regularly check the temperature of the milk before feeding, and discard any liquid that has been exposed to ambient heat for too long.
Common Packing Mistakes That Ruin Your Organization
One of the most frequent mistakes parents make is overpacking “just in case” items. While it is tempting to pack for every far-fetched scenario, carrying excessive toys, heavy books, or duplicate outfits only adds unnecessary weight. Overstuffing compresses your baby organizer, making it incredibly difficult to slide items in and out, which completely defeats the purpose of having dedicated compartments.
Another common pitfall is failing to restock the bag immediately after returning from an outing. It is easy to walk through the front door, set the diaper bag down, and forget about it until your next trip. However, arriving at your next destination only to realize you forgot to replace the three diapers and wipes you used earlier can leave you stranded. Make it a habit to spend five minutes restocking used items as soon as you get home.
Finally, avoid using completely opaque, unlabeled pouches for small, miscellaneous items. If you store medicine, hairbands, pacifiers, and creams in identical solid-colored bags, you will find yourself opening every single pouch to locate a specific item. Opt for pouches with clear vinyl windows, mesh panels, or distinct color-coded zippers so you can verify the contents at a glance.
The "Grab-and-Go" Test: Verifying Your Setup
Once you have packed your diaper bag using your new baby organizer, it is time to test the efficiency of your layout before heading outside. You can do this by conducting a simple “Grab-and-Go” simulation at home. Imagine a common, stressful scenario: your baby has just had a blowout in a public restroom, and you need to access a wipe, diaper cream, and a fresh onesie immediately.
Set a timer and attempt to retrieve these three items using only one hand, simulating holding your baby with the other. If you can locate and extract all three items in under 10 seconds without rummaging or tipping over other compartments, your setup is highly successful. If it takes longer, or if other items spill out in the process, re-evaluate your layout and adjust the placement of your pouches to ensure your most critical gear sits right at the top.
Frequently Asked Questions (FAQ)
How many diapers should I pack for a full-day outing?
For a full-day outing lasting around 8 to 10 hours, a safe standard is to pack 5 to 6 diapers. This follows the general guideline of one diaper for every two hours, plus a buffer of two extra diapers. If your baby is currently experiencing a growth spurt or digestive changes, consider adding one or two more to your baby organizer to ensure you are fully covered.
Can I use regular makeup or travel pouches instead of a dedicated baby organizer?
Yes, generic travel pouches and makeup bags can work well if they are water-resistant, durable, and fit neatly inside your bag. However, dedicated baby organizers often feature specialized designs that generic pouches lack, such as insulated foil linings for bottles, dedicated wet-dry compartments, and quick-dispense slots designed specifically for baby wipes.
How do I keep expressed breast milk safe in a diaper bag during hot weather?
To keep expressed breast milk safe in hot weather, store it in a dedicated insulated cooler pouch inside your diaper bag alongside multiple frozen gel ice packs. Ensure the milk bottles remain in direct contact with the ice packs. Always verify that the milk is cold before feeding, and consult standard pediatric guidelines regarding safe storage times for breast milk in warm environments.
Community discussion
Share your experience or ask a question. Comments are reviewed before publication.