
To organize the inside of your mama bag for quick access, you must transition from a single-compartment dumping ground to a structured, zone-based system. By grouping related items into dedicated, color-coded pouches and placing them inside your bag based on frequency of use, you can locate diapers, wipes, or a fresh pacifier in seconds using only one hand. This systematic approach eliminates the stress of digging through a cluttered bag while holding a crying baby, ensuring that every outing is smooth and highly manageable.
Successfully managing a diaper bag requires understanding both your daily routine and the specific challenges of your environment. In a tropical climate, issues like high humidity, sudden rain showers, and intense heat dictate not only what you pack but also how you protect and store those items inside your bag. Transitioning to a structured setup requires a clear assessment of your bag’s physical layout, the strategic use of modular organizers, and a commitment to a quick daily maintenance routine.
Evaluate Your Bag's Layout and Declutter Essentials
Before placing a single item inside your mama bag, empty it completely and analyze its built-in architecture. Take note of every zippered pocket, elasticized slot, insulated sleeve, and key clip. Built-in insulated pockets are ideal for items that must remain cool, while exterior slip pockets are best reserved for things you need to grab instantly without unzipping the main compartment. Understanding this layout prevents you from wasting valuable space on loose items that could otherwise be secured in specialized slots.
Products mentioned in this guide
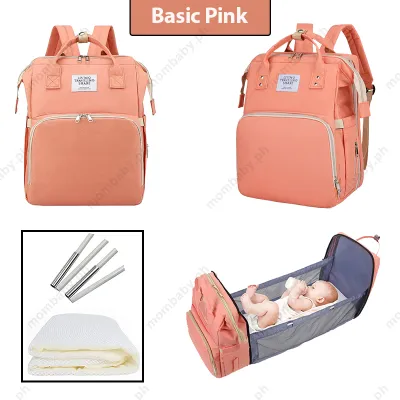
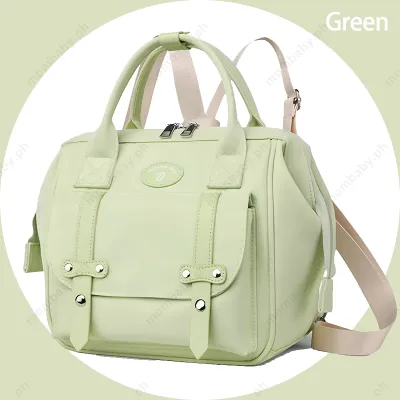
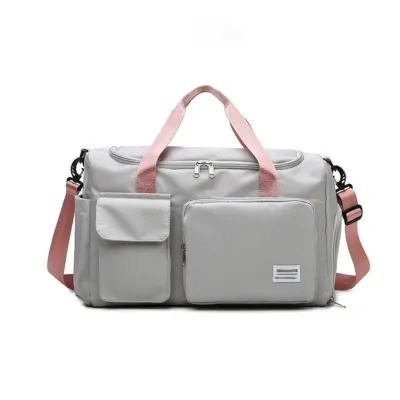
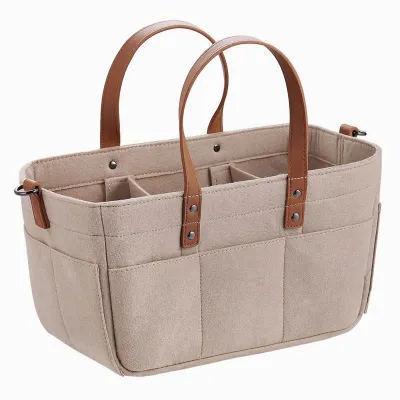
Prices are valid at publication and may change. Please refer to the product page for the latest price.
Streamlining your packing list is the most effective way to prevent clutter and reduce physical strain on your shoulders. Differentiate strictly between absolute daily essentials and optional items based on your baby’s developmental stage, feeding method, and the expected duration of your outing. For instance, a newborn requires far more frequent diaper changes and changes of clothes than an older infant, whereas a toddler will require a variety of solid snacks and small toys. Avoid the temptation to pack duplicates of items that serve the same purpose, such as carrying both a bulky blanket and a heavy swaddle.
In hot and humid tropical climates, your essential checklist must adapt to protect your baby from the elements. Outdoor trips in the Philippines require dedicated space for a small, rechargeable portable fan, baby-safe sunscreen, and a gentle insect repellent. When packing these items, always check the manufacturer’s product labels for age suitability and application instructions. For example, many sunscreens and insect repellents are formulated for infants aged six months and older; for younger babies, consult your pediatrician first. Store these liquid formulas in a sealed, leak-proof plastic pouch to prevent them from spilling and ruining other items in your bag.
Choose the Right Organizers and Pouches
If your bag lacks built-in dividers, you can easily create custom zones using lightweight, low-cost organizational tools. Clear, mesh, or lightly tinted zippered pouches are highly effective because they provide immediate visual identification of what is inside. Instead of unzipping three different bags to find a clean bib, a single glance through a mesh pouch tells you exactly where your feeding supplies are stored. Using different colored pouches for different categories also helps other caregivers locate items quickly when you are not nearby.

For larger categories like diapering, a dedicated diaper clutch or a small, structured packing cube works best. These organizers keep diapers flat and prevent them from crumpling or tearing at the bottom of your bag. For items that require immediate, external access, utilize simple hardware modifications. Attaching carabiners or sturdy stroller clips to your bag’s exterior allows you to hang lightweight items like a travel wipe case, a pacifier pod, or a small bottle of hand sanitizer, freeing up valuable interior volume.
If you prefer using a large, unstructured tote bag, a lightweight and washable felt or canvas bag insert organizer is an excellent investment. These inserts feature multiple vertical pockets and open compartments that slide directly into your tote, instantly giving it the structure of a premium diaper bag. Look for inserts that can be easily lifted out, allowing you to transfer all your organized essentials from one handbag to another in a single motion.
Pack by Zone: A Step-by-Step Organization System
To maintain order, assign every item in your bag to one of three distinct functional zones. This ensures that you always know exactly where to look based on the specific task at hand.
The Diapering and Changing Zone
This is the most critical zone in your bag, as diaper changes often require immediate action and absolute hygiene. Group your diapers, a travel-sized pack of wipes, a small tube of diaper rash cream, and a foldable, waterproof changing pad together inside a single, easily identifiable pouch. Place this entire assembly in the most accessible part of your bag, preferably right at the top or in a dedicated wide compartment, so you can retrieve it instantly during an emergency.
Always include a high-quality, waterproof wet bag or several disposable sanitary sacks within this zone. When you are away from home, you will inevitably encounter situations where there is no immediate trash receptacle for dirty diapers, or where your baby has a sudden diaper blowout. A wet bag safely seals away soiled clothing and used diapers, containing both moisture and odors until you can dispose of them or wash them properly.
The Feeding and Hydration Zone
Organizing your feeding supplies properly prevents cross-contamination and ensures that milk, formula, or water remains safe for consumption. Utilize your bag’s built-in insulated pockets to store prepared bottles or expressed breastmilk. Keep in mind that insulated pockets only slow down temperature changes; they do not refrigerate. Always follow strict safety guidelines regarding how long milk or formula can safely remain at room temperature, particularly in warm tropical environments, and consult a lactation specialist or pediatrician if you are unsure.
Keep bibs, burp cloths, spoon sets, and small snack containers grouped together in a separate, clean pouch placed away from your diapering supplies. This division ensures that items entering your baby’s mouth never come into contact with dirty changing gear. For your own health, always slide a spill-proof, reusable water bottle into an external side pocket. Staying hydrated is essential, especially for breastfeeding mothers navigating hot afternoons.
The Maternal and Emergency Zone
Your personal items should never get lost in the sea of baby gear. Designate a smaller, secure, zippered pocket near the top of the bag exclusively for your phone, wallet, keys, lip balm, and home keys. If your bag has an integrated key clip, use it consistently so you never have to empty your bag on the doorstep just to find your keys.
Create a compact, clearly labeled emergency kit in a small, waterproof pouch. This kit should contain basic first-aid items such as sterile adhesive bandages, a digital thermometer, saline nasal drops, and infant pain relievers. Before administering any over-the-counter medication to your child, verify the correct dosage based on their current weight and consult your pediatrician. To round out this zone, keep a spare change of clothes for your baby and a lightweight, clean top for yourself. Roll these clothing items tightly into compact cylinders and secure them with elastic bands to save space and minimize wrinkles.
Optimize for Quick Access and Daily Maintenance
How you distribute weight inside your mama bag directly impacts your physical comfort and the bag’s longevity. Always place the heaviest items, such as full water bottles, large packs of liquid wipes, or a tablet, against the back panel of the bag closest to your spine. This keeps the center of gravity near your body, significantly reducing strain on your neck, shoulders, and lower back. Lighter items, like swaddles, spare clothes, and empty pouches, should occupy the front and outer sections.
To test your organization, apply the “One-Touch” rule: you should be able to retrieve your most frequently used items, such as a wet wipe or a pacifier, with a single hand while holding your baby with the other. If you have to unzip multiple compartments, untie knots, or dig beneath layers of clothing to reach a wipe, those items need to be repositioned. Keep these high-frequency items in external slip pockets or at the very top of your main compartment.
Maintaining your organized bag requires a commitment to a daily reset routine. When you return home from an outing, spend three minutes emptying any trash, discarding used diaper sacks, and wiping down the interior with a damp cloth to prevent odors. Restock the diapers and wipes you consumed during the day so that the bag is fully prepared and grab-and-go ready for your next unexpected trip.
Finally, perform a thorough deep clean once a week. Empty the entire bag completely, shake out any crumbs, and wipe down all internal organizers. Take this opportunity to check the expiration dates on any packed snacks, baby food jars, or emergency medications. Inspect your baby’s spare clothes to ensure they still fit, replacing them with a larger size if your little one has recently gone through a growth spurt.
Frequently Asked Questions (FAQ)
How often should I restock my mama bag?
You should perform a quick restock of your mama bag immediately upon returning home from an outing, or at the very least, the night before your next planned trip. This habit ensures that you are never caught in a rush with an empty wipe dispenser or too few diapers. Regularly restocking also allows you to remove accumulated trash, receipts, and half-eaten snacks before they cause odors or attract pests.
What if my mama bag does not have enough built-in pockets?
If your bag lacks built-in compartments, you can easily create a highly organized system using color-coded packing cubes, clear zippered utility pouches, and a removable felt or canvas bag insert. These modular tools allow you to categorize your items into self-contained units that stay upright and organized. This approach also makes it incredibly simple to swap your entire baby-care setup between different bags, such as moving from a daily backpack to a stylish tote, without having to reorganize individual items.

Community discussion
Share your experience or ask a question. Comments are reviewed before publication.