
A crying baby in a crowded public space is one of the most stressful scenarios a parent can face. When you need a wet wipe or a fresh diaper immediately, rummaging through a dark, chaotic bag only heightens the tension. Organizing your diaper bag systematically ensures that every essential item is exactly where you expect it to be, allowing you to handle diaper changes and feeding sessions in seconds.
By establishing clear zones and using targeted storage tools, you can transform any bag into an efficient, mobile nursery station. This structured approach keeps you calm and prepared, ensuring that family outings remain enjoyable rather than overwhelming.
The Stress-Free Benefit of a Systematic Diaper Bag Layout
Contrast the stressful hunt for a misplaced pacifier with a smooth, five-second retrieval. In high-humidity environments where outdoor outings can quickly become warm and tiring, minimizing the time spent searching through a cluttered bag keeps both you and your baby comfortable. A disorganized bag often leads to forgotten items, accidental spills, and crushed snacks, which can cut a pleasant family outing short.
Products mentioned in this guide
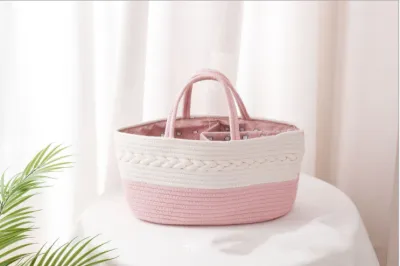
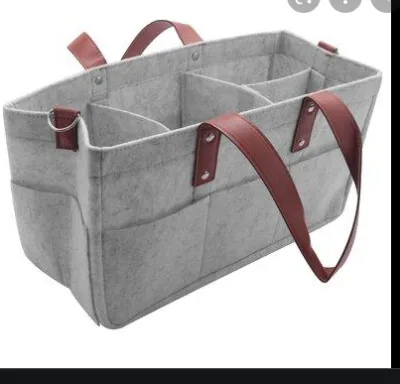
Prices are valid at publication and may change. Please refer to the product page for the latest price.
When you implement a structured layout, you eliminate the guesswork. Instead of treating your bag as a single, deep cavern where small items sink to the bottom, a systematic approach divides the space into accessible compartments. This predictable setup means you can keep your eyes on your baby during a diaper change rather than digging blindly for a tube of cream.
Ultimately, a well-organized bag provides peace of mind. Knowing that you have a dedicated spot for every necessity allows you to focus on enjoying your time outside the home, confident that you can handle any minor emergency with ease.
Essential Tools for Effective Diaper Organizer Storage
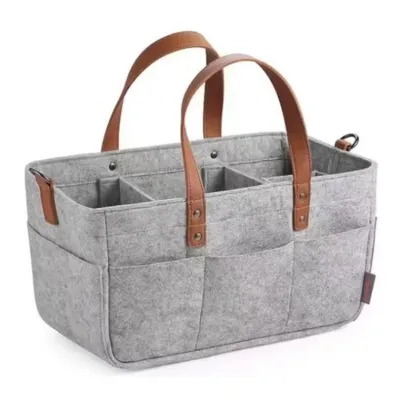
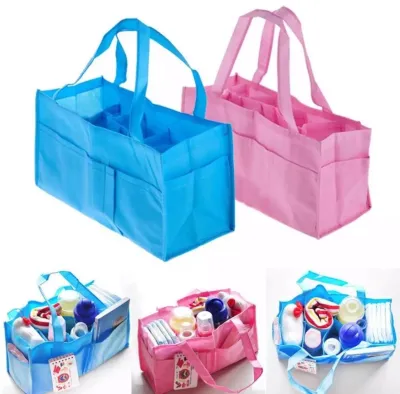
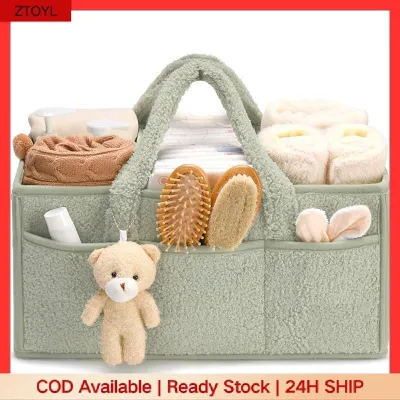
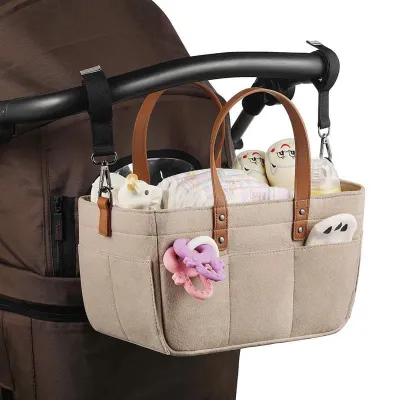
Achieving an organized layout is much easier when you use dedicated tools designed to segment space. If your bag lacks built-in dividers, a diaper bag insert or organizer caddy is an excellent investment. These structured, multi-pocket felt or nylon organizers slip directly into the main compartment of your bag, providing instant structure.

Before purchasing an insert, measure the interior base dimensions—specifically the length, width, and height—of your bag to ensure a snug fit that does not collapse or slide around. High-quality inserts generally range from ₱300 to ₱1,200 in local online marketplaces, offering a cost-effective way to upgrade any standard backpack or tote.
Another indispensable tool is the waterproof wet bag. These zippered pouches, typically lined with polyurethane laminate, isolate damp or soiled clothing from clean items. In tropical climates, wet bags are also useful for storing sweaty outfits or damp washcloths after a warm afternoon at the park. Keeping soiled items sealed prevents moisture and odors from transferring to the rest of your gear.
To prevent small, loose items from getting lost, utilize small, color-coded zippered pouches. Assigning specific pouches for distinct categories—such as medical items, grooming tools, or toys—makes them instantly recognizable. For instance, a small pastel pouch can hold pacifiers, teething toys, and travel-sized diaper creams, keeping them clean and preventing them from sinking into the dark corners of your bag.
Step-by-Step Guide to Packing Your Diaper Bag by Zone
A logical packing strategy relies on a three-zone system. This method categorizes items by how quickly you need them, how heavy they are, and how clean they must remain. By dividing your bag into distinct layers and compartments, you maintain physical balance and ensure absolute hygiene during outings.
Zone 1: High-Frequency Essentials (Quick Grab)
The highest-frequency zone consists of items you must access instantly without unzipping the main compartment or disrupting the rest of your packing. These items belong in the exterior slip pockets, zippered front compartments, or at the very top of the bag’s main opening.
- Pacifiers and Teethers: Keep these in a small, sterile case in an outer pocket so you can soothe a fussy baby instantly.
- Sanitizing Supplies: Store hand sanitizer and baby-safe antibacterial wipes where they can be grabbed before you touch any feeding or changing gear.
- Travel Wipes and Changing Pad: Place a small pack of wipes and a foldable changing pad right at the top of the main compartment for immediate deployment.
To keep this zone functional, resist the temptation to stuff random receipts, loose coins, or wrappers into these pockets. Keeping these high-traffic areas clear ensures that when you reach for a wipe during a sudden spill, you do not accidentally pull out other items that could fall onto the ground.
Zone 2: Diapering and Changing Supplies
This zone occupies the center and bottom-center of the main compartment, serving as the core of your diaper organizer storage. Because diapering supplies are bulky and heavy, placing them centrally helps distribute the bag’s weight evenly, preventing a backpack or tote from tipping over when placed on a table or hung on a stroller.
- Diapers: Stack diapers vertically rather than flat so you can count them at a glance and pull one out without disturbing the others.
- Full-Sized Wipes: Keep a full pack of wipes in the center of the bag to act as a sturdy anchor for your organizer insert.
- Diaper Cream: Store creams in a secure, upright pocket within this zone to prevent accidental squeezing and leakage.
Always include a clean, wipeable changing pad liner within this zone. Before placing your baby on any public changing table, lay down the clean liner to create a protective barrier. If your baby has sensitive skin or is prone to diaper rash, consult a pediatrician regarding the best barrier creams to carry, and ensure they are stored securely in this central zone.
Zone 3: Feeding, Clothing, and Emergency Reserves
The final zone is reserved for items that require strict hygiene or are needed less frequently, typically placed at the bottom of the bag or in specialized compartments. This zone includes feeding equipment, spare clothing, and emergency backup supplies.
- Bottles and Formula: Store baby bottles, formula dispensers, or expressed breastmilk in insulated side pockets to maintain appropriate temperatures. If your bag does not have insulated pockets, keep bottles upright in the central caddy, ensuring they are physically separated from diapering supplies to prevent cross-contamination.
- Spare Outfits: Use the "ranger roll" method—rolling onesies and pants tightly into compact cylinders. This technique saves significant space and keeps clothes neat.
- Wet Bag Placement: Keep an empty waterproof wet bag rolled up next to the spare clothes, ready to receive soiled garments immediately after a blowout.
Always verify the manufacturer’s guidelines for your specific bottles and feeding containers to prevent leaks. Keeping feeding items physically isolated from diapering gear is a simple but vital step in maintaining proper hygiene while on the go.
Smart Packing Tips to Prevent Spills and Humidity Damage
High humidity and warm temperatures require extra precautions to protect your baby gear from spoilage and damage. Creams, sunscreen, and liquid hand soaps can expand and leak under tropical heat. To safeguard your bag’s interior, double-bag all liquids and lotions in small, sealable silicone or plastic bags before placing them in their designated pouches.
Excess moisture in a sealed bag can lead to musty odors or mold growth on fabric items like spare onesies, burp cloths, and cloth diapers. To combat this, place food-safe silica gel packets in the closed compartments of your diaper bag. These packets absorb ambient moisture, keeping fabrics fresh and dry. However, ensure these packets are kept completely out of reach of infants and young children, as they pose a choking hazard.
Always check that bottle nipples, sippy cup valves, and formula container lids are tightly sealed and stored in an upright position. When carrying prepared formula, expressed breastmilk, or baby food, pay close attention to safety and storage guidelines. Check the manufacturer labels or consult a healthcare professional regarding the safe temperature limits and maximum storage times for milk and food, particularly when traveling in warm weather. If you suspect that milk or food has spoiled due to heat exposure, discard it immediately to protect your baby’s health.
How to Adjust Your Bag Setup as Your Baby Grows
A diaper bag is not a static setup; its contents must evolve alongside your baby’s developmental milestones. For a newborn, your bag will be heavily packed with bulkier items, including numerous diapers, burp cloths, swaddles, and multiple changes of clothes to handle frequent spit-ups and diaper leaks.
As your baby transitions into toddlerhood, the focus shifts from constant diaper changes to hydration, nutrition, and entertainment. You can gradually decrease the number of diapers you carry and allocate that space to spill-proof straw cups, healthy snacks, and small toys. When introducing new cups or snack containers, verify the manufacturer’s age recommendations and cleaning instructions to ensure they are safe and easy to maintain.
To keep your bag from becoming cluttered with expired snacks, outgrown clothing, and accumulated trash, establish a weekly “bag audit” routine. Every weekend, empty the entire bag, shake out any crumbs, and wipe down the interior with a damp cloth. This routine allows you to replace outgrown clothes with the correct size, restock diaper supplies, and downsize your organizer inserts as your child’s daily needs become more manageable.
Frequently Asked Questions (FAQ)
How many diapers should I pack for a day trip?
A reliable rule of thumb is to pack one diaper for every two hours you plan to be out, plus two additional diapers for emergencies. For example, if you plan to be away from home for six hours, packing five to six diapers is generally sufficient. However, you should adjust this estimate based on your baby’s age—newborns typically require more frequent changes than older infants—and any potential travel delays or changes in their regular routine.
Can I use a regular tote bag instead of a dedicated diaper bag?
Yes, you can easily convert a regular tote bag or backpack into a functional diaper bag by using a structured diaper organizer insert. This approach allows you to use a bag you already own while still benefiting from dedicated pockets and compartments. Keep in mind, however, that regular totes often lack specialized features found in dedicated diaper bags, such as built-in insulated bottle pockets, waterproof linings, and integrated stroller straps. If you choose to use a standard tote, you may need to purchase separate insulated bottle sleeves and stroller hooks to achieve the same level of convenience.

Community discussion
Share your experience or ask a question. Comments are reviewed before publication.