
Organizing the inside of your diaper bag for fast access requires a systematic, zone-based approach that eliminates the need to rummage through a chaotic pile of baby gear while holding a crying infant. By utilizing a dedicated baby organizer insert or a system of structured pouches, you can transform any standard bag into an efficient mobile nursery. In tropical climates like the Philippines, where high humidity and sudden downpours are common, a well-structured bag also protects clean clothes from moisture and prevents feeding essentials from spoiling in the heat. Transitioning to an organized system ensures that every diaper change, feeding session, or minor emergency is handled smoothly and without unnecessary stress.
To build an effective system, you must first understand the physical layout of your bag and match it to your daily routine. This guide outlines how to categorize your baby gear, establish intuitive packing zones, utilize organizer inserts safely, and maintain your setup so you are always ready for your next outing.
Assess Your Outing Needs and Bag Layout
Before packing, evaluate the specific requirements of your trip, as a quick two-hour stroll through an air-conditioned mall requires a different gear footprint than an all-day family road trip. The baby’s age and feeding method dictate the volume and type of items you must carry. Newborns require more frequent diaper changes and multiple changes of clothes, whereas older infants and toddlers need snacks, teething toys, and cups. Overpacking leads to a heavy, disorganized bag, while underpacking leaves you stranded without critical supplies.
Products mentioned in this guide
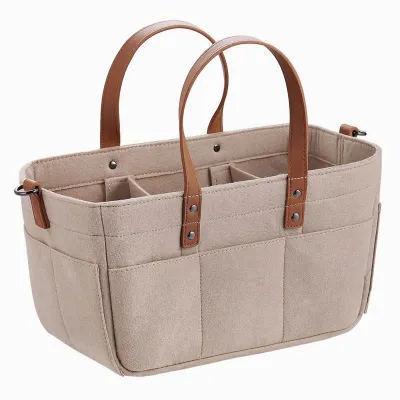
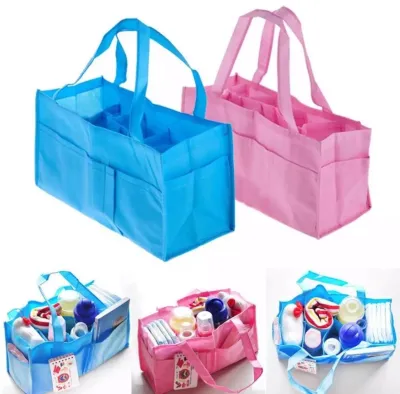
Prices are valid at publication and may change. Please refer to the product page for the latest price.
To streamline your packing list, categorize all items into three distinct urgency levels: immediate-access, routine-use, and emergency-only. Immediate-access items include things you might need in a split second, such as pacifiers, hand sanitizer, or wet wipes. Routine-use items are those required for scheduled activities, such as diapers, bottles, and feeding spoons. Emergency-only items include backup outfits, basic first-aid supplies, and spare plastic bags for soiled clothing.
Once your items are categorized, map them directly to the physical anatomy of your diaper bag. Take note of the built-in pockets, zippered compartments, insulated bottle holders, and external slip pockets. External pockets are ideal for immediate-access items, while the deep main cavity should house your routine-use gear. Zippered interior pockets are best reserved for small, secure items or parent essentials like keys and wallets, keeping them separate from the baby’s belongings.
Build a Zone-Based Packing System for Fast Access
An intuitive diaper bag relies on a strict zone-based packing system that assigns every item a permanent, logical home. The top zone of your bag, along with any external slip pockets, must be reserved exclusively for high-urgency items. When your baby spit-ups or drops a pacifier on a dusty floor, you cannot afford to dig through layers of clothing to find a wipe or a replacement. Keeping a travel pack of wipes, a clean pacifier in a protective case, and a bottle of hand sanitizer right at the top ensures you can react to any situation in seconds.

The middle zone of the bag is the largest and should contain your routine-use items, which are best managed using a structured baby organizer insert. This central cavity holds the bulk of your gear, including diapers, a portable changing pad, and feeding supplies. By placing these items in the middle, they remain highly visible and accessible when you unzip the main compartment, yet they do not block access to the emergency gear stored underneath.
The bottom zone of the bag is reserved for heavy, bulky, or low-urgency items that you hope you will not need but must carry just in case. Place spare outfits, a wet bag for soiled clothes, and extra blankets at the very bottom. Storing these heavier items at the base of the bag also lowers its center of gravity, preventing the diaper bag from tipping over when placed on a flat surface or hung securely from stroller hooks.
Use a Baby Organizer to Group and Secure Essentials
Implementing a baby organizer insert or a modular pouch system is the most effective way to prevent items from shifting and becoming lost in a deep bag. A highly recommended strategy is to create a self-contained “changing caddy” pouch. Group three to four diapers, a travel-sized pack of wipes, and a small tube of diaper barrier cream together inside a single, easily removable pouch. When it is time for a diaper change in a public restroom, you can simply grab this single pouch instead of hauling your entire, heavy diaper bag to the changing station.
Small, loose items present a safety hazard and are easily lost if left floating freely in the bag. Use secure, zippered compartments or child-resistant pouches to store items like baby nail clippers, digital thermometers, and any necessary infant medications. Keeping these items zipped away prevents them from accidentally falling out of the bag or being reached by curious little hands during an outing.
When packing feeding supplies, safety and hygiene are paramount. Always check the manufacturer labels and specifications of your diaper bag’s insulated pockets before relying on them to keep milk or formula cool. If your bag does not feature certified insulated compartments, use a separate, dedicated cooler pouch with a small ice pack to store expressed breast milk or prepared formula. Keep clean bottles and nipples sealed in sterile bags until the moment of use to protect them from dust and lint inside the bag.
Maintain and Restock Your Diaper Bag After Every Trip
An organized diaper bag is only useful if it is kept clean and fully stocked. Establish a strict post-trip reset routine as soon as you return home. Empty any trash, place dirty clothes directly into the laundry, and wash used bottles or food containers. In warm, humid environments, leaving damp burp cloths or half-empty bottles inside a closed diaper bag for even a single night can lead to rapid mold growth and unpleasant odors. Wipe down the interior lining of the bag with a damp, baby-safe cloth and allow it to air dry completely.
To make restocking effortless, set up a dedicated diaper bag station near your home changing table or entryway. Keep a basket stocked with travel-sized wipes, diapers in the correct size, disposable diaper bags, and travel-friendly snacks. Having these items pre-sorted and readily available allows you to refill your baby organizer insert in less than two minutes, ensuring you are never caught unprepared during a sudden departure.
Finally, perform a comprehensive review of your diaper bag’s contents every few weeks. Babies grow rapidly, and their needs change alongside their developmental milestones. Remove clothes that have become too tight, swap out newborn toys for age-appropriate entertainment, and adjust the diaper sizes as your baby grows. This regular audit prevents your bag from becoming cluttered with obsolete gear, keeping your mobile organization system lean, efficient, and highly functional.
Frequently Asked Questions (FAQ)
How do I estimate the number of diapers to pack for an outing?
To estimate your diaper needs, consider your baby’s age and the total duration of your planned outing. A general rule of thumb is to pack one diaper for every two hours you expect to be away from home, then add a buffer of two extra diapers to account for unexpected delays, traffic, or sudden digestive upsets. Newborns generally require more frequent changes than older infants, so adjust your numbers upward if you are caring for a very young baby. When packing, ensure that your baby organizer insert does not compress the diapers too tightly, as crushing can damage the absorbent cores or cause the adhesive tabs to tear when you try to use them.
How should I adjust my diaper bag organization for twins or multiples?
Managing gear for twins or multiples requires a highly structured, modular approach to prevent your diaper bag from becoming overwhelming. Use color-coded pouches or separate baby organizer inserts for each child to keep their specific clothing sizes or personal items easily identifiable. Consolidate shared supplies that both babies can use, such as a single large pack of wet wipes, a shared changing pad, and a single bottle of hand sanitizer, to save valuable space. Depending on the length of your outings, evaluate whether a single extra-large backpack-style diaper bag or a dual-bag system—where one bag stays in the stroller basket and the other is carried—works best for your physical comfort.
What are the safest ways to store temperature-sensitive items like formula or milk?
To safely transport temperature-sensitive feeding items, always verify the insulation rating and manufacturer guidelines of your diaper bag’s built-in cooler compartments. If you are traveling in hot weather, do not rely solely on the bag’s fabric insulation; instead, place a frozen gel pack directly alongside the bottles to maintain a safe, cool temperature. Prepared formula and expressed breast milk must be handled in strict accordance with standard food safety time limits to prevent bacterial growth. If you are using powdered formula, carry pre-measured portions of dry powder in a clean dispenser and mix it with safe, room-temperature water only at the time of feeding to ensure maximum freshness and safety.
Community discussion
Share your experience or ask a question. Comments are reviewed before publication.