
Properly installing furniture edge guards requires a systematic approach that focuses on surface preparation, precise fitting, and adequate curing time. When toddlers begin pulling themselves up on coffee tables, TV consoles, and bedside drawers, their grip is surprisingly strong. A poorly installed edge guard will peel off quickly, presenting both a choking hazard and leaving sharp corners exposed. By following the correct steps, you can ensure the protective foam or silicone remains firmly anchored to your furniture.
In tropical environments like the Philippines, high humidity can interfere with adhesive bonding, making meticulous preparation even more vital. Taking the time to clean the surface, measure accurately, and let the adhesive cure undisturbed will create a reliable barrier that keeps your active child safe from sharp edges.
Prepare Your Tools and Materials Before Starting
Before peeling any adhesive backing, gather all your supplies to avoid interruptions mid-process. Having everything within arm’s reach ensures you can work efficiently and apply the guards before dust resettles on your cleaned surfaces.
Products mentioned in this guide
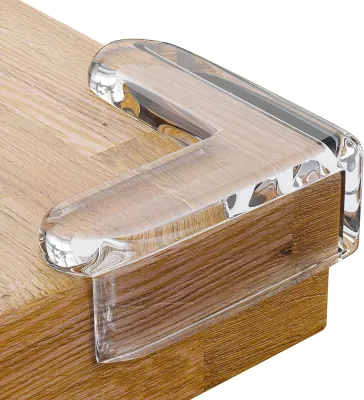
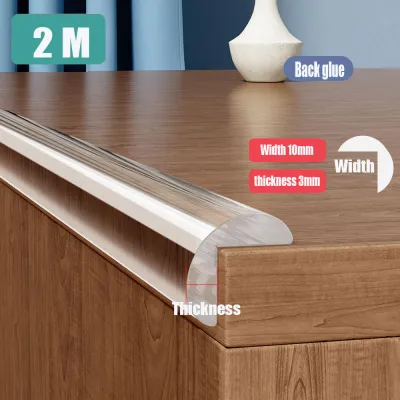
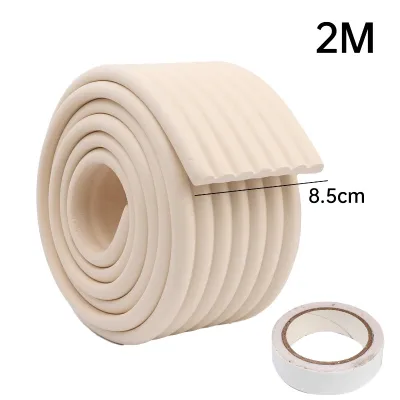
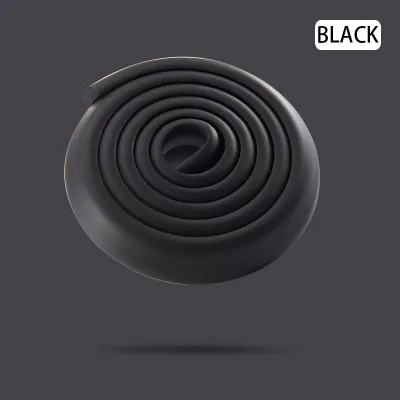
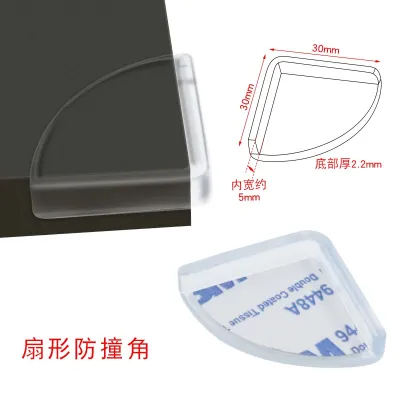
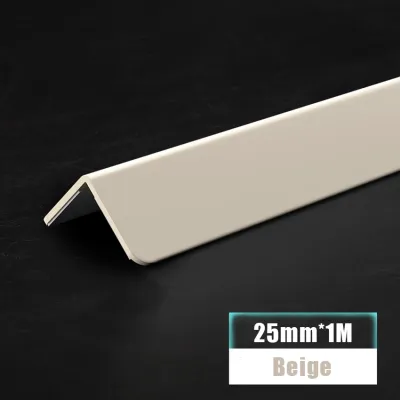
Prices are valid at publication and may change. Please refer to the product page for the latest price.
First, select the appropriate edge guard material for your specific furniture pieces. Soft, high-density foam guards are excellent for absorbing heavy impacts on sharp wooden tables, while slim, clear silicone guards work well on glass coffee tables or modern metal frames where you want to maintain a low visual profile. Check the thickness of your furniture edges and match them to the width of the guard to prevent overhangs that toddlers can easily grab and peel.
Next, prepare your cleaning agents. Isopropyl alcohol is the standard choice for most finished wood, metal, and glass surfaces because it cuts through grease and evaporates quickly. For delicate finishes, painted wood, or varnished surfaces that might discolor with alcohol, a mild dish soap diluted in warm water is a safer alternative.
You will also need clean, lint-free microfiber cloths to wipe down the surfaces without leaving tiny fibers behind. Avoid paper towels, which can shred and leave debris on the furniture.
Finally, secure a sharp utility knife or a pair of heavy-duty kitchen shears. Clean, straight cuts are essential for seamless corner joints; jagged edges or uneven cuts create small gaps where tiny fingers can wedge themselves and pull the guard away. Keep a measuring tape and a pencil handy to mark your cuts precisely.
Clean and Prepare the Furniture Surface for Maximum Adhesion
The single most common reason edge guards peel off prematurely is poor surface preparation. Furniture surfaces accumulate a hidden layer of dust, skin oils, food residue, and wax from commercial furniture polishes over time. This invisible barrier prevents the adhesive from making direct contact with the actual wood, glass, or metal substrate.

Begin by wiping away any loose dust and crumbs with a dry microfiber cloth. Once the loose debris is gone, apply your chosen cleaning agent. If you are using isopropyl alcohol, pour a small amount onto a clean cloth and scrub the entire edge and underside where the adhesive will rest. For soapy water, use a damp cloth, scrub thoroughly, and then wipe the area again with a damp cloth dipped in clean water to remove any soap residue.
Pay special attention to the underside of the table or shelf. Toddlers often pull from underneath, so the adhesive bonding to the bottom surface must be just as strong as the top.
In humid tropical climates, moisture can easily become trapped beneath the adhesive, severely weakening the chemical bond. After cleaning, allow the furniture to air-dry completely. You can accelerate this process by using a dry microfiber cloth to buff the surface or running a fan nearby. Do not attempt to apply the adhesive if the surface feels even slightly cool or damp to the touch.
If your furniture has a highly textured, unfinished, or peeling surface, the adhesive may struggle to bond. Inspect the wood for loose splinters or flaking paint; you may need to lightly sand rough spots to create a smooth, stable surface for the adhesive tape to grip.
Measure, Cut, and Apply the Edge Guards Step-by-Step
Accurate measurement prevents material wastage and ensures there are no weak points in your baby-proofing setup. Measure the exact length of each furniture edge using your measuring tape, and mark the measurements directly on the back of the edge guard with a pencil.
When dealing with corners, you have two main options: use pre-formed corner protectors alongside straight edge guards, or cut mitered joints yourself. If you are using straight roll material, cutting a 45-degree miter joint at the corners creates a neat, flush fit that minimizes gaps. Avoid wrapping a single continuous piece of thick foam tightly around a sharp 90-degree corner, as the material’s natural tension will constantly pull against the adhesive, eventually causing it to pop off.
Once your pieces are cut to size, prepare the adhesive tape. If your edge guards did not come with pre-applied tape, apply the double-sided tape to the inside surfaces of the guard first, pressing it down firmly with your fingers to secure the bond to the guard material.
To apply the guard to the furniture, do not peel off all the adhesive backing at once. Peel back just a few centimeters of the backing at one end. Align the guard carefully with the edge of the furniture, ensuring it is perfectly straight and covers the sharpest points.
Press the exposed adhesive firmly onto the surface. Slowly peel away the remaining backing with one hand while using your other hand to smooth the guard down, working in short sections. Apply firm, continuous pressure along the entire length of the guard, pressing from the center outward to push out any trapped air bubbles.
For curved or irregular edges, guide the material gently along the curve without stretching it. Stretching the foam or silicone creates internal tension that will slowly pull the adhesive away from the furniture over the following days. Once the entire strip is in place, use your palms to apply heavy pressure along the top, front, and bottom edges for at least sixty seconds to fully activate the pressure-sensitive adhesive.
Allow Proper Curing Time Before Toddler Testing
It is highly tempting to let your child back into the room immediately after installation, but doing so almost guarantees failure. Pressure-sensitive adhesives do not bond instantly; they require time to flow into the microscopic pores of the surface and cure.
Understand the difference between initial tack and a fully cured bond. The initial tack holds the guard in place, but the bond is still weak and highly vulnerable to being pulled off. Most high-quality adhesives require a full 24 hours to reach their maximum holding strength.
Always check the manufacturer’s instructions on the packaging for specific curing times, as some heavy-duty adhesives may require up to 48 hours to set completely, especially in high-humidity environments.
To protect your hard work during this critical curing window, plan your installation for a time when your toddler will not be around. Installing the guards late in the evening after your child has gone to sleep is an excellent strategy, as it allows the adhesive to cure undisturbed overnight.
If you must install them during the day, temporarily block access to the room or place lightweight barriers, such as playpen panels or heavy chairs, in front of the treated furniture. Keeping your child away for the first 24 hours ensures the adhesive can form a permanent, resilient bond that can withstand future tugs and bumps.
Troubleshoot Peeling Guards and Maintain the Setup
Even with careful installation, high-traffic areas or determined toddlers can occasionally cause an edge to lift. If you notice a corner or end of the guard starting to peel, address it immediately before the entire strip detaches.
Do not simply press a dirty, peeling guard back onto the furniture; dust and lint have likely already coated the exposed adhesive, making it useless. Carefully peel back the lifting section, clean the furniture surface again with a small amount of isopropyl alcohol, and apply a fresh piece of heavy-duty double-sided mounting tape. Trim away any stretched or damaged portions of the guard before reattaching.
Establish a regular inspection routine as part of your weekly cleaning. Walk through your home and gently tug on the edge guards to check for loose spots, tears, or signs of wear. Pay close attention to low-lying tables where your child frequently stands or plays.
Over time, foam guards can become worn, chewed, or heavily soiled from spilled food and drinks. Because foam is porous, it can harbor bacteria if not cleaned regularly. Wipe down the guards with a damp cloth and mild soap during your routine cleaning.
If an edge guard becomes severely damaged, deeply gouged, or loses its cushioning properties, replace it promptly. Baby-proofing is an ongoing process that evolves as your child grows, and maintaining these barriers is just as important as the initial installation.
Frequently Asked Questions (FAQ)
Can I use heavy-duty double-sided tape instead of the pre-applied adhesive?
Yes, you can use aftermarket heavy-duty double-sided mounting tape if the pre-applied adhesive fails or if you are reinstalling a salvaged guard. However, you must verify the tape’s specifications and compatibility before application. Look for acrylic-based mounting tapes designed for indoor use, as they offer excellent holding power without degrading the foam or silicone material.
Always check the tape manufacturer’s instructions regarding surface compatibility. Some industrial-strength tapes are designed for permanent bonding and can easily strip the varnish, paint, or veneer off wooden furniture when removed. Avoid using extremely thick outdoor mounting tapes, as they can create a bulky gap between the guard and the furniture, making it easier for a toddler to get a finger grip underneath and pull the guard off.
How do I remove edge guards without damaging my wood furniture?
When your child outgrows the need for baby-proofing, removing the edge guards safely requires patience to protect your furniture’s finish. Avoid pulling the guards off forcefully, as this can rip away wood fibers, paint, or lacquer.
Instead, use a hair dryer on a low or medium heat setting to gently warm the adhesive. Hold the dryer a few centimeters away from the guard and move it back and forth along a small section. The heat will soften the adhesive, making it pliable. Slowly and gently peel the guard away at an angle while continuing to apply heat just ahead of the peeling point.
Once the guard is removed, you may find a sticky residue left behind. Apply a small amount of a finish-safe adhesive remover, mineral oil, or vegetable oil to a clean cloth and gently rub the residue in a circular motion. Always test any solvent or oil on an inconspicuous area of the furniture first—such as the underside of a table leg—to ensure it does not discolor or damage the finish. Wipe the area clean with a damp, soapy cloth and dry it thoroughly.
Community discussion
Share your experience or ask a question. Comments are reviewed before publication.