
Replacing a worn, stained, or damaged baby high chair cover is an excellent way to refresh your child’s dining space while maintaining a hygienic environment. A clean and intact cover ensures your little one remains comfortable and secure during mealtimes. However, installing a replacement cover is not merely about aesthetics; it directly impacts the functionality of the safety harness and the overall stability of the chair. Properly executing this task requires a methodical approach to ensure every strap, buckle, and fastener is correctly positioned and fully operational.
To successfully install a replacement baby high chair cover, you must systematically prepare your workspace, carefully document the disassembly of the old cover, align the new fabric with precision, and perform rigorous safety checks. Skipping steps or forcing components into place can compromise the structural integrity of the high chair or render the safety harness ineffective. By following a structured installation process, you can extend the life of your nursery furniture while keeping your baby’s safety as the absolute priority.
Preparing for the Cover Replacement
Before you begin detaching any parts, verify that your replacement baby high chair cover is fully compatible with your specific high chair model. High chairs come in various configurations, meaning a cover designed for one model will rarely fit another securely. Look for the manufacturer’s label on the frame of your high chair—usually located on the underside of the seat—to identify the exact model number. Cross-reference this information with the product specifications on the replacement cover’s packaging or the manufacturer’s official website to confirm a precise match.
Products mentioned in this guide
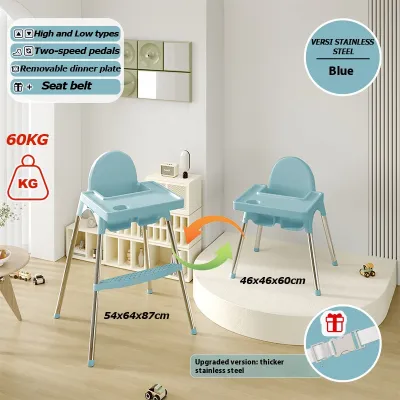
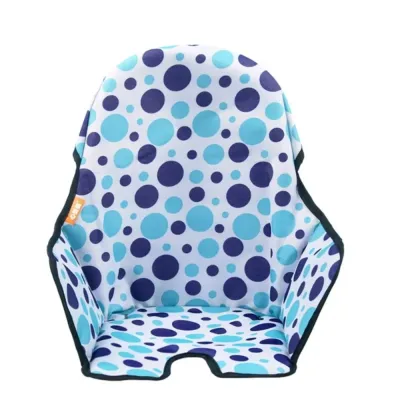


Prices are valid at publication and may change. Please refer to the product page for the latest price.
Locating the original high chair user manual is another critical preparatory step. The manual provides detailed diagrams of the chair’s anatomy, highlighting specific fastening mechanisms, warning labels, and any tools required for assembly. If you no longer have the physical manual, most manufacturers offer downloadable digital versions on their official support portals. Reviewing these diagrams beforehand helps you understand how the seat shell, harness straps, and fabric cover interact, preventing accidental damage to delicate plastic tabs or wooden pegs during the process.
Once compatibility is confirmed, prepare a clean, flat workspace. In warm or humid tropical environments, working on a clean plastic mat or a swept tiled floor prevents dust or moisture from settling onto the new fabric. Keep a small container nearby to hold any screws, washers, or clips. Only gather tools, such as screwdrivers, if the manufacturer’s instructions explicitly require frame disassembly. Otherwise, keep tools away to avoid accidentally scratching the frame or puncturing the new fabric.
Removing the Old High Chair Cover
The safety harness is the most critical component of any baby high chair, and documenting its original routing is vital before you begin removing the old cover. Use your smartphone to take clear photos of the harness system from multiple angles. Capture how the shoulder, waist, and crotch straps pass through the fabric slots, how they anchor to the backrest and seat pan, and how the buckles connect. These visual references will serve as your primary guide when threading the harness through the new cover, eliminating guesswork and ensuring the restraint system remains fully functional.

With the harness routing documented, begin identifying and carefully undoing all the fasteners securing the old cover to the frame. Depending on your high chair model, these may include metal snaps, hook-and-loop fabric strips, zippers, elastic bands, or plastic clips. Work systematically from the top of the backrest down to the footrest, gently releasing each fastener. Pay close attention to the underside of the seat pan, as manufacturers often place hidden attachments or elastic loops there to keep the cover taut and prevent it from sliding forward.
If you encounter any resistance during this process, stop immediately. In humid climates, metal snaps or screws can occasionally develop rust, or food residue can dry and act like glue inside the fastening channels. Forcing a stuck fastener can easily crack a plastic seat shell, strip a screw head, or splinter a wooden frame. If a fastener is stripped, rusted, or requires excessive force, consult the manufacturer’s customer service or a qualified repair professional for guidance on safe removal techniques rather than attempting to pry it open with brute force.
Installing the New Replacement Cover
To begin the installation, drape the new replacement baby high chair cover over the seat frame and carefully align its pre-cut slots with the corresponding openings in the chair’s structure. The fabric must sit completely flat against the seat pan and backrest without any twisting, bunching, or folding. Bunching causes discomfort for your baby during mealtimes and can create uneven pressure points that wear out the fabric prematurely. Take your time to smooth out the material, ensuring the corners of the cover hug the contours of the frame precisely.
Once the cover is aligned, begin threading the safety harness straps through the designated slots in the fabric. Refer closely to the photos you took during the removal phase to ensure each strap is routed through the correct path. The shoulder straps must emerge at or slightly above your child’s shoulder level, while the waist and crotch straps must sit flat against the seat. Double-check that the straps do not pass through unintended fabric layers or get twisted behind the cover, as twisted straps can reduce the effectiveness of the harness.
After successfully routing the harness, secure all the primary fasteners according to the manufacturer’s specified sequence. If the manual recommends starting with the top snaps before securing the bottom elastic bands, follow that order strictly to ensure even tension. Avoid pulling the fabric too tightly or overtightening any screws or clips, as excessive tension can tear the seams of your new cover or warp the plastic seat structure. A properly installed cover should feel snug and secure, with no loose flaps or excessively tight areas that strain the stitching.
Verifying Safety and Stability
Before placing your baby back into the high chair, you must conduct a thorough safety inspection to verify that the reassembly was successful. Begin by performing a physical tug test on every harness strap and buckle. Pull firmly on the shoulder, waist, and crotch straps to confirm they are securely anchored to the frame and cannot slip through the new cover’s grommets or slots. Fasten the buckle and pull on the connection points to ensure the locking mechanism engages fully and does not release under tension.
Next, evaluate the high chair’s overall stability on a flat, level surface. Ensure that the new cover does not interfere with any of the chair’s mechanical functions, such as the leg splay, folding hinges, height adjustment latches, or wheel locks. If your high chair folds for storage, test the folding mechanism a few times to confirm the fabric does not get caught in the hinges, which could damage the cover or prevent the frame from locking securely into its open, usable position.
Finally, conduct a detailed tactile and visual inspection of the entire seat area. Run your hands along the edges of the cover to check for any exposed hard plastic or wooden edges that could scratch your baby’s delicate skin. Inspect the seams and cutouts for loose threads, frayed edges, or small detachable parts, such as plastic tags or loose snaps, which could pose a choking hazard. If you detect any structural instability, loose harness connections, or manufacturing defects in the cover, do not use the high chair; contact the manufacturer immediately for assistance.
Caring for Your High Chair Cover
Establishing a proper maintenance routine is essential to prolong the lifespan of your new baby high chair cover and keep it hygienic. Always read the care label stitched onto the cover before attempting to clean it. The label will specify whether the fabric is machine washable, hand-wash only, or restricted to spot cleaning. Because high chairs are exposed to frequent spills, crumbs, and moisture, understanding these guidelines prevents you from accidentally damaging the protective coatings or shrinking the fabric during wash cycles.
When cleaning the cover, avoid using harsh chemical cleaners, bleach, or abrasive scrubbing pads unless the manufacturer explicitly approves them. These substances can degrade the fabric’s strength, fade its colors, and strip away water-resistant finishes. Instead, opt for mild, baby-safe detergents and warm water. In tropical climates with high humidity, avoid high-heat drying methods like tumble dryers unless specified, as extreme heat can warp synthetic materials or melt waterproof backings. Instead, allow the cover to air-dry completely in a well-ventilated, shaded area to prevent mold and mildew growth.
Lastly, make it a habit to schedule regular visual inspections of the cover’s seams, strap cutouts, and fastening points. Over months of daily use, the friction from the harness straps and the weight of your growing child can cause minor wear. Look for early signs of fraying, loose stitching, or weakening snaps. Catching these issues early allows you to address them before they compromise the safety of the harness system or require another complete cover replacement, ensuring a safe and clean dining environment for your little one.
Frequently Asked Questions (FAQ)
Can I use a universal cover if I cannot find an official replacement?
Using a universal cover is generally not recommended because these products are designed to fit a wide variety of models rather than your specific high chair. Consequently, universal covers often do not align precisely with the harness slots, buckle paths, or frame contours of your particular chair. This misalignment can cause the safety straps to sit at incorrect angles, twist, or become obstructed, significantly compromising the effectiveness of the restraint system. Before considering a universal option, check if the manufacturer has tested or certified it for your specific model, and prioritize official, model-specific replacements to guarantee optimal safety and fit.
What should I do if the new cover blocks the harness adjustment mechanism?
If you find that the new cover blocks or restricts the harness adjustment mechanism, immediately stop the installation and re-check the alignment of the cover’s cutouts. Ensure that no fabric is folded over the adjuster buckles or trapped beneath the seat frame, as this can prevent the straps from tightening or loosening smoothly. Never attempt to cut, trim, or modify the cover’s slots to expose the mechanism yourself; doing so will void the product warranty, weaken the fabric structure, and create fraying hazards that could choke your child. If the cover simply does not fit without blocking the safety controls, it may be the wrong model, and you should return it for a correctly sized replacement.
Community discussion
Share your experience or ask a question. Comments are reviewed before publication.