
Installing a Joie car seat correctly is one of the most critical steps you can take to protect your child during every journey. Whether you are navigating busy city streets or embarking on a long family road trip, a secure installation ensures the car seat performs as designed in the event of sudden braking or a collision. You can install most Joie models using either the vehicle’s built-in ISOFIX system or the standard three-point seat belt. Both methods are highly effective when executed precisely, but they require careful attention to detail and strict adherence to your specific car seat manual.
The choice between ISOFIX and a seat belt often depends on your vehicle’s manufacturing year, the specific model of your Joie car seat, and your personal preference. ISOFIX offers a rigid, mechanical connection that minimizes the risk of installation errors, while the seat belt method provides universal compatibility for older car models or different seating positions. Regardless of the method you choose, taking the time to understand the routing paths, locking mechanisms, and safety indicators is essential for your child’s protection.
Before You Begin: Checking Vehicle and Car Seat Compatibility
Before attempting to install your Joie car seat, you must verify that the seat is fully compatible with both your vehicle and your child’s current developmental stage. Start by consulting the specific Joie car seat user manual and looking for the approved vehicle fit list. Some car seats are semi-universal, meaning they are only certified for use in specific vehicle models or seating positions. Never assume a car seat fits your vehicle simply because it is a standard passenger car or SUV.
Products mentioned in this guide
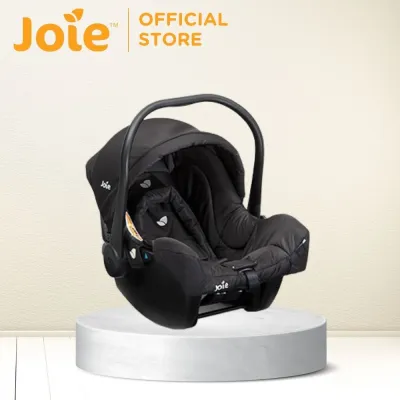

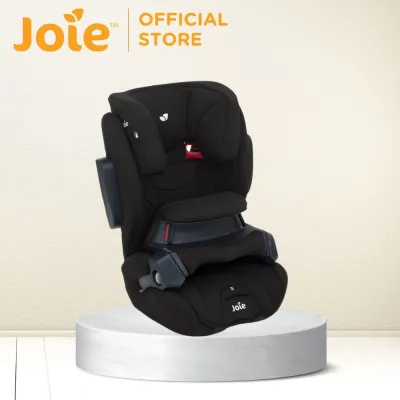
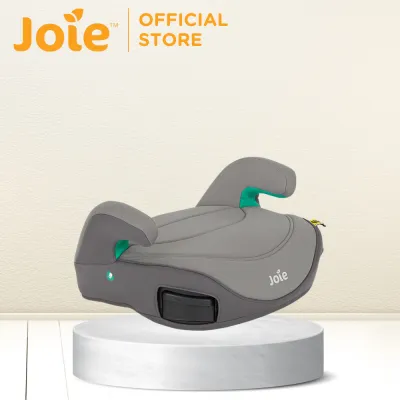

Prices are valid at publication and may change. Please refer to the product page for the latest price.
Next, inspect your vehicle’s cabin to locate the physical installation points. If you plan to use the ISOFIX method, run your hand along the crease between the vehicle seat back and the bottom cushion to locate the metal anchor bars. These are often marked with small plastic buttons, fabric tags, or plastic guide tunnels. In tropical climates, dust, sand, or small debris can easily accumulate in these crevices, so ensure the anchor points are clean and free of obstructions before proceeding. Additionally, check your vehicle owner’s manual for any warnings regarding under-floor storage compartments, as these can prevent the safe deployment of a support leg.
If you are opting for a seat belt installation, pull the vehicle seat belt out completely to inspect its condition. Look closely for any signs of fraying, twisting, or stiffness, which can compromise the belt’s ability to hold tension. Ensure the buckle mechanism clicks securely and releases smoothly. You must also verify that the seat belt is a three-point lap-and-shoulder belt, as standard Joie car seats are not compatible with two-point lap-only belts.
Finally, confirm that the car seat matches your child’s physical measurements. Check the orange approval label (often an ECE R44/04 or R129 i-Size sticker) located on the shell of your Joie car seat. This label specifies the exact weight or height limits for the seat. Children grow at different rates, so always rely on their current height and weight measurements rather than their age to determine if they should ride rear-facing or forward-facing.
Step-by-Step Guide: Installing Your Joie Car Seat with ISOFIX
The ISOFIX system provides a direct, mechanical connection to your vehicle’s chassis, reducing the likelihood of installation mistakes. To begin, locate the ISOFIX release buttons on your Joie car seat or its separate base. Extend the ISOFIX connectors fully until they lock into their outermost position, which makes it easier to align them with the vehicle’s anchor points.

Align the connectors with the metal anchor bars in your vehicle seat crease. Push the car seat or base firmly backward into the vehicle seat until you hear a distinct, audible click from both sides. This click indicates that the connectors have latched onto the anchor bars. Once attached, look closely at the visual installation indicators located on the sides of the connectors or the top of the base. These indicators are designed to change color—typically from red to green—once a secure connection is established. If one or both indicators remain red, release the connectors and try the process again.
If your Joie model utilizes a support leg, you must deploy it to prevent the seat from rotating forward during a sudden stop. Swing the support leg down from the bottom of the base and extend it until it rests firmly against the vehicle floorboard. The foot of the support leg must make flat, solid contact with the floor. Check the indicator window on the support leg; it should turn green to confirm proper tension. Ensure the leg is not resting on a flexible floor mat or over an empty under-floor storage bin, as these surfaces can collapse under pressure.
For models that require a top tether instead of a support leg, route the tether strap over the vehicle seat back and attach it to the designated top tether anchor point in your vehicle. This anchor point is typically located on the back of the vehicle seat, on the parcel shelf, or on the floor of the cargo area. Tighten the strap until the tension indicator turns green. To finish the installation, perform a physical push-and-pull test. Grasp the car seat near the ISOFIX connectors and try to move it side-to-side and front-to-back. The seat should not move more than one inch (2.5 centimeters) in any direction.
Step-by-Step Guide: Installing Your Joie Car Seat with a Seat Belt
Installing your Joie car seat with a vehicle seat belt requires careful routing to ensure the belt remains locked and tight throughout your journey. Start by identifying the correct color-coded routing paths on the car seat shell. Joie uses industry-standard color coding: blue guides indicate the path for rear-facing installations, while red guides indicate the path for forward-facing setups. Refer to your specific user manual to confirm these paths, as routing the belt through the wrong guides can cause the seat to fail in an accident.
Place the car seat on the vehicle seat in the desired direction. Pull the vehicle seat belt out and thread it carefully through the designated color-coded guides. Ensure the belt lies completely flat without any twists or folds, as twists can concentrate crash forces and damage the belt fibers. Insert the seat belt tongue into the buckle until you hear a clear click, then pull on the belt to verify that it is securely locked into the buckle.
To remove all slack from the installation, apply your physical weight to the car seat. Place your hand or knee firmly into the center of the car seat to compress the vehicle’s seat cushion. While pressing down, pull the shoulder portion of the vehicle seat belt upward to tighten the lap belt section first. Once the lap belt is tight, feed the remaining slack of the shoulder belt back into the vehicle’s retractor mechanism.
Many Joie car seats feature a built-in lock-off device or blue/red locking clips. If your model has a lock-off, open it before routing the belt, and clamp it shut over the shoulder belt once all slack has been removed. This device prevents the seat belt from slipping or loosening over time. If your vehicle has switchable locking retractors, pull the shoulder belt slowly all the way out to activate the locking mode (you will hear a clicking sound as it retracts), then let it feed back in tightly. Perform the one-inch wiggle test at the belt path to ensure the seat is firmly secured.
Essential Post-Installation Safety Checks
Once the physical installation is complete, you must perform a series of quick safety checks before placing your child in the seat. First, test the stability of the installation by grabbing the car seat at the belt path or ISOFIX connection points. Give it a firm shake from side to side and front to back. The seat must not move more than one inch (2.5 centimeters) along the path. If it slides easily, you must uninstall the seat and repeat the tightening process.
Next, examine the harness system to ensure your child will be secured correctly. The harness straps must be at the correct height relative to your child’s shoulders. For rear-facing installations, the straps should emerge from the seat back slots at or slightly below your child’s shoulders. For forward-facing installations, the straps should be at or slightly above the shoulders. Perform the “pinch test” to check the harness tightness: pinch the harness webbing at your child’s collarbone. If you can pinch any excess fabric between your fingers, the harness is too loose and must be tightened further.
If your Joie model includes a chest clip, slide it up so that it sits level with your child’s armpits. Positioning the chest clip too low, such as over the abdomen, can cause internal injuries during a sudden stop. Additionally, ensure that the harness pads are flat against the chest and that the straps are not twisted anywhere along their length.
Finally, check the recline angle indicator on the side of the car seat or base. This is especially critical for newborns and young infants riding rear-facing. Infants do not have the neck strength to support their heads; if the seat is too upright, their head can flop forward and restrict their airway. Adjust the recline mechanism until the bubble, ball, or color indicator sits perfectly within the designated safe zone for your child’s weight or age group.
When to Stop and Consult the Manufacturer or a Professional
While many parents can successfully install a Joie car seat on their own, there are situations where you should stop immediately and seek professional assistance. If you encounter conflicting instructions between your Joie car seat manual and your vehicle owner’s manual, do not guess which one is correct. Different manufacturers have specific rules regarding active airbags, seat belt designs, and approved seating positions that require expert reconciliation.
You should also halt the installation if you notice that your vehicle’s seat contours prevent the car seat from sitting flush against the seat back or cushion. If the vehicle seat belt buckle is exceptionally long and sits inside the car seat’s routing path—a dangerous condition known as “buckle crunch”—the plastic buckle can shatter under crash forces. In such cases, the seat belt method may not be safe for that specific seating position, and you should try a different seat or switch to ISOFIX if available.
If you have followed all the steps but the visual indicators on your ISOFIX base or support leg fail to turn green, do not use the seat. Similarly, if you cannot reduce the side-to-side movement to less than one inch, the installation is incomplete. Contact Joie customer support directly if you suspect any parts, labels, or connectors are damaged, worn out, or missing from your product.
For additional peace of mind, consider consulting a certified Child Passenger Safety Technician (CPST). These trained professionals can inspect your installation, identify subtle errors, and teach you how to secure your child safely. Many local road safety organizations, pediatric clinics, or authorized baby gear distributors offer inspection services to help parents travel with confidence.
Frequently Asked Questions (FAQ)
Can I use both ISOFIX and a seat belt together for extra security?
No, you should not use both ISOFIX and a vehicle seat belt simultaneously unless the specific Joie car seat manual explicitly instructs you to do so for that exact model. Car seats are rigorously crash-tested and certified using one installation method at a time. Combining both systems can alter the crash dynamics, put unintended stress on different parts of the car seat shell, and potentially cause the seat to fail during an impact. Always choose one approved method—either ISOFIX or the seat belt—and ensure it is installed securely.
What should I do if my vehicle seat belt is too short to route properly?
If your vehicle’s seat belt is too short to route through the designated paths on your Joie car seat, do not use aftermarket seat belt extenders. These extenders are not safety-tested for use with child car seats and can fail under the extreme forces of a collision. Instead, try installing the car seat in a different approved seating position in your vehicle, as seat belt lengths can vary between the center and outboard seats. Alternatively, switch to the ISOFIX installation method if your vehicle and car seat are compatible, or consult a certified technician for advice.
How do I verify the correct recline angle for rear-facing installation?
To verify the correct recline angle, locate the built-in angle indicator on the side of your Joie car seat or base. This indicator may feature a physical bubble level, a rolling ball, or a color-coded guide line. Park your vehicle on a completely flat, level surface before checking the indicator, as an incline can give an inaccurate reading. Adjust the recline angle adjustment handle on the car seat until the indicator aligns correctly with the designated safe range specified in your user manual for your child’s weight.
Community discussion
Share your experience or ask a question. Comments are reviewed before publication.