
Preparing homemade purees for your little one is a rewarding way to control ingredients and introduce fresh flavors. Using a silicone baby food freezer tray simplifies this process, allowing you to prepare large batches of nutritious meals and freeze them in convenient, single-serving portions. This method saves time during busy weekdays and minimizes food waste by letting you defrost only what your baby needs for a single meal. To keep these homemade meals safe and nutrient-dense, you must follow proper preparation, freezing, and thawing techniques.
Preparing Your Silicone Tray and Baby Food
Before you begin pureeing fruits, vegetables, or grains, establishing a clean workspace is paramount. Babies have developing immune systems that are highly sensitive to foodborne pathogens, making hygiene your top priority. Start by thoroughly washing your hands with soap and water for at least twenty seconds. Clean and sanitize all kitchen countertops, cutting boards, knives, and blender components that will come into contact with the food.
Your silicone baby food freezer tray requires careful preparation before its first use and after every subsequent feeding cycle. Always consult the manufacturer’s instructions for the recommended cleaning protocol, as some silicone materials can withstand boiling water sterilization while others require gentle hand washing. Wash the tray thoroughly with warm, soapy water, ensuring you clean every corner of the individual compartments where food residue might hide. Rinse it completely to remove any soap film, and let it air dry on a clean rack.
Products mentioned in this guide
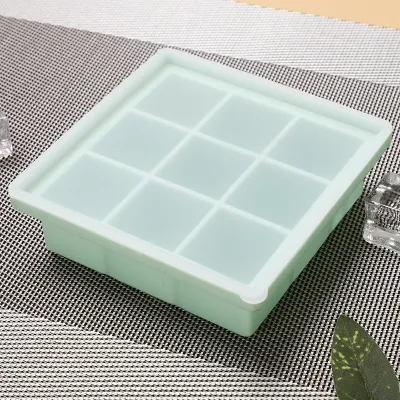
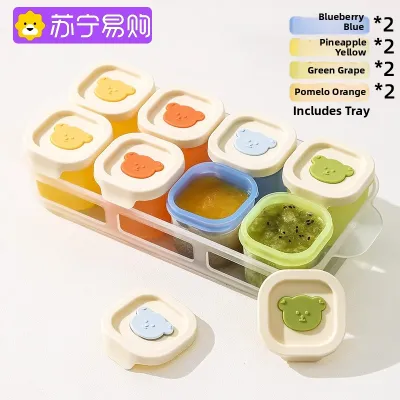
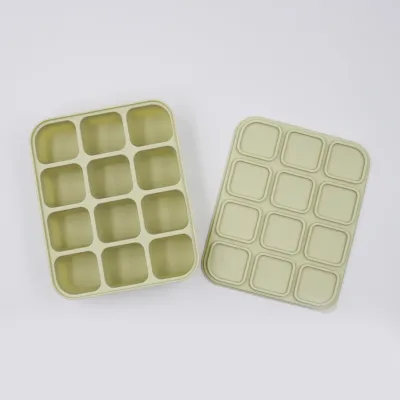
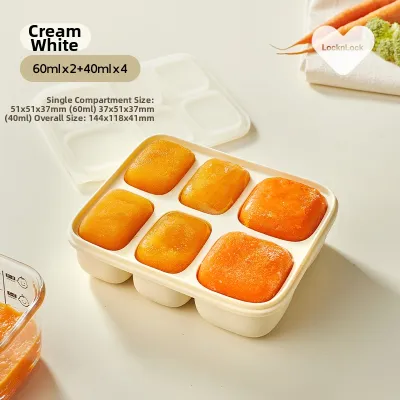
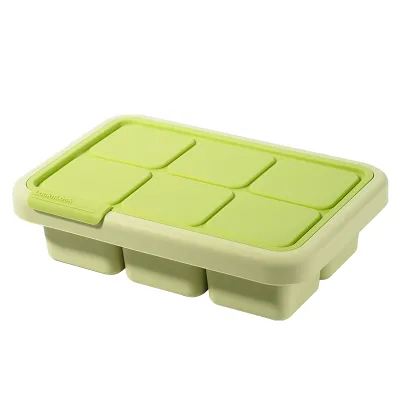
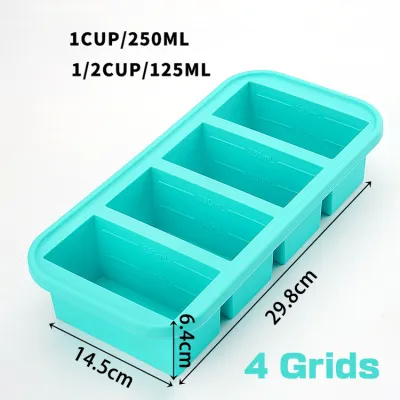
Prices are valid at publication and may change. Please refer to the product page for the latest price.
Once your baby food is cooked and pureed, you must manage its temperature carefully before it goes into the freezer. In warm and humid tropical environments, such as the Philippines, leaving cooked food sitting on the counter for too long can invite rapid bacterial growth. However, placing piping hot puree directly into the freezer is also problematic. Hot food creates excess steam and condensation inside the storage container, leading to ice crystals, freezer burn, and a potential rise in the freezer’s internal temperature, which could compromise neighboring food items.
To strike the perfect balance, allow the freshly cooked puree to cool down gradually at room temperature. To speed up this process safely, you can spread the puree in a shallow dish or place the mixing bowl in an ice bath, stirring occasionally. Aim to transfer the food to the freezer as soon as it reaches room temperature, ensuring it does not sit out for more than two hours. This careful temperature management preserves the natural flavors and vital nutrients of the ingredients while keeping the food safe for your baby.
Step-by-Step Guide to Portioning and Freezing
Portioning baby food into a silicone tray requires a gentle touch and an eye for detail. Start by using a clean spoon or a small ladle to transfer the cooled puree into the individual compartments. As you fill each cup, remember that liquids and purees naturally expand as they transition from liquid to solid state. To accommodate this expansion without causing messy overflows or fused portions, leave a small gap of about a quarter-inch at the top of each compartment.

Once the compartments are filled, gently tap the bottom of the silicone tray against your clean countertop. This simple action helps release any trapped air bubbles within the puree, ensuring consistent portion sizes and reducing the risk of localized freezer burn. If your tray features individual measurement markings, this step also helps you gauge the exact volume of each portion, which is incredibly helpful for tracking your baby’s daily food intake.
Protecting the food from the harsh freezer environment is the next crucial step. Secure the tray with its designated, tight-fitting lid to create an airtight seal. If your tray did not come with a lid, cover it tightly with a layer of food-safe wrap or place the entire tray inside a large, sealable freezer bag. This protective barrier prevents the baby food from absorbing unwanted odors from other frozen items, such as fish or onions, and keeps frost from forming on the surface of the purees.
Where you place the tray inside your freezer significantly impacts the freezing speed and overall food quality. Position the silicone tray on a flat, stable shelf in the coldest part of your freezer, ideally toward the back. Avoid placing the tray on the freezer door shelves, as these areas experience frequent temperature fluctuations every time the door is opened. Rapid, consistent freezing is key to maintaining the texture, color, and nutritional value of the homemade purees.
Once the portions are frozen solid—which typically takes several hours or overnight—you can optimize your freezer space. Gently pop the frozen cubes out of the flexible silicone compartments and transfer them into a labeled, airtight freezer bag. This frees up your silicone tray for the next batch of meal prep. Be sure to squeeze out as much air as possible from the storage bag before sealing it to maintain maximum freshness.
Safe Thawing and Reheating Practices
Thawing frozen baby food safely is just as important as freezing it correctly. The safest and most recommended method is to plan ahead and transfer the required number of frozen cubes from the freezer to a clean container in the refrigerator overnight. This slow, controlled thawing process keeps the food at a safe, cold temperature, preventing harmful bacteria from multiplying while the puree softens.
If you need to thaw a portion quickly, you can use a sealed warm water bath. Place the frozen cube in a small, leak-proof glass jar or a food-safe bag, and submerge it in a bowl of warm water. Change the water occasionally to maintain a warm temperature until the food is completely thawed. Avoid leaving frozen baby food on the kitchen counter to thaw at room temperature, especially in warm climates where ambient temperatures can quickly push the food into the bacterial danger zone.
When it comes to reheating, thoroughness is essential to ensure food safety. If you choose to reheat the thawed puree, heat it until it is hot throughout to eliminate any potential bacteria. You can do this by placing the food in a heat-safe dish over a pot of simmering water, or by using a microwave. If using a microwave, stir the food vigorously halfway through the heating cycle and again at the end to eliminate hidden hot spots that could burn your baby’s sensitive mouth.
Always test the temperature of the reheated food before offering it to your little one. Stir the puree thoroughly to distribute the heat evenly, then place a small drop on the inside of your wrist. It should feel lukewarm, not hot. If it feels too warm, let it cool down for a few minutes and test it again.
Finally, practice strict portion control during feeding times. Only place the amount of food you expect your baby to eat into their feeding bowl, leaving the rest in the refrigerator. Saliva from your baby’s spoon introduces bacteria into the food during feeding; therefore, any leftover puree remaining in the feeding bowl at the end of the meal must be discarded. Never refreeze previously thawed baby food, as this repeated temperature cycling compromises both safety and nutritional quality.
Cleaning and Maintaining Your Silicone Tray
To ensure your silicone baby food freezer tray remains a safe and durable kitchen companion, proper cleaning and maintenance are essential. After popping out the frozen food cubes, wash the tray immediately to prevent food residues from drying and sticking to the flexible walls. Use a mild, fragrance-free dish soap and warm water, scrubbing gently with a soft sponge to avoid scratching the silicone surface.
If you prefer using a dishwasher, first verify that your specific tray is labeled as dishwasher-safe by the manufacturer. Place it on the top rack to keep it away from the high-heat drying elements at the bottom of the machine, which can degrade the material over time. Keep in mind that silicone can sometimes absorb the scent of highly fragranced dishwashing detergents, so opting for mild, unscented soaps is highly recommended.
Over time, highly pigmented foods like carrots, pumpkins, or sweet potatoes may leave stubborn stains or lingering odors on the silicone. To address this, you can create a gentle paste using baking soda and a small amount of water. Apply the paste to the stained areas, let it sit for about thirty minutes, then scrub gently and rinse thoroughly. Always check the manufacturer’s care guidelines before applying any cleaning mixtures to ensure material compatibility.
Once clean, ensure the tray is completely dry before storing it. Any remaining moisture can encourage mold or mildew growth, particularly in humid tropical climates. Store the dry tray in a cool, dark cupboard away from direct sunlight, as prolonged exposure to UV rays can cause the silicone to become brittle, warp, or lose its flexibility over time.
Frequently Asked Questions (FAQ)
How long can baby food stay frozen in a silicone tray?
The safe storage duration for frozen baby food depends heavily on the ingredients used in the puree. Generally, vegetable and fruit purees can be stored in the freezer for up to six to eight months, while purees containing meat, poultry, fish, or eggs have a shorter safe storage window, typically around one to two months. To ensure you are following the safest practices for your child, consult current pediatric guidelines or recognized food safety authorities for exact, up-to-date recommendations. To keep track of your inventory, always label your storage bags with the preparation date and the exact ingredients using a food-safe marker, ensuring you use the oldest batches first.
Can I put the silicone tray directly in the microwave or oven?
You should never assume that all silicone trays are universally safe for high-heat applications like microwaves or ovens. Before exposing your tray to heat, carefully inspect the bottom of the tray for molded safety symbols or consult the manufacturer’s user manual to verify its specific temperature thresholds. Some trays are designed strictly for freezing and cannot tolerate high heat, which could lead to warping or chemical leaching. If your tray’s heat safety is unconfirmed, the safest approach is to pop the frozen food cubes out of the tray and transfer them to a verified microwave-safe glass or ceramic dish before reheating.
Community discussion
Share your experience or ask a question. Comments are reviewed before publication.