
Using a cloth diaper for toddler stages requires a shift in strategy from the infant days. As your child transitions from a stationary baby to a highly active, fast-moving toddler, their diapering needs change dramatically. To keep up with their busy days, you must adapt your fitting techniques, choose the right absorbency inserts, and learn how to navigate diaper-change resistance. Proper fit adjustments, such as letting out rise snaps and tucking leg gussets into the leg creases, are essential to prevent leaks during active play. By mastering quick-fastening methods and implementing positive distraction strategies, you can turn diaper changes from a daily struggle into a smooth, stress-free routine.
Preparing Your Supplies and Changing Space
Transitioning to toddlerhood means dealing with a completely different wetting pattern. While infants urinate frequently in small amounts, toddlers hold their urine for longer periods and release large volumes all at once. This sudden flood can easily overwhelm standard infant inserts, leading to leaks even if the diaper fits perfectly. To handle this, you will need to upgrade your absorbency setup by incorporating high-capacity inserts or boosters made from dense, natural fibers.
Before starting a change, compile a checklist of essential supplies to keep the process efficient. Ensure you have appropriately sized cloth diapers; always check the manufacturer’s documentation for weight and size limits, as toddlers can quickly outgrow one-size systems. Keep high-absorbency inserts, a large wet bag for soiled diapers, and diaper-safe rash creams nearby. If you are using rash creams, verify the ingredients first; traditional zinc oxide or petroleum-based creams can coat cloth diaper fibers, causing them to repel liquid unless you use a disposable or fleece liner. In warm, humid environments like the Philippines, maintaining a breathable setup with natural fibers is also crucial to prevent heat rash, locally known as bungang-araw, from developing under the diaper.
Products mentioned in this guide

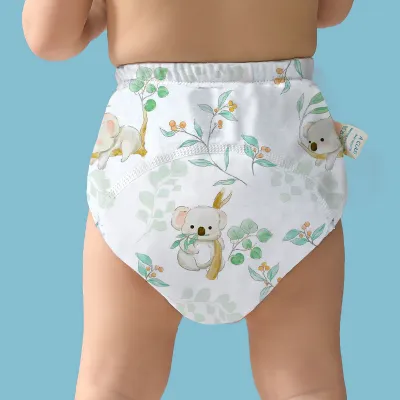



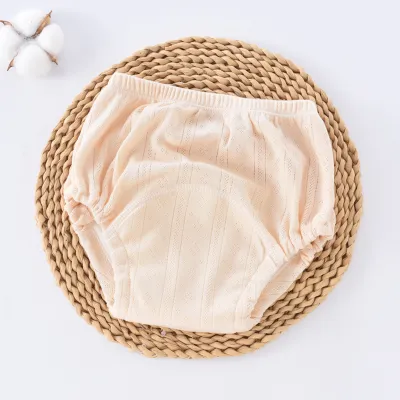

Prices are valid at publication and may change. Please refer to the product page for the latest price.
Your changing environment must also adapt to a child who can roll, crawl, or walk away in an instant. Elevated changing tables that worked well for infants present a significant fall risk for an active toddler. Consider moving your changing station directly to the floor, using a clean, soft play mat or a low-profile changing pad. This eliminates the risk of falls and gives you more leverage to manage a squirming child safely.
If you must use an elevated surface like a bed or a traditional changing table, safety rules are absolute. Always keep at least one hand firmly on your child at all times to prevent sudden rolls. Ensure every single item on your checklist is within arm’s reach before you begin, so you never have to turn your back or step away from your toddler for even a second.
How to Adjust the Fit for a Growing Toddler
As your child grows, their body shape shifts from a rounded, chubby baby silhouette to a taller, leaner toddler build. This means you must adjust the dimensions of your cloth diapers to accommodate a longer torso, thicker or thinning thighs, and changing physical proportions.

The first step in adjusting the fit is managing the rise snaps, which are the vertical rows of snaps located on the front of the diaper shell. For a taller toddler, you will need to let these snaps out to lengthen the diaper. This adjustment ensures the waistband sits comfortably at your toddler’s natural waistline—just below the belly button—rather than riding too low on the hips, which can cause the diaper to pull down at the back when they sit or climb.
Next, pay close attention to the leg gusset placement. The elastic edges of the diaper must sit snugly within the leg creases, right where your toddler’s thigh meets their pelvis, similar to the fit of standard underwear. After fastening the diaper, run your index finger along the inside of the leg elastics to tuck the fabric inward. Gaps in the leg area are the primary cause of leaks in active toddlers, but the elastic should not be so tight that it digs painfully into the skin or leaves deep, lasting red marks.
Checking the waist fit requires utilizing the two-finger rule. Once the diaper is secured, try to slide two fingers comfortably between the front of the diaper waistband and your toddler’s tummy. The diaper should be snug enough to stay in place as they walk, run, and squat, but loose enough to prevent restriction when they sit down. If you cannot fit two fingers easily, or if the waistband leaves deep red indentations on their stomach, loosen the closure by one setting.
Insert positioning must also be customized to match your toddler’s anatomy and movement patterns. For boys, fold your inserts to concentrate the absorbency toward the front of the diaper, where wetness is concentrated. For girls, place the bulk of the absorbency in the middle of the diaper. This targeted placement allows you to handle heavy wetting efficiently without adding excessive bulk across the entire diaper, which could otherwise restrict your toddler’s natural stride or make walking uncomfortable.
Keep in mind that sizing and fit guidelines vary significantly across different brands and styles. Always verify the specific weight limits, sizing charts, and fit recommendations provided by your diaper manufacturer to ensure your child is within the intended developmental range for that specific product.
Fastening Techniques for Wiggly and Resisting Kids
Fastening a diaper on a highly mobile toddler is often a race against time. To succeed, you need a calm, quick approach that minimizes the window of opportunity for your child to escape. Understanding the strengths of the two primary closure systems—hook-and-loop and snaps—will help you choose the best tool for your child’s temperament.
Using Hook-and-Loop Closures
Hook-and-loop closures, often referred to by the brand name Velcro, offer the fastest application speed of any diapering system. This speed is incredibly valuable when dealing with a toddler who refuses to lie still. To achieve a secure, customized waist fit on a slender or highly active child, utilize the overlap or cross-tab method. This technique involves pulling one wing across the front and fastening it directly over the opposite wing’s tab, allowing for a tighter fit than standard side-by-side fastening.
However, be careful not to pull the tabs too tightly across your toddler’s waist. Doing so can cause the diaper’s fabric wings to curl outward, exposing the rough hook material or creating stiff edges that dig into your child’s hips as they move. The closure should lie flat against the front panel of the diaper to ensure maximum comfort during active play.
Additionally, protecting your investment requires proper care during laundry cycles. Always secure the integrated laundry tabs—folding the hook side back onto the designated loop strip on the inside of the diaper wing—before placing the diaper in the washing machine. Failing to do this can result in the hooks snagging other garments, damaging the waterproof TPU or PUL outer layer of your diapers, and creating a tangled mess of laundry.
Securing Snap Closures
Snap closures require slightly more coordination to fasten, but they offer exceptional durability and are highly resistant to toddler manipulation. Active toddlers quickly learn how to peel off hook-and-loop tabs, but snaps are much harder for small fingers to undo. To prevent “wing droop”—a common issue where the top corners of the diaper fold downward, causing the leg elastics to sag and leak—you should utilize the hip snap or cross-snap technique. This involves fastening the outermost snap on the wing to a lower snap on the front panel, anchoring the sides securely.
When fastening a snap diaper on a moving child, establish an efficient snapping sequence. Always secure the middle snaps first to anchor the diaper’s position on your toddler’s body. Once the diaper is stabilized, quickly fasten the outer snaps on each wing to pull the leg gussets snug against the thighs. This systematic approach ensures a balanced fit even if your child is twisting or kicking.
While snaps take a few seconds longer to secure than hook-and-loop closures, the peace of mind they provide is well worth the extra effort. Once fastened, they remain locked in place, ensuring the diaper stays secure through climbing, running, and playtime.
Quick-Change Strategies to Manage Toddler Resistance
Managing diaper changes for a toddler who wants to run away requires a blend of preparation, distraction, and behavioral strategies. By making the process as fast and engaging as possible, you can significantly reduce resistance.
Preparation is your first line of defense. Never bring your toddler to the changing area until the new diaper is completely assembled and ready to go. If you use pocket diapers, pre-stuff them with the necessary inserts beforehand. If you use flats, pre-folds, or fitted diapers with covers, lay them out and fold them in advance. Having everything pre-assembled reduces the time your toddler needs to remain still to a bare minimum.
Distraction techniques can turn a potential power struggle into a cooperative moment. Keep a dedicated basket of small, safe toys, books, or puzzles that are strictly reserved for diaper-changing time. Because these items are not accessible during regular play, they retain a high level of novelty and interest. Singing a specific, engaging song or playing a quick game of peek-a-boo with a clean diaper can also keep your toddler’s mind occupied while you work.
For toddlers who absolutely refuse to lie down, mastering the standing change is a highly effective alternative. Have your toddler stand up while holding onto a stable object, such as the edge of a sofa or a low table. While they are standing, you can easily wipe, apply any necessary diaper-safe cream, and slide a pre-fastened diaper or a pull-up style cloth cover up their legs. Keep in mind that standing changes are best reserved for wet diapers; messy bowel movements are much easier and safer to clean when the child is lying down.
Giving your toddler a sense of control can also dramatically reduce resistance. Offer them limited, safe choices to foster cooperation. For example, ask, “Do you want to wear the blue diaper with the dinosaurs or the green diaper with the leaves?” or “Would you like to hold the toy car or the board book during your change?” This simple shift gives your toddler a feeling of autonomy without compromising on the necessity of the diaper change.
Always prioritize safety boundaries during a difficult change. If your child becomes dangerously erratic, thrashing, kicking, or crying hysterically, do not try to force the diaper on by power. Stop what you are doing, ensure your child is safe on the floor, and take a deep breath. Wait for a calm moment to resume, as forcing a diaper change during a high-stress struggle can lead to accidental pinches, scratches, or falls.
Troubleshooting Leaks and Comfort Issues
Even with a perfect routine, you may occasionally encounter leaks or comfort issues as your toddler grows and puts new physical stresses on their cloth diapers. Diagnosing these problems quickly will keep your child dry and comfortable.
First, distinguish between compression leaks and fit gaps. Fit gaps occur when there is visible space between the diaper’s elastic and your child’s skin, usually around the legs or waist. Compression leaks, on the other hand, happen when a highly saturated insert is squeezed—such as when your toddler sits down hard, rides a toy, or squats to play. This pressure forces liquid out of the insert like water from a squeezed sponge. If you suspect compression leaks, consider adding a stay-dry fleece liner to wick moisture away quickly, or switch to denser, highly absorbent natural fibers like hemp or bamboo blends, which hold onto liquid much better under pressure than synthetic microfiber.
Another common issue is repelling, where liquid pools on top of the diaper’s inner lining instead of absorbing into the insert. This is typically caused by detergent buildup, the use of fabric softeners, or non-cloth-safe diaper rash creams that leave an oily barrier on the fabric. To check for repelling, pour a small amount of warm water onto a clean, dry diaper; if the water beads or rolls off, the fabric is repelling. To resolve this, consult your manufacturer’s washing instructions to safely strip the buildup from your diapers and restore their absorbency.
Finally, monitor your toddler’s skin for red marks and chafing. It is entirely normal to see faint, temporary pink marks from the elastic, similar to the marks left by socks on your own ankles. However, deep, painful red indentations, broken skin, or raw chafing indicate a fit or sizing issue. These marks suggest that the diaper is fastened too tightly, the elastics have become worn out and stiff, or your toddler has outgrown their current size. If loosening the rise snaps or waist tabs does not resolve the issue, it may be time to transition to a larger diaper size or explore a different brand with a cut better suited to your child’s unique body shape.
Community discussion
Share your experience or ask a question. Comments are reviewed before publication.